
Hello there GDM fans, today I will be showing how you can add a cool tag cloud for your website to make your tag cloud look more stylish and less messy.
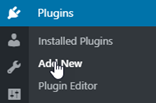
1. First, you go into Plugins>Add new
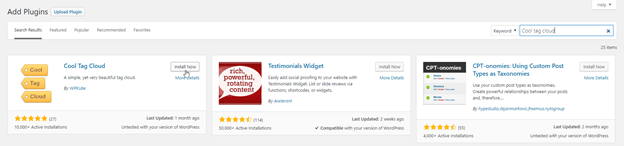
2. Now search up, “Cool Tag Cloud”, install it, and activate it

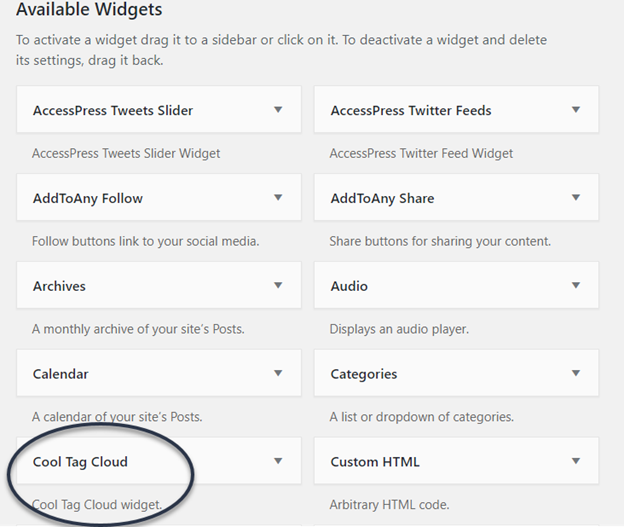
3. Now, go into Appearance>Widgets and look through the available widgets. You should then be able to find, “Cool Tag Cloud”
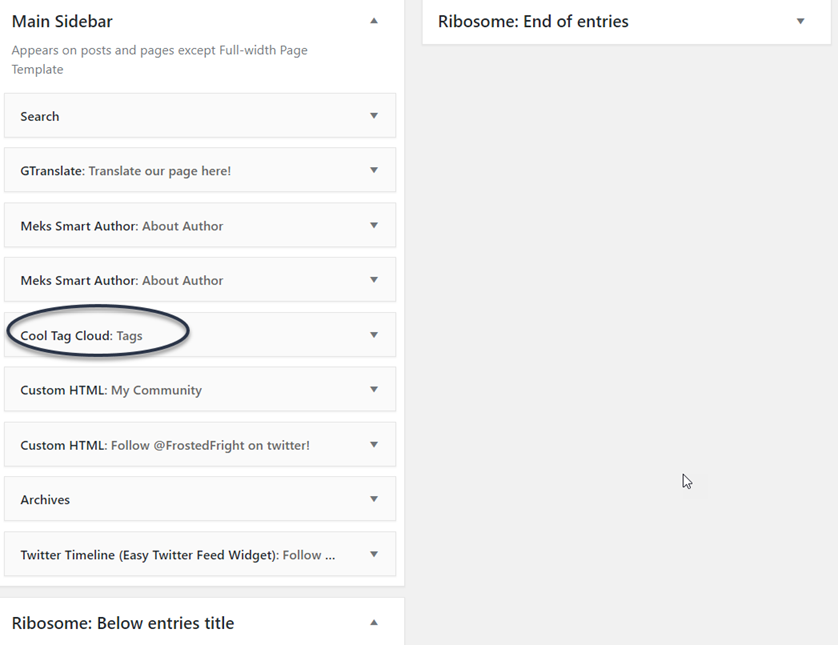
4. Once you’ve found it, drag it to where you want it to be.
5. Now, expand it and change the settings you want to change, such as the font, size, number of tags on screen, etc.
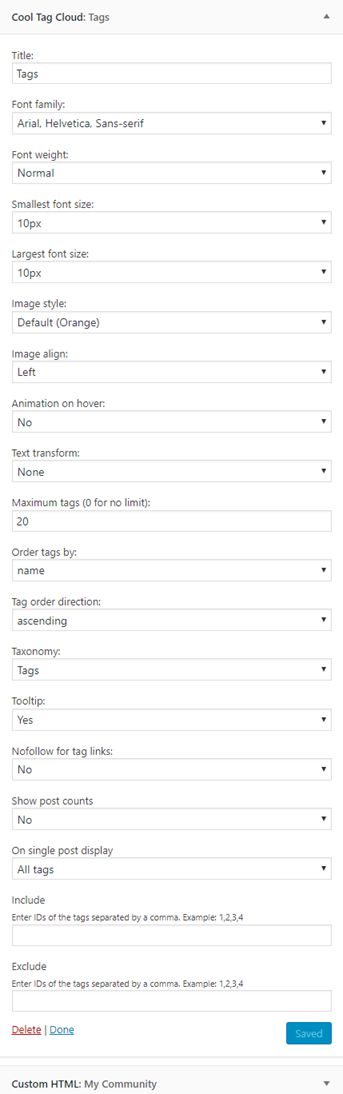
6. After you’re finished, save it.
7. Now you’re finished! You can now go to the place where you’ve put the Cool Tag Cloud and it will be there! Looking less messy, and more stylish than the original tag cloud that you usually have when you’ve just started a WordPress site.

I hope all of you have found this short and easy tutorial helpful and useful, also if you have any questions remember to comment down below! Anyways, I’ll be seeing you all in the next blog!