
If you create a new Citrix server (license server) and want to move an existing license to the new server, follow these steps to reassign it.
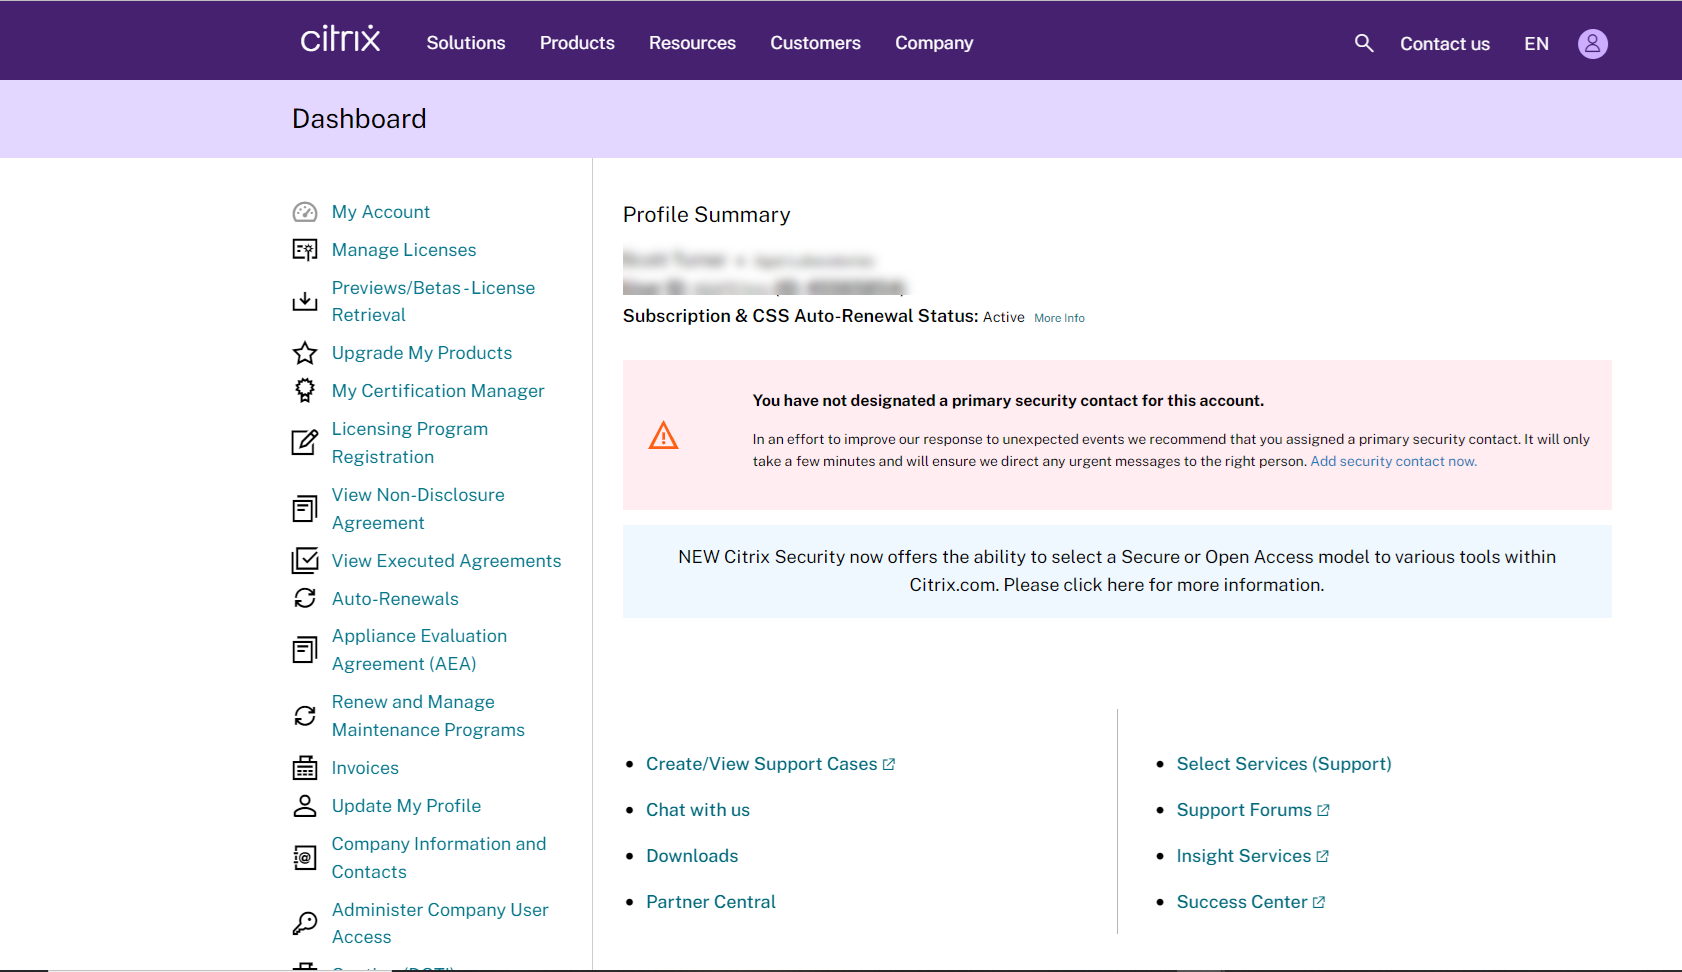
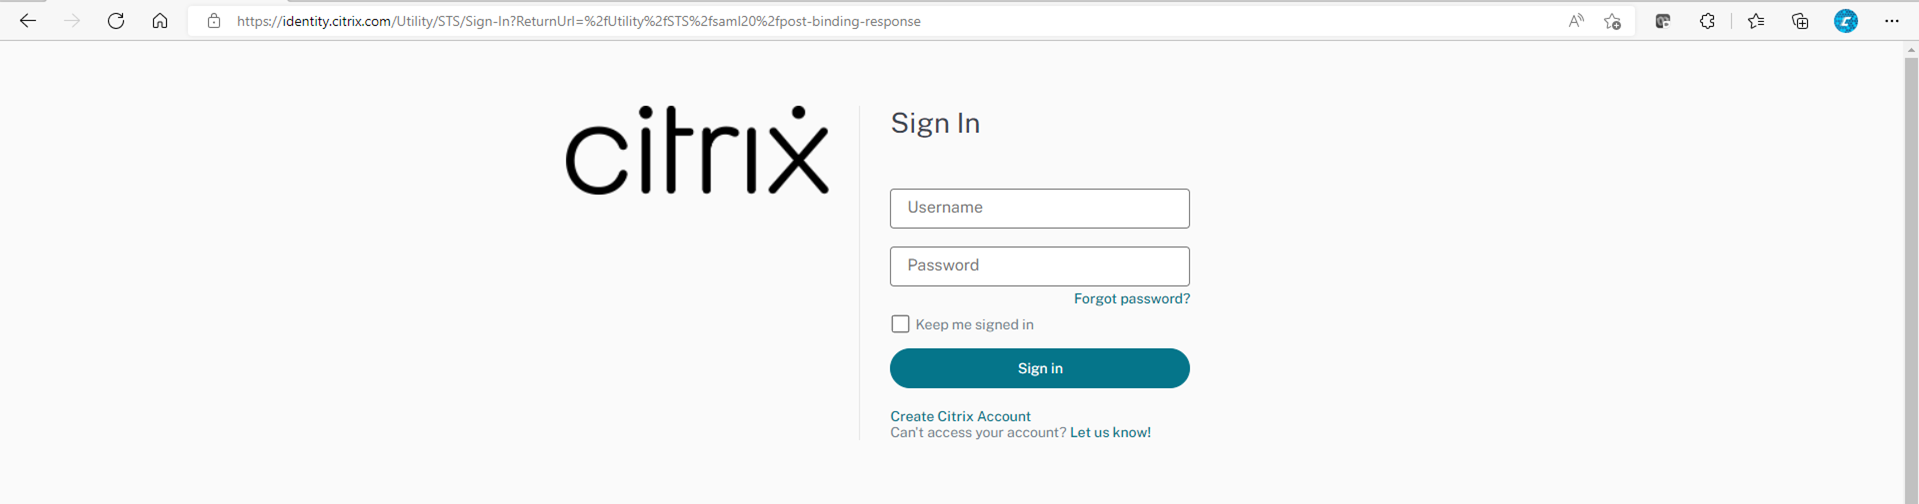
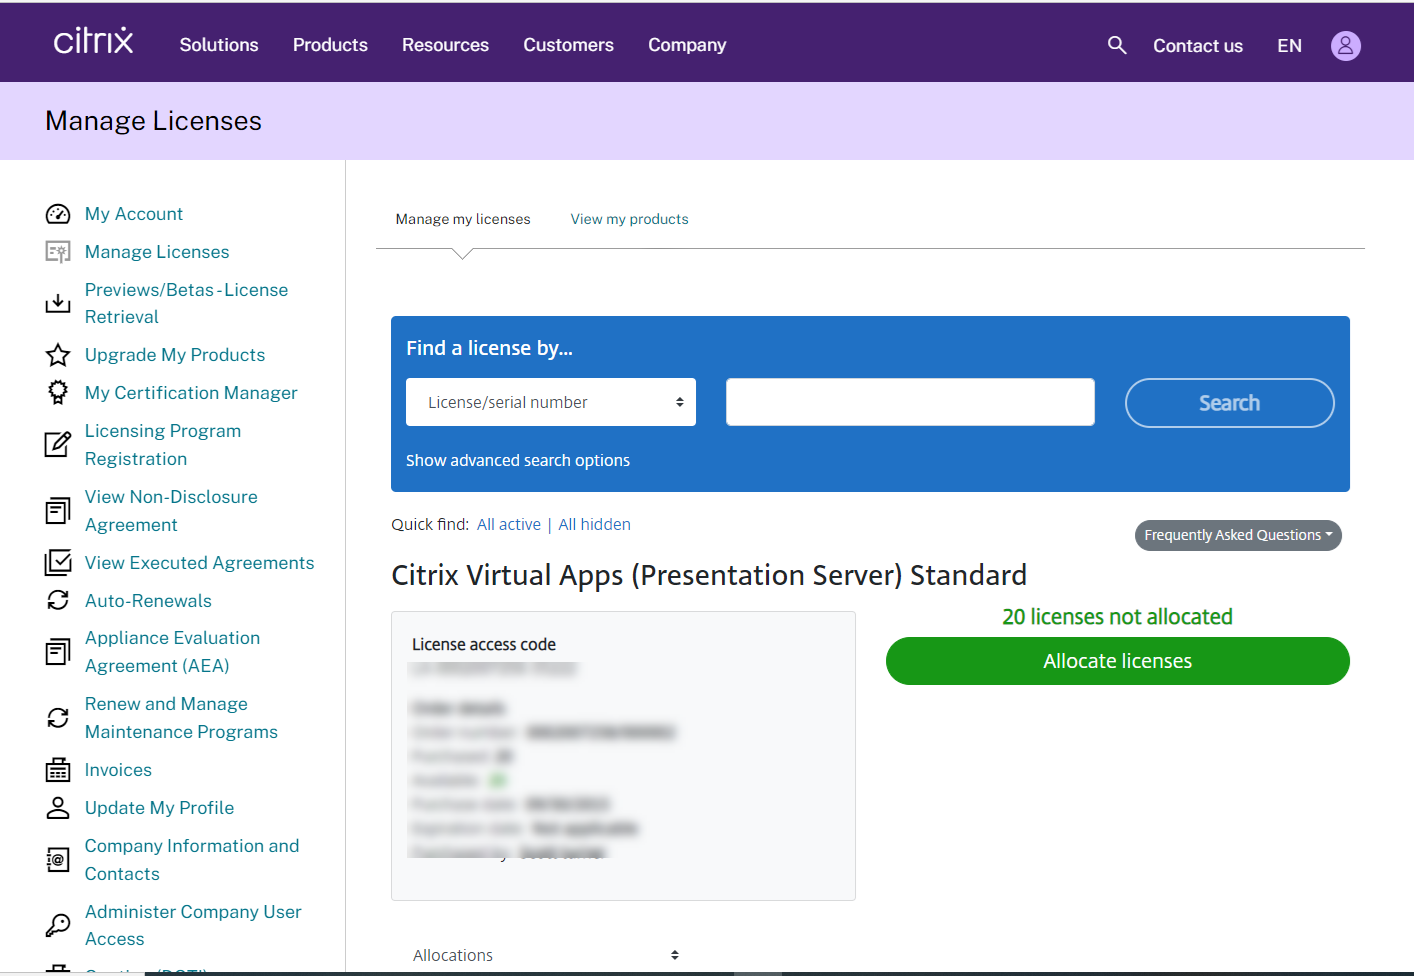
1. Sign in to the Citrix portal.
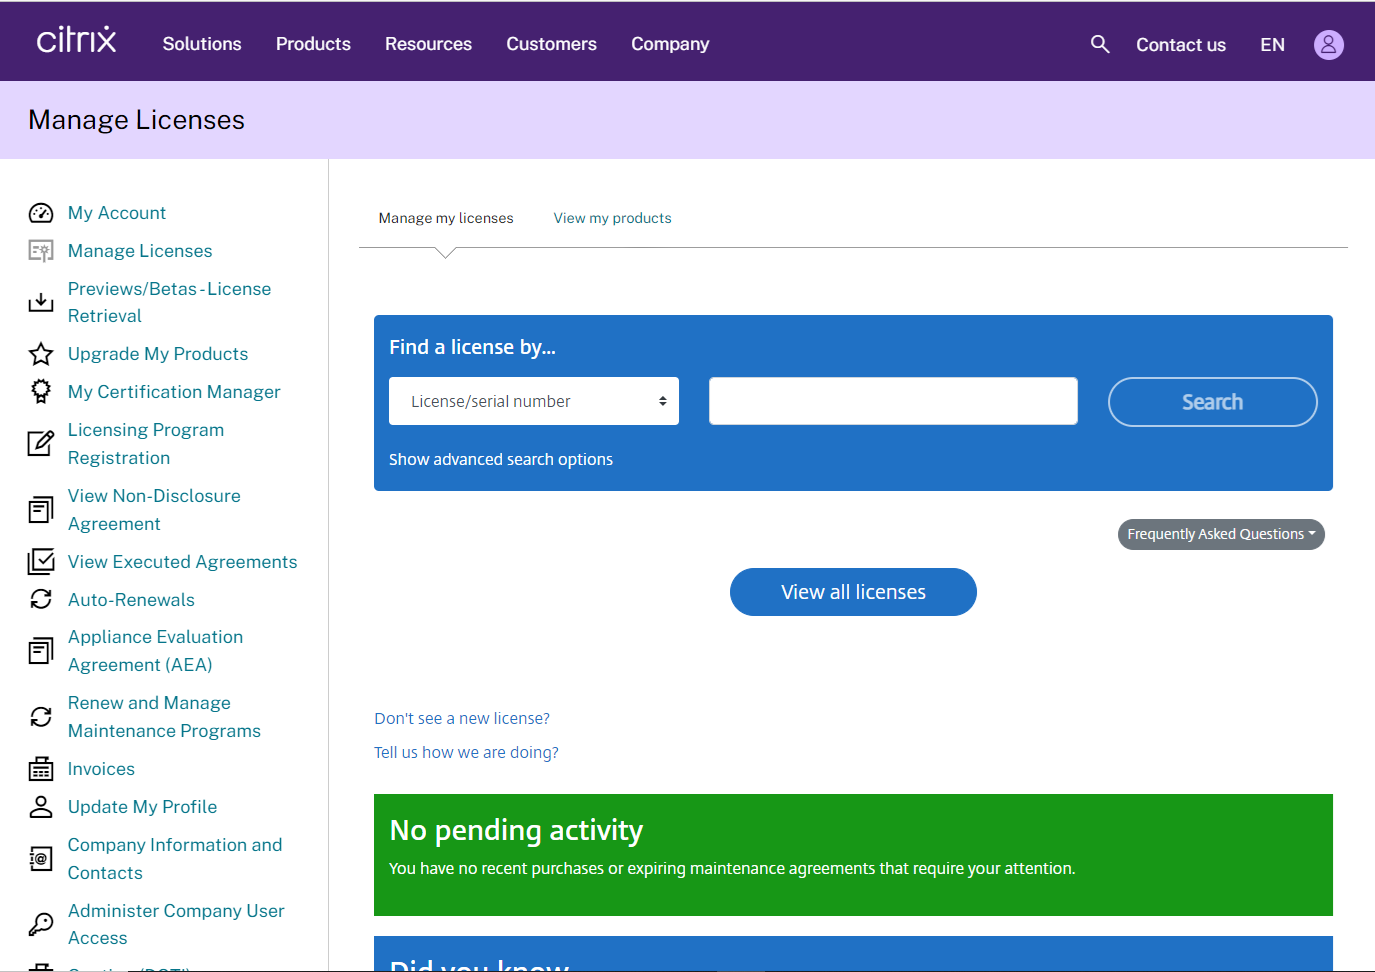
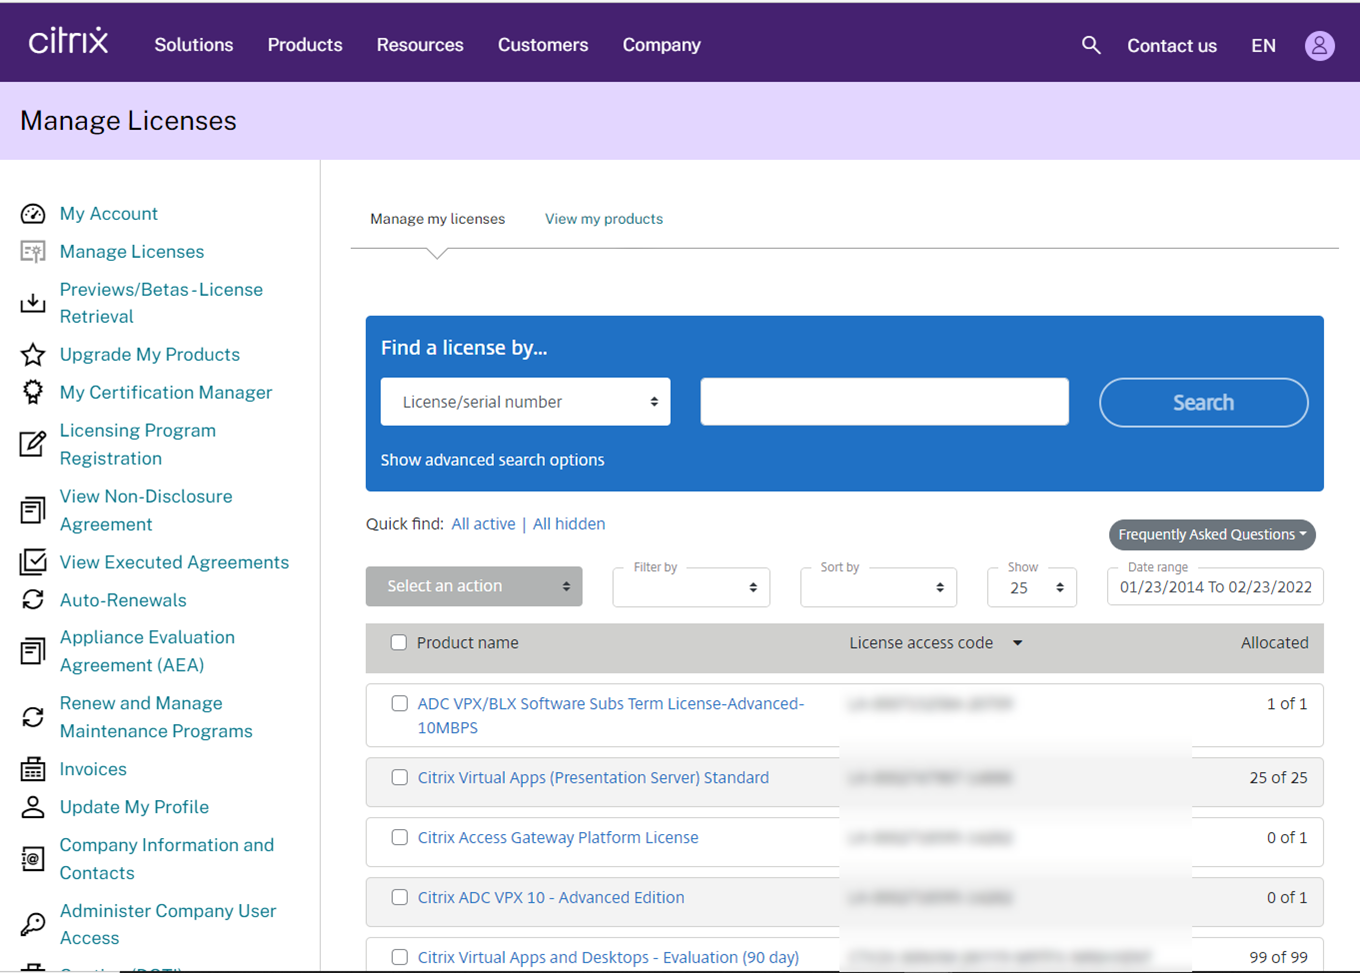
2. choose manage licenses.
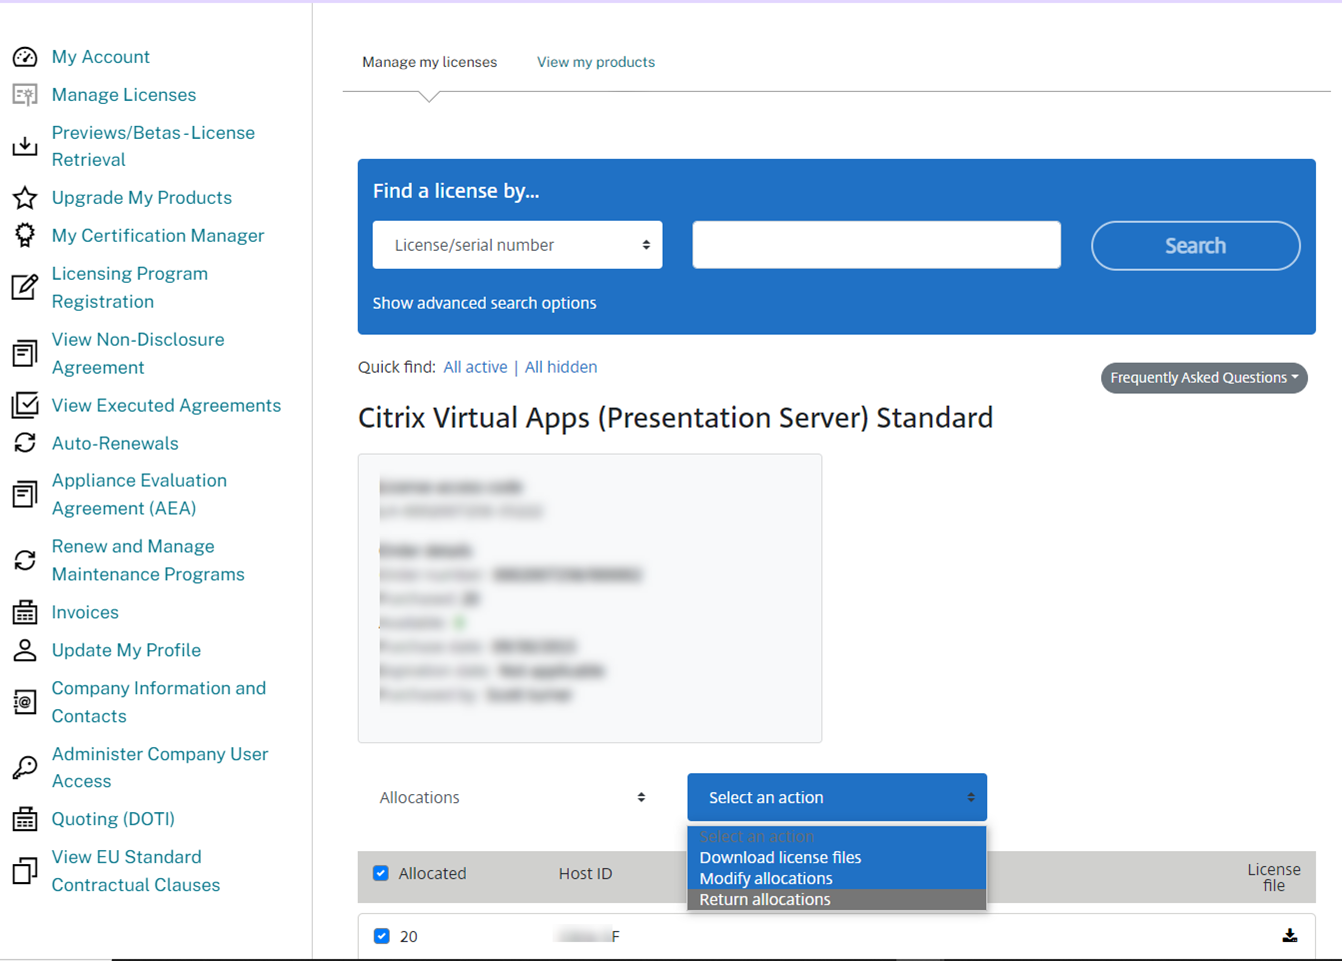
3. on the manage my licenses page, choose view all licenses.

4. Select the Citrix Virtual Application license that you want to assign to the other server.

5. select license, drop down list to select an action, and press modify assignment.
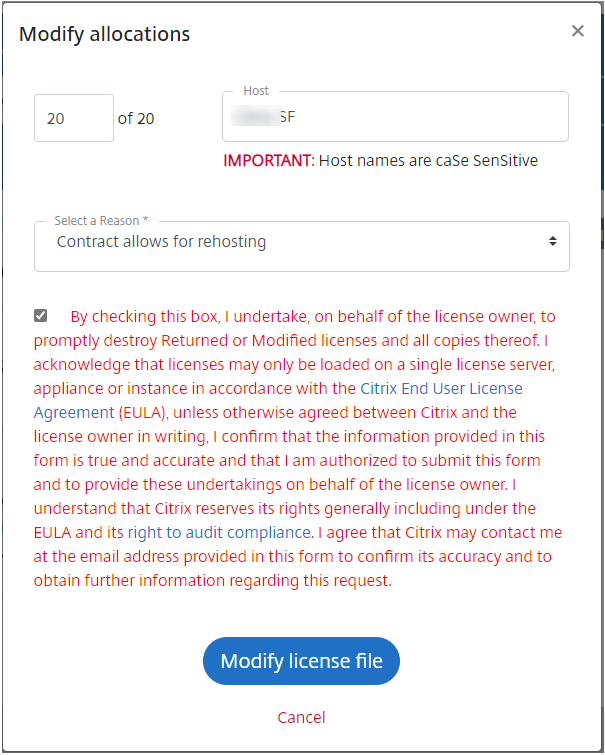
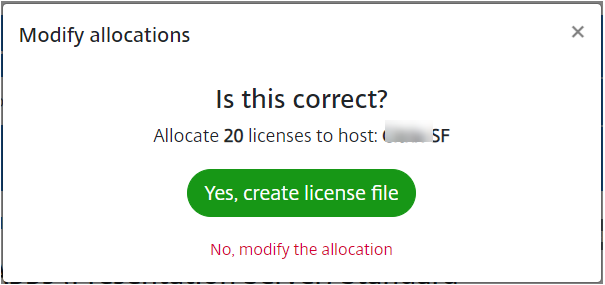
6. On the Modify allocations page, enter the number of licenses, type the Name of the destination Hostname, the Hostname is case sensitive, drop-down Select a Reason, and click Contract allows for rehosting.
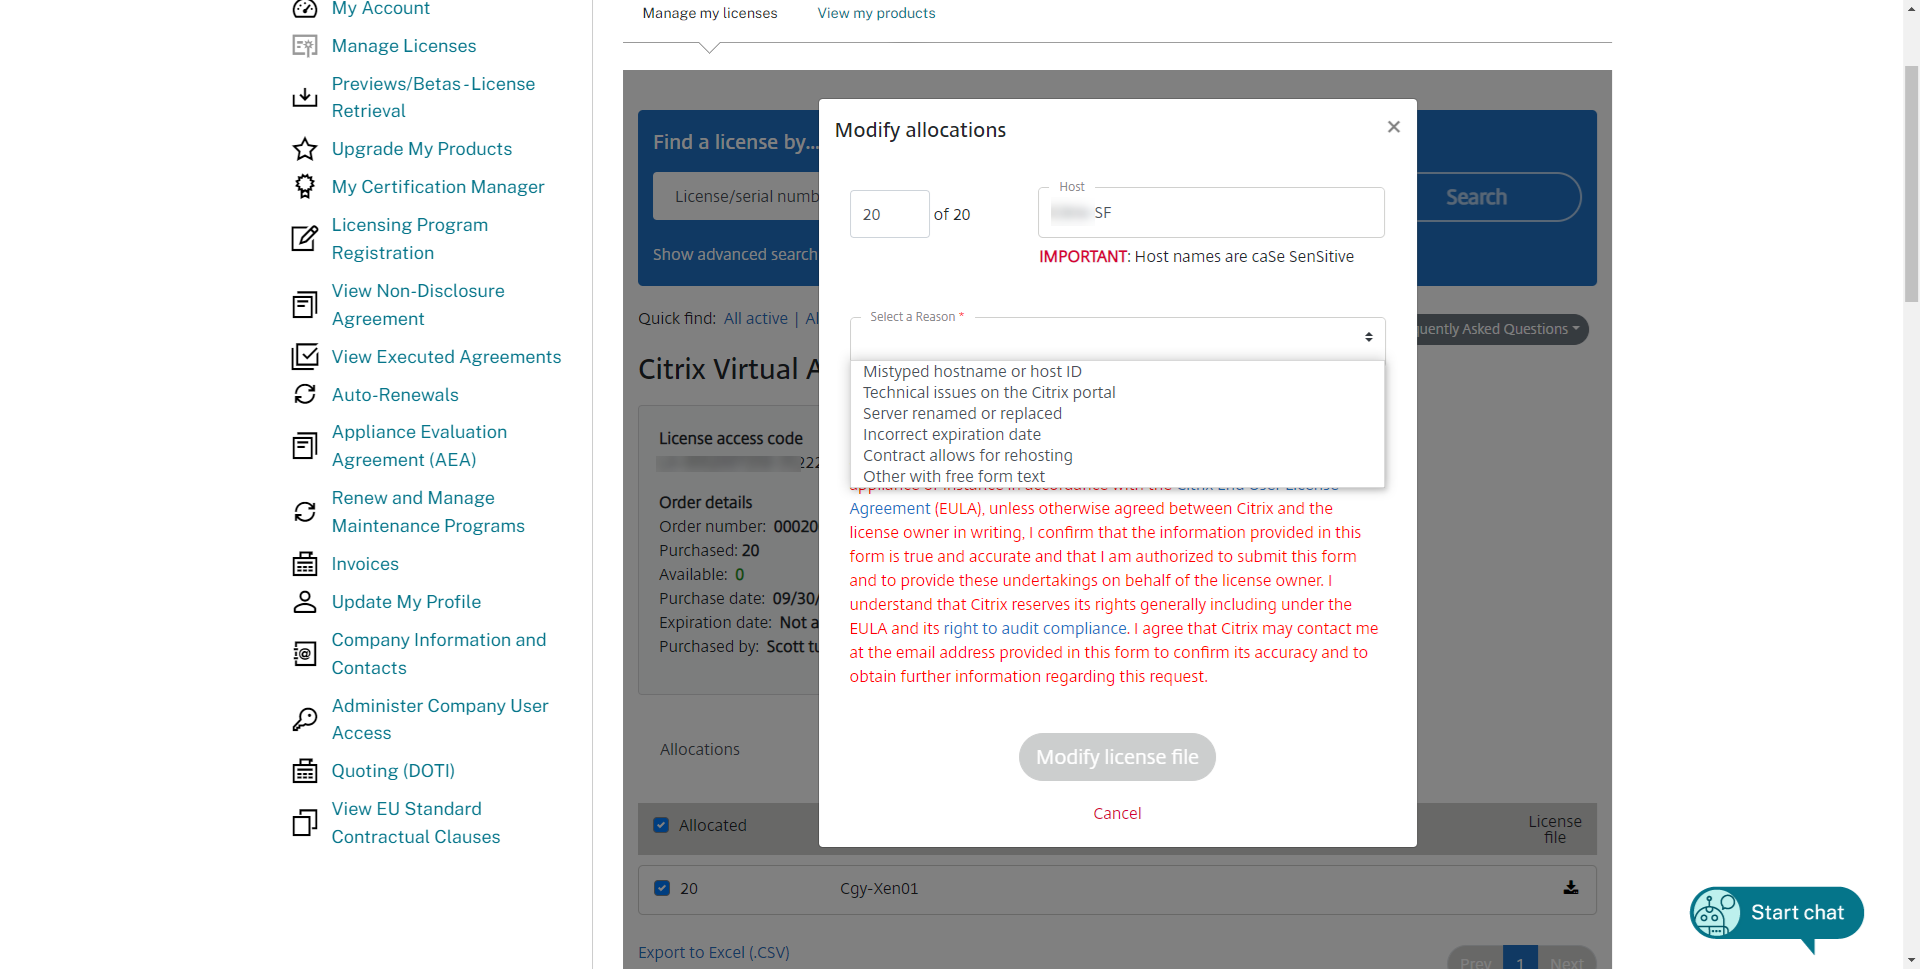
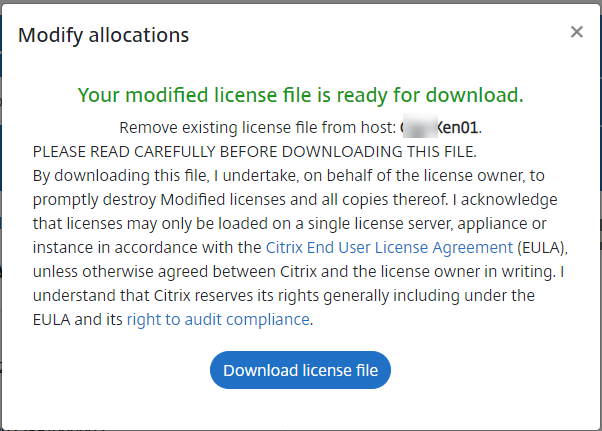
7. Select By checking this box, I undertake, on behalf of the license owner, to promptly destroy Returned or Modified licenses and all copies thereof….. , click Modify license file.
8. On the Confirm page, click Yes, and create a license file.
9. On the download page, select Download license file.
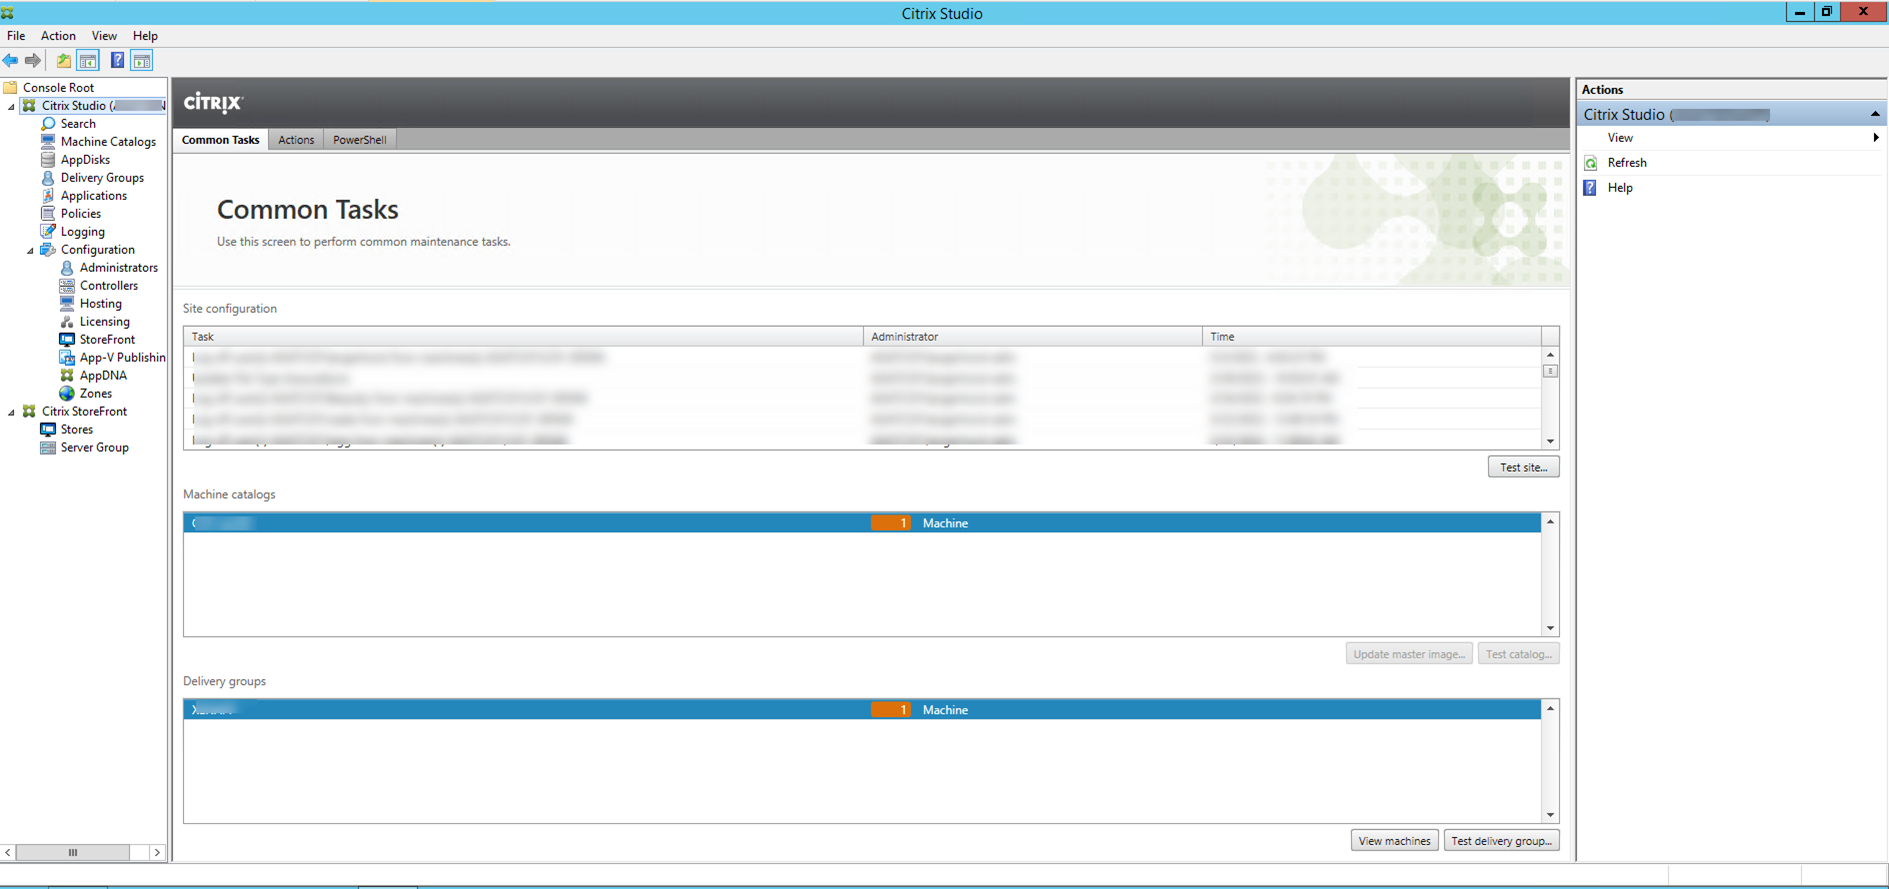
10. Sign in to the new Citrix Virtual Apps server.
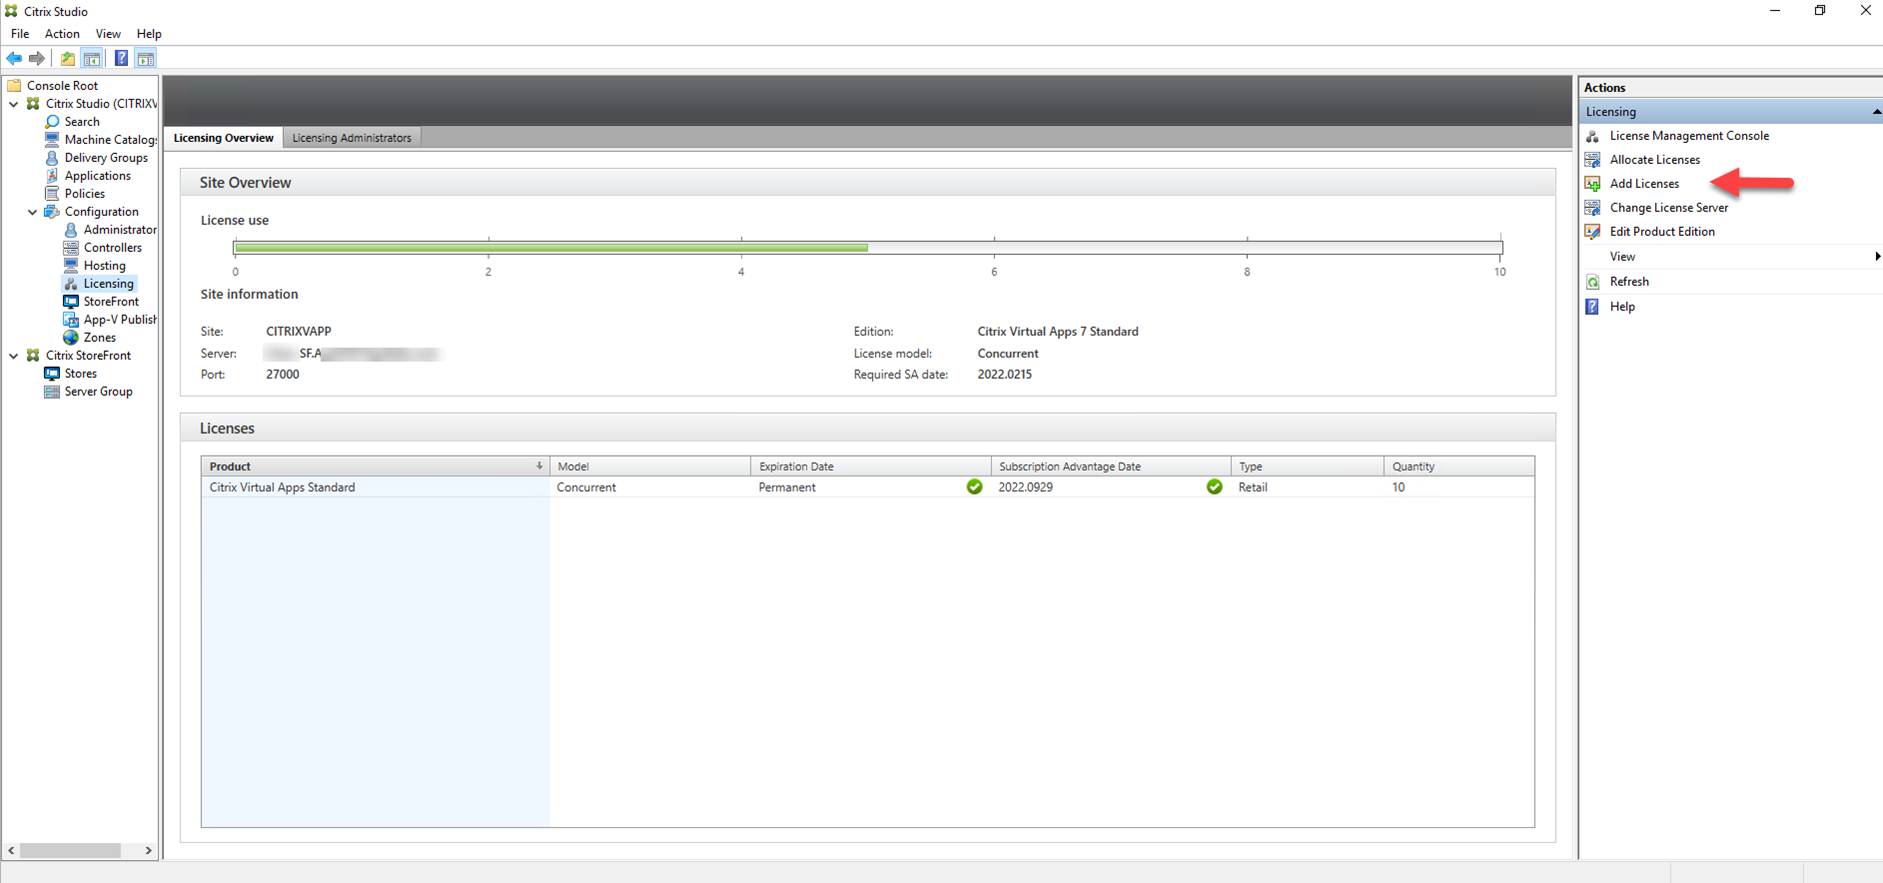
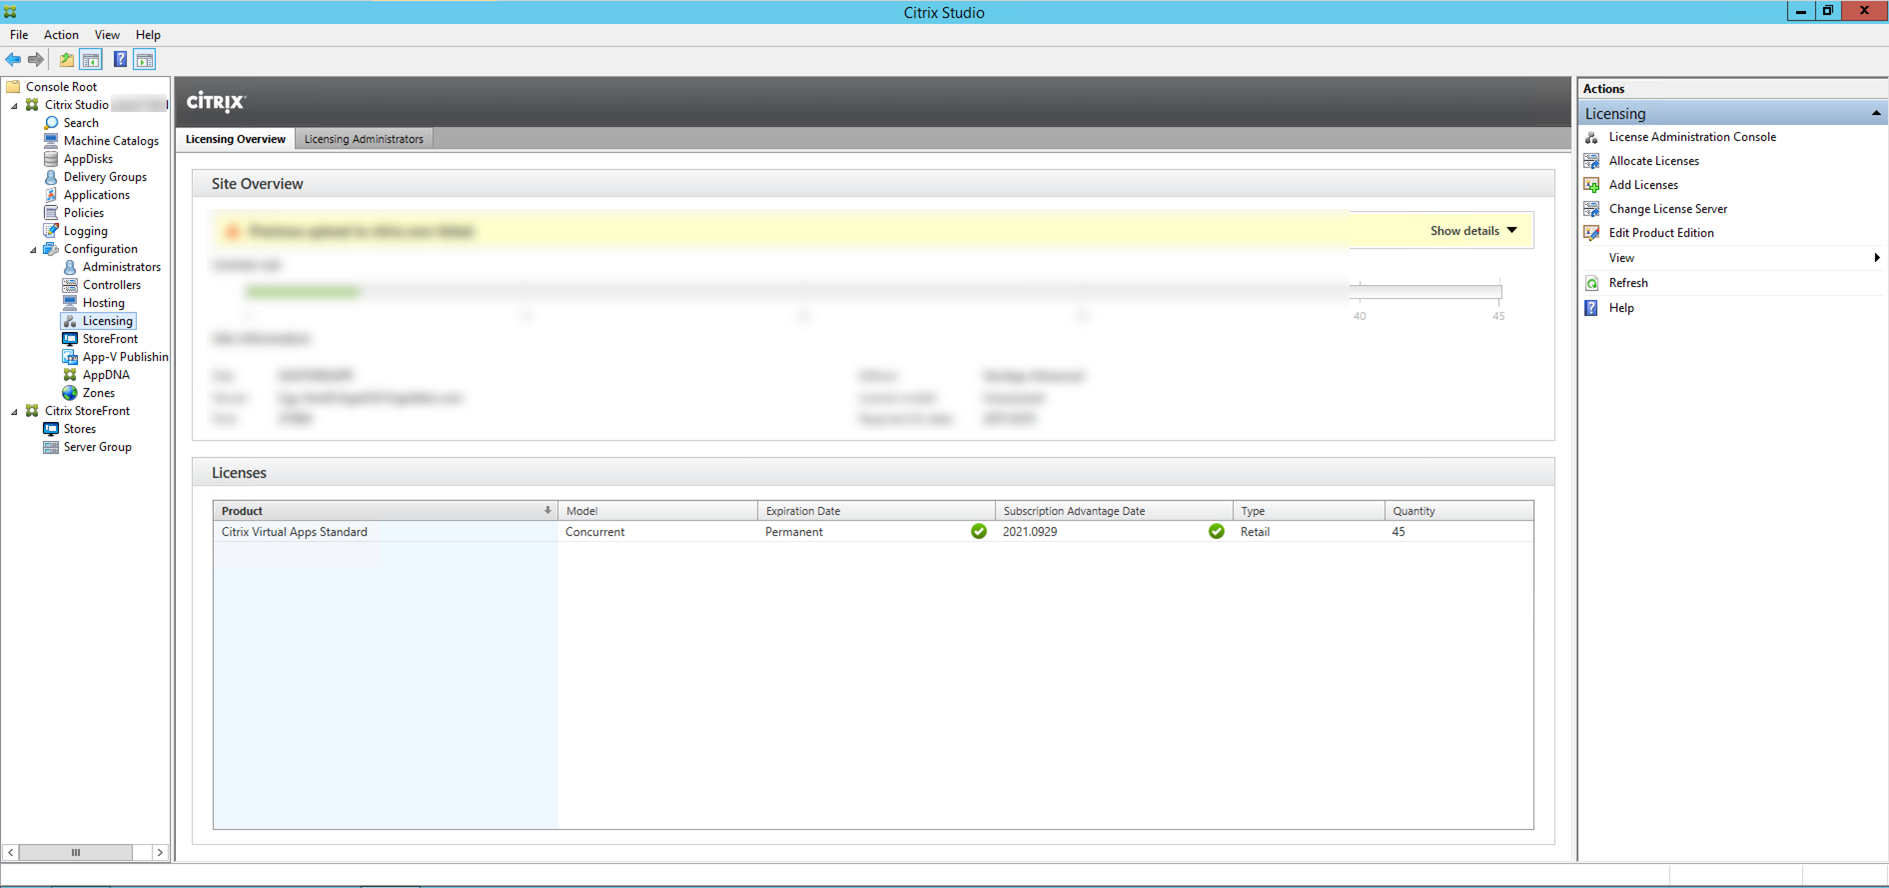
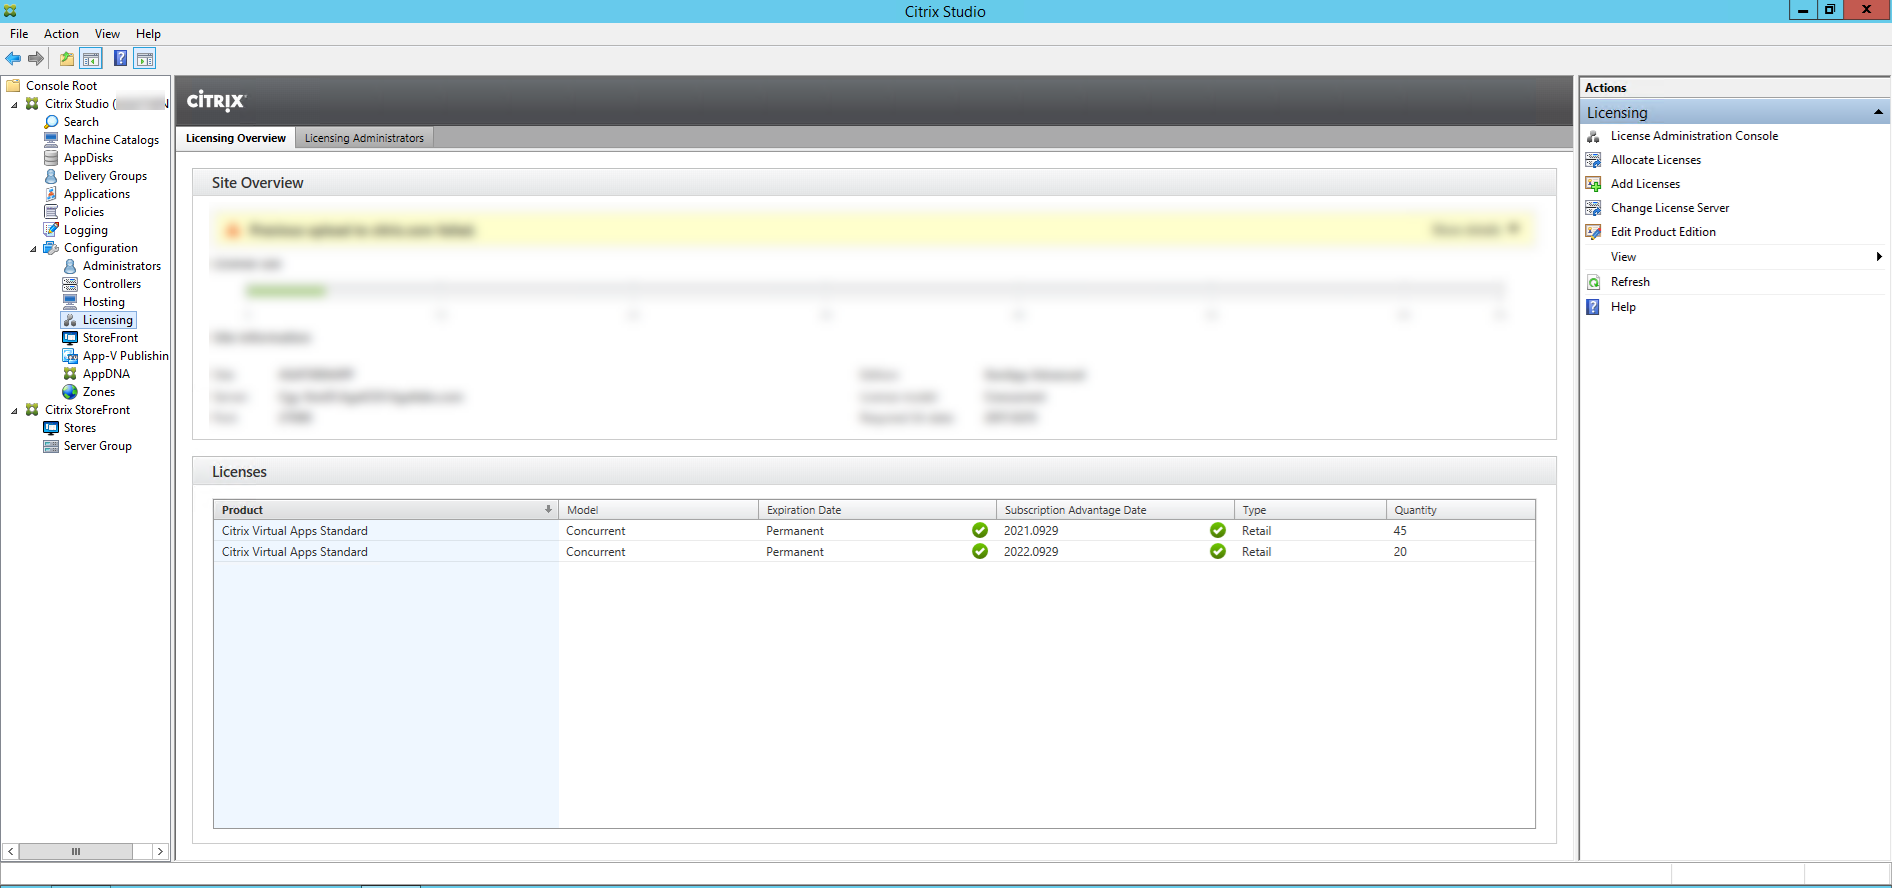
11. Open Citrix Studio Console, select Configuration, and select Licensing.
12. On the Licensing page, select Add Licenses.
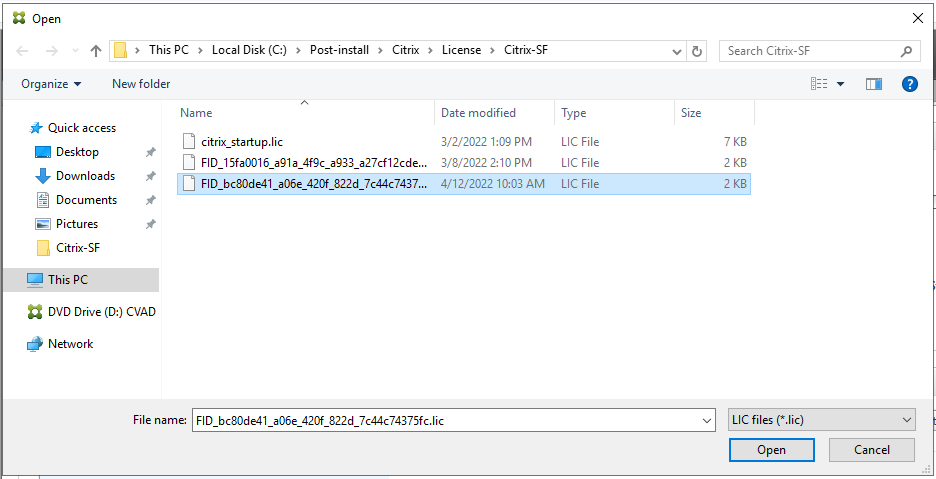
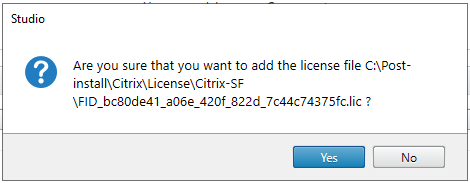
13. Select the license file, and click Open.
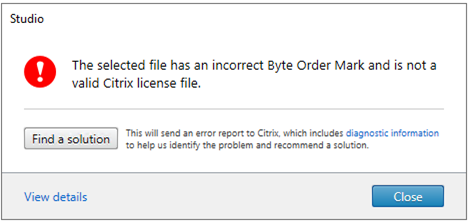
14. On the Confirm page, select Yes.
15. If happen error, you need to use the reallocate License method.
16. Sign in Citrix portal.
17. Select Manage Licenses.

18. On the Manage my licenses page, select View all licenses.
19. Select the Citrix Virtual Apps license that you would like to assign to another server.
20. Select the License, drop-down Select an action, click Return allocations.

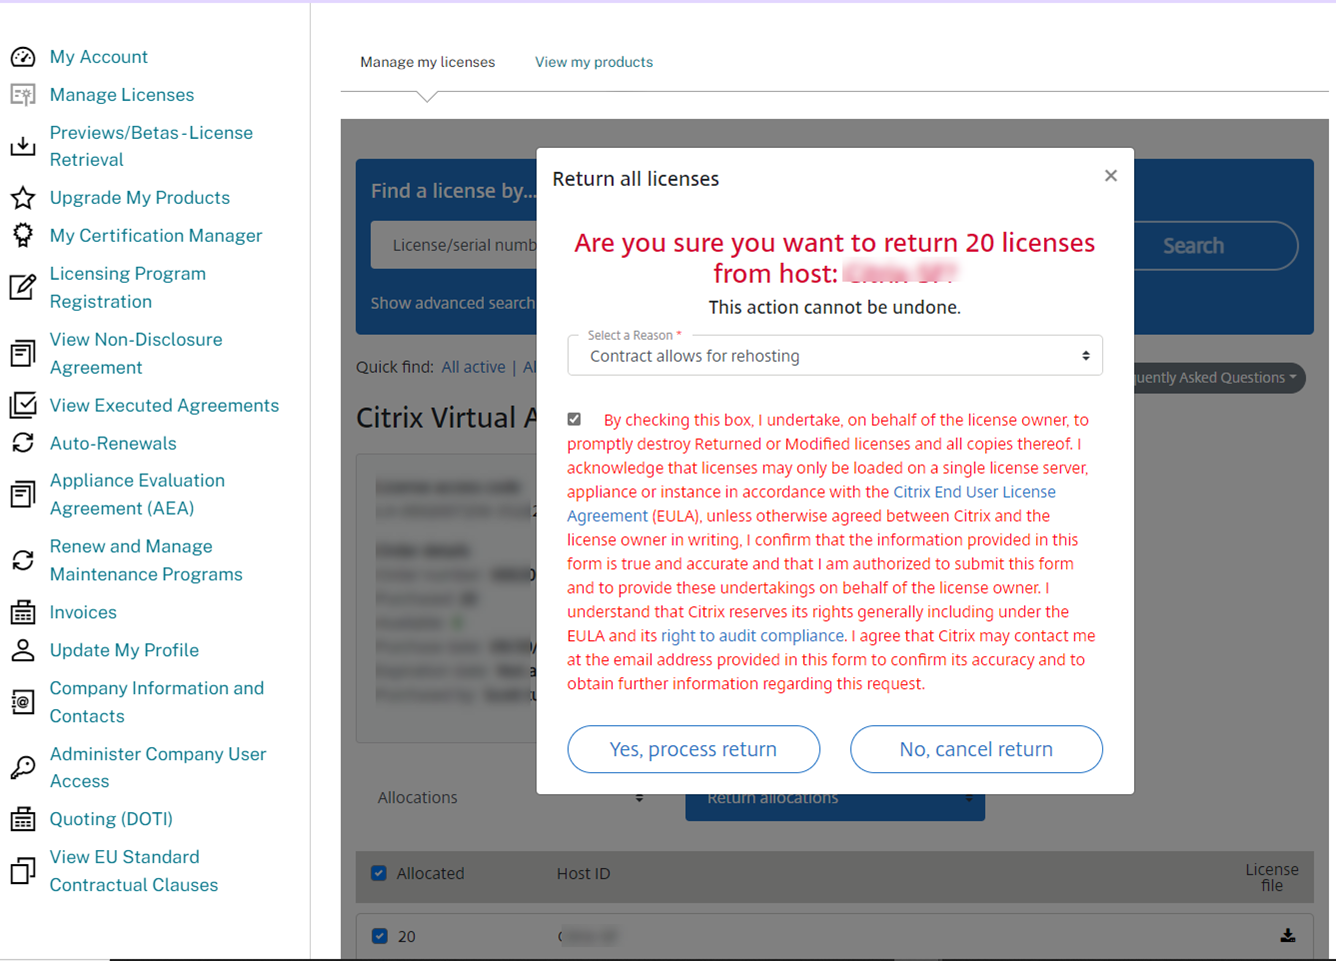
21. On the Return all licenses page, drop-down Select a Reason, click Contract allows for rehosting.
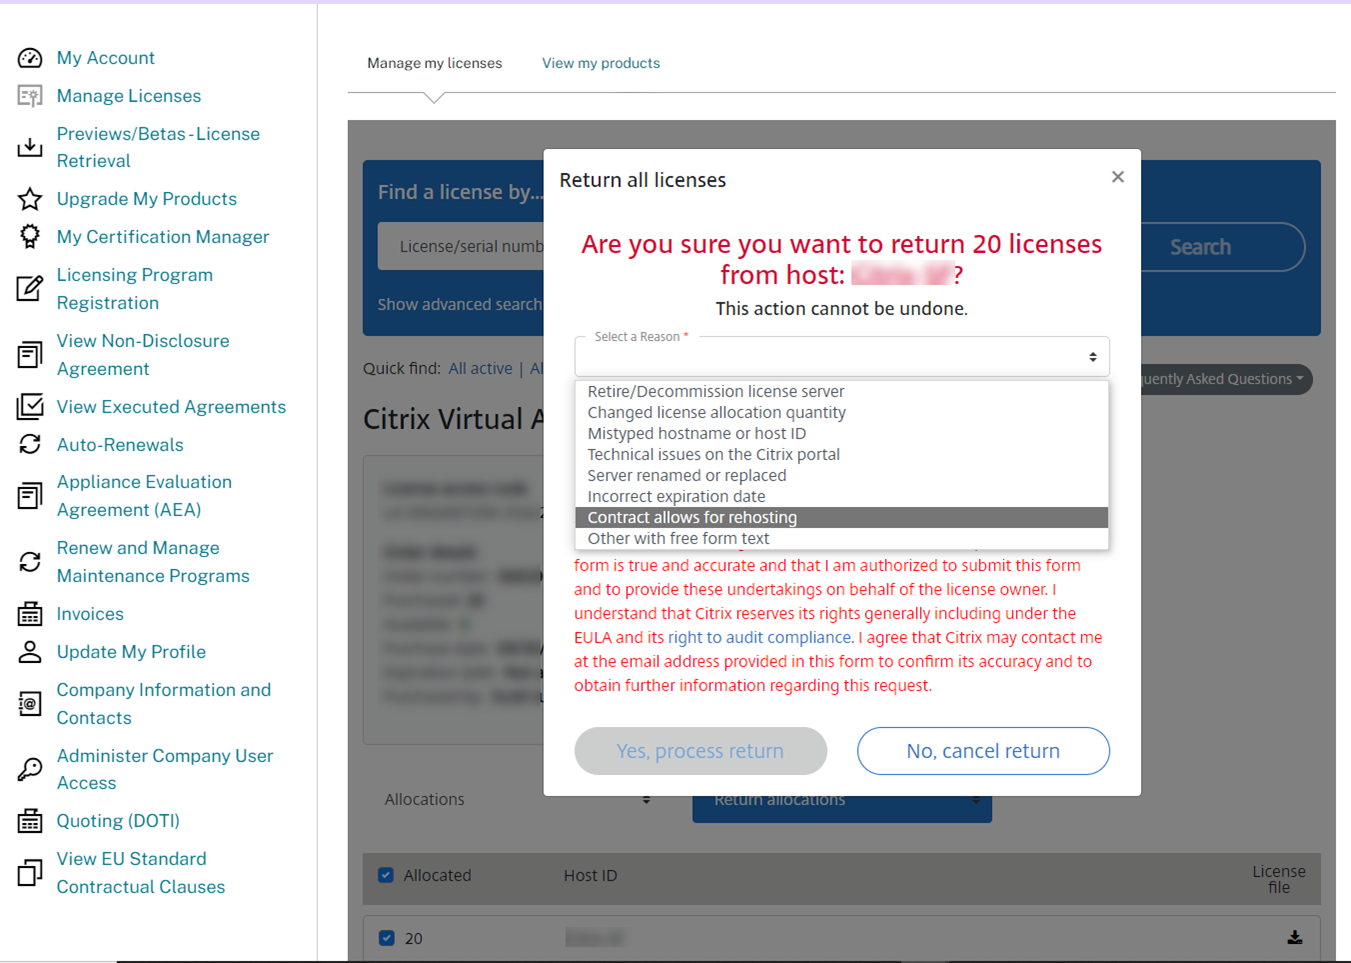
22. Select By checking this box, I undertake, on behalf of the license owner, to promptly destroy Returned or Modified licenses and all copies thereof. I acknowledge that licenses may only be loaded on a single license server….., click Yes, and process the return.
23. On the Return all licenses page, click Close windows.
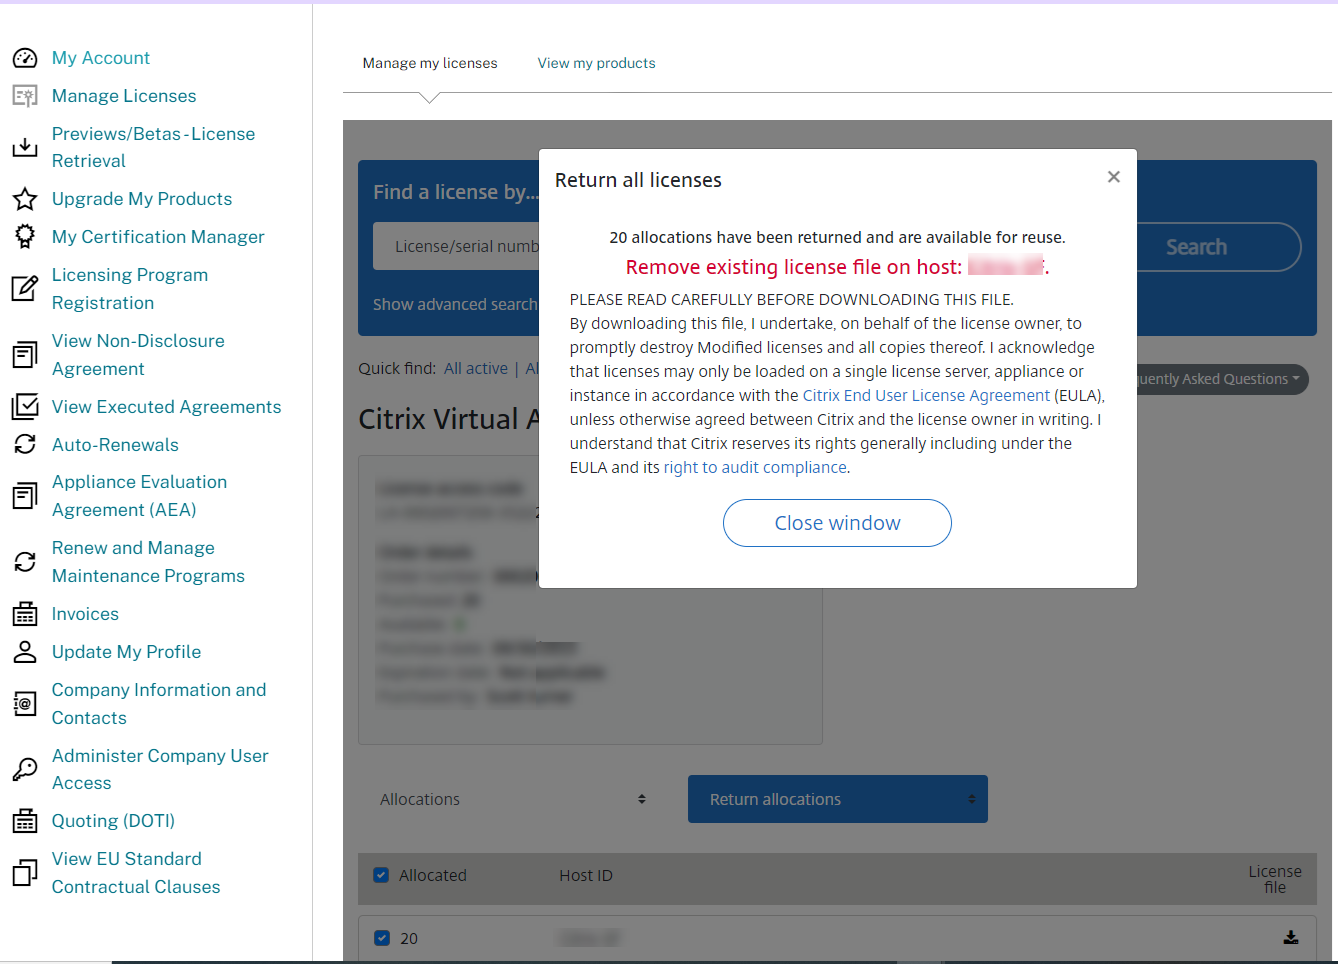
24. On the product page, write down the License access code that you will need it later to allocate licenses.
25. login to the new Citrix server, and open Citrix Studio.
26. On the Citrix Studio page, expand Configuration and select Licensing.
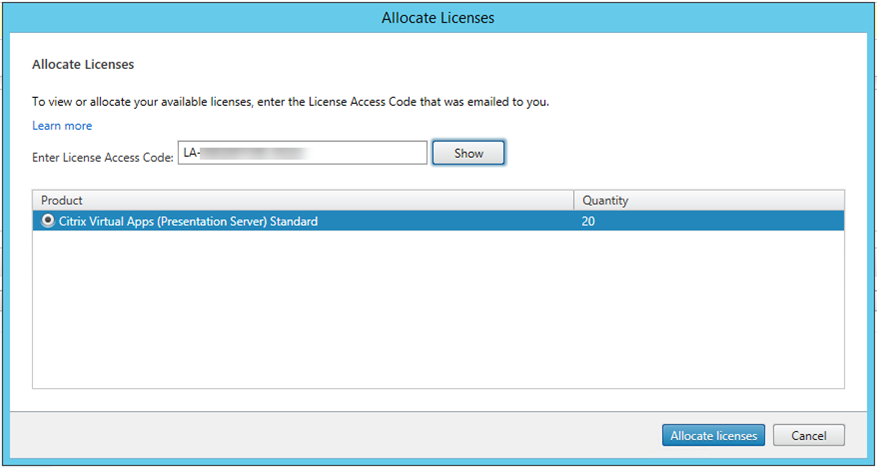
27. On the Licensing page, select Allocate Licenses.
28. On the Allocate Licenses page, enter the License access code and click Show.
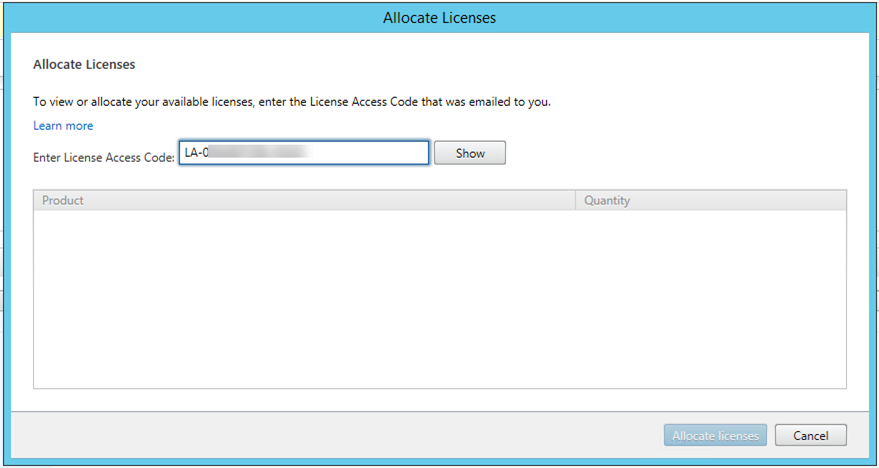
29. On the Allocate Licenses page, select the product and click Allocate licenses.
30. Make sure add licenses succeeded.
Hope you enjoy this post.
Cary Sun
Twitter: @SifuSun
Web Site: carysun.com
Blog Site: checkyourlogs.net
Blog Site: gooddealmart.com