
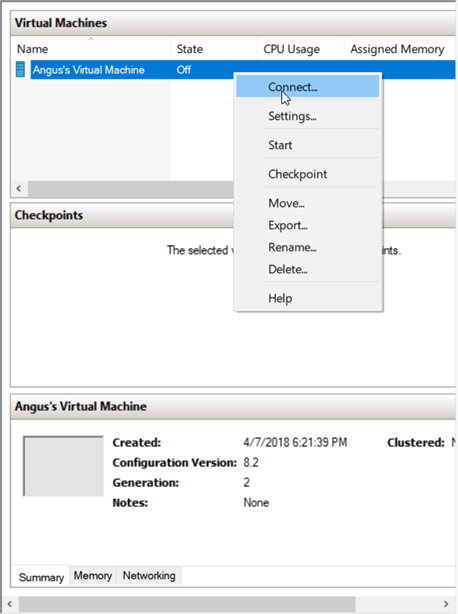
Welcome back GDM fans and let’s continue about the blog about Hyper-V, remember that I am using Windows 2016 Server so I am setting it up a little differently than a normal windows setup. 1. So first, of course you have to right click your virtual machine and press connect
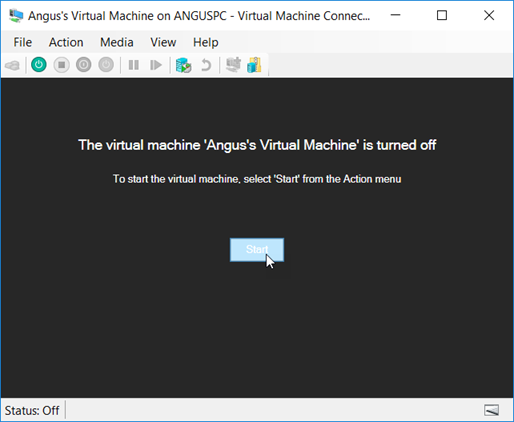
2. Now you click on the Start button in your Virtual Machine
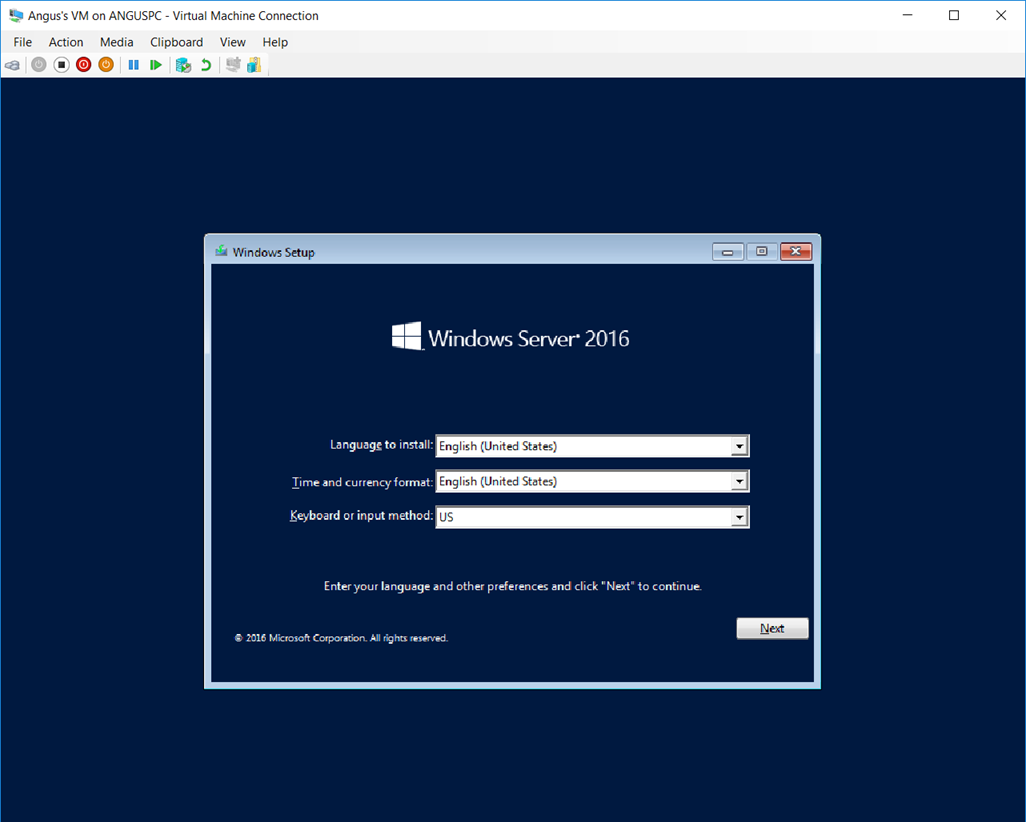
3.When you are done pressing Start you have to quickly press enter when you see this screen on your virtual machine (when you launch an iso file and it doesn’t show this screen then that is okay, just continue)

Another important thing is that when you setup your virtual machine, when you are done just right click on it and press settings, go to “Integration Services” and Guest Services will be off, click on it and it should turn on. Guest Services let’s the VM do more things so it is recommended, it might show this screen a bit later if you are using servers”
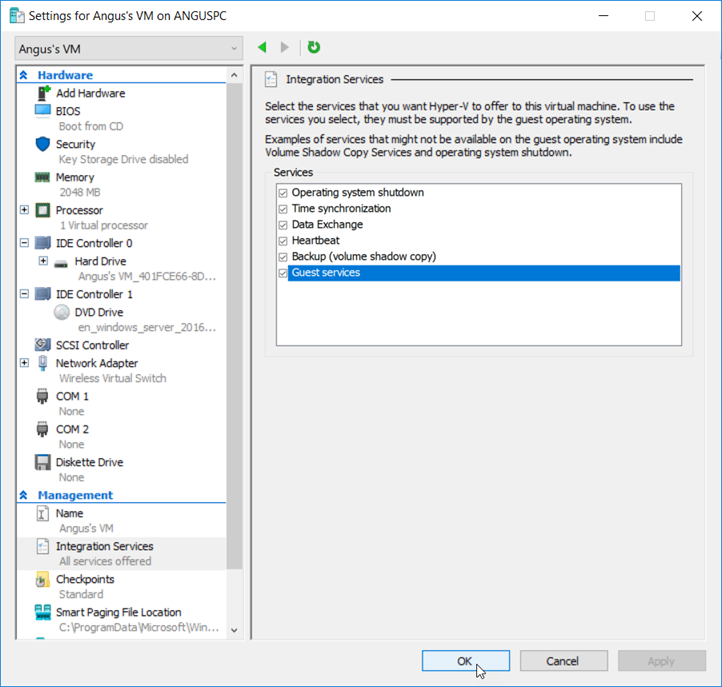
1.You should also right click on your virtual machine>settings>Integration Services and as you see my Guest Services is on but for you it might not be so what you need to do is to enable guest services and press on Apply and okay
- When you open the virtual machine you should see this screen and just change it to your desired settings and then press next
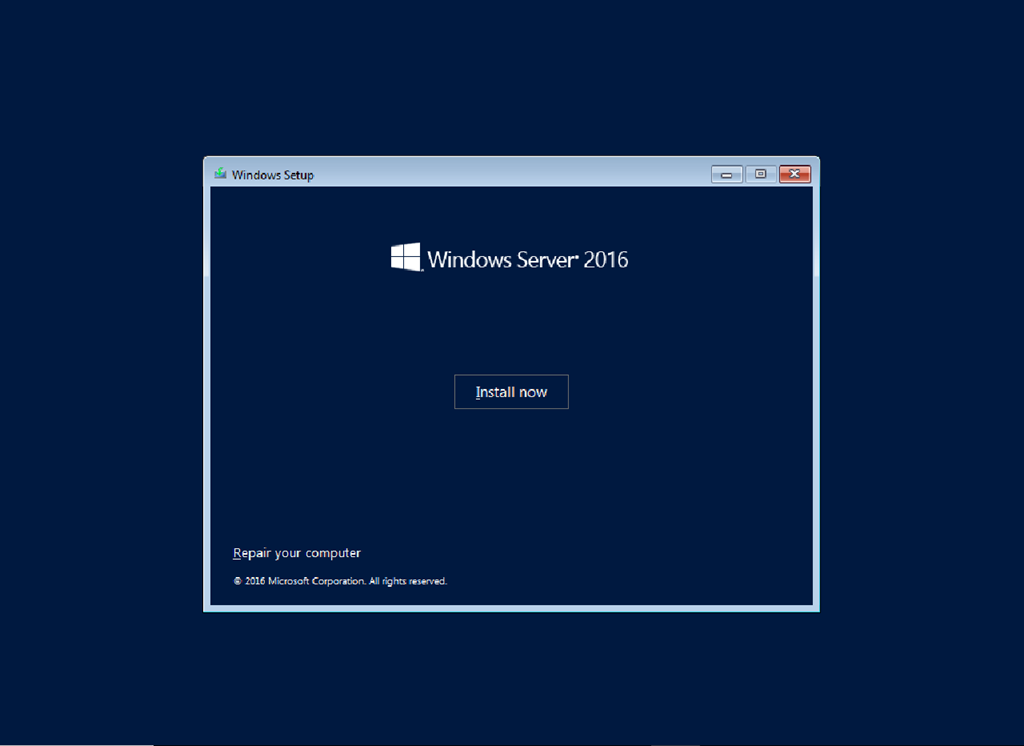
- Now press install now
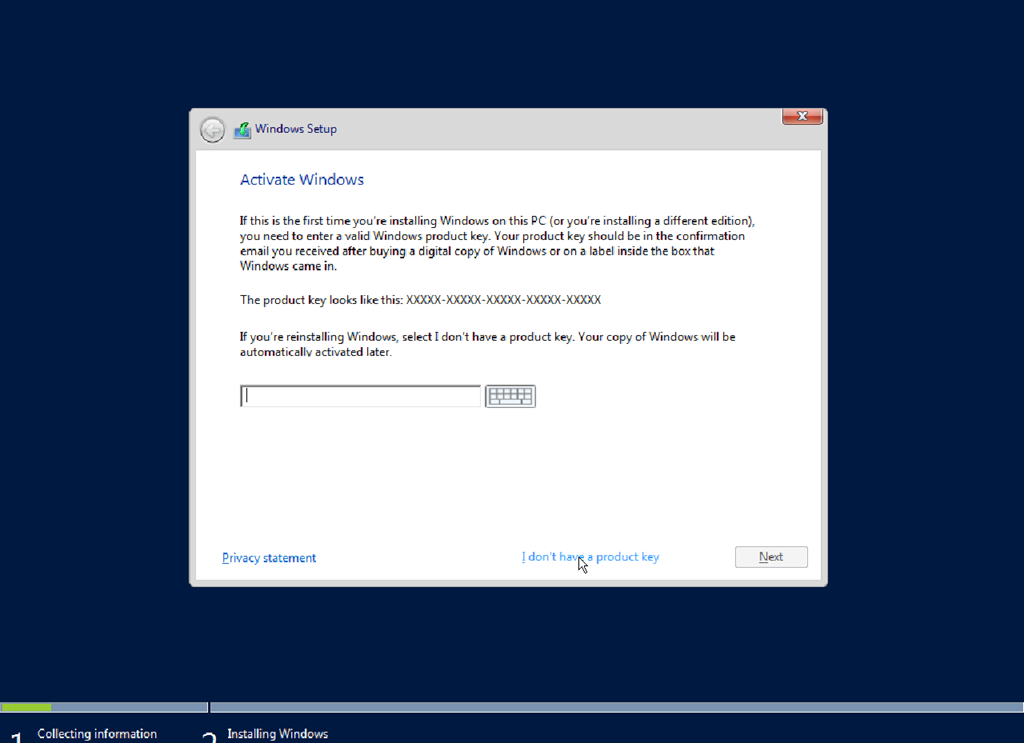
- Now you press I don’t have a product key but you can choose if you want to
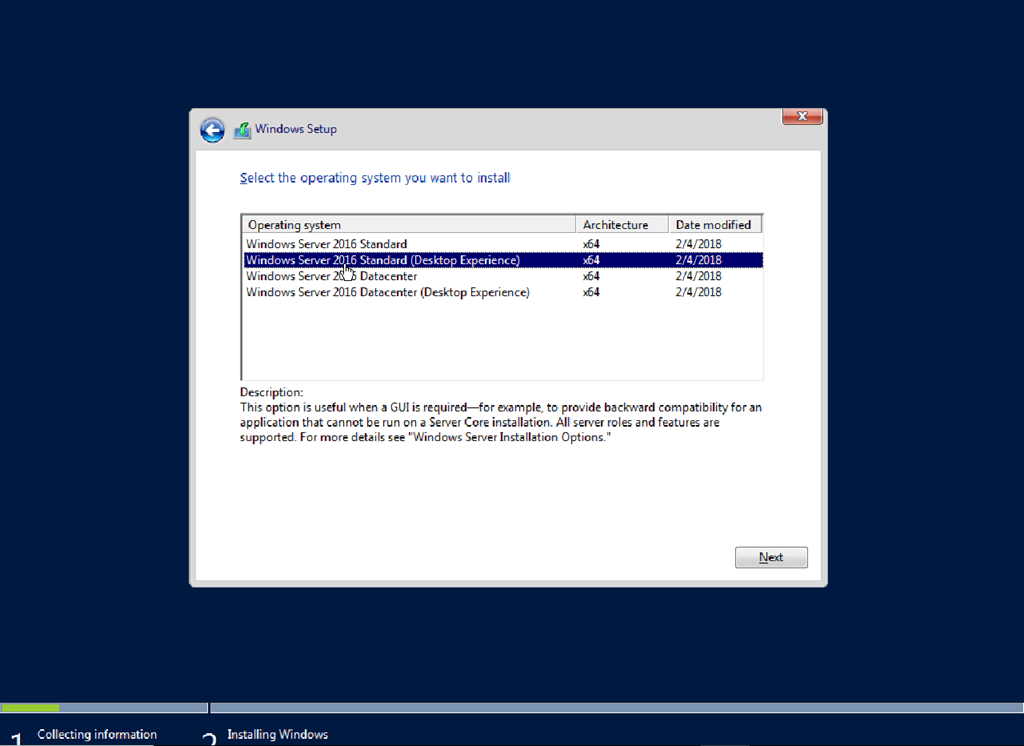
- Choose the operating system that you want to install for your Virtual Machine
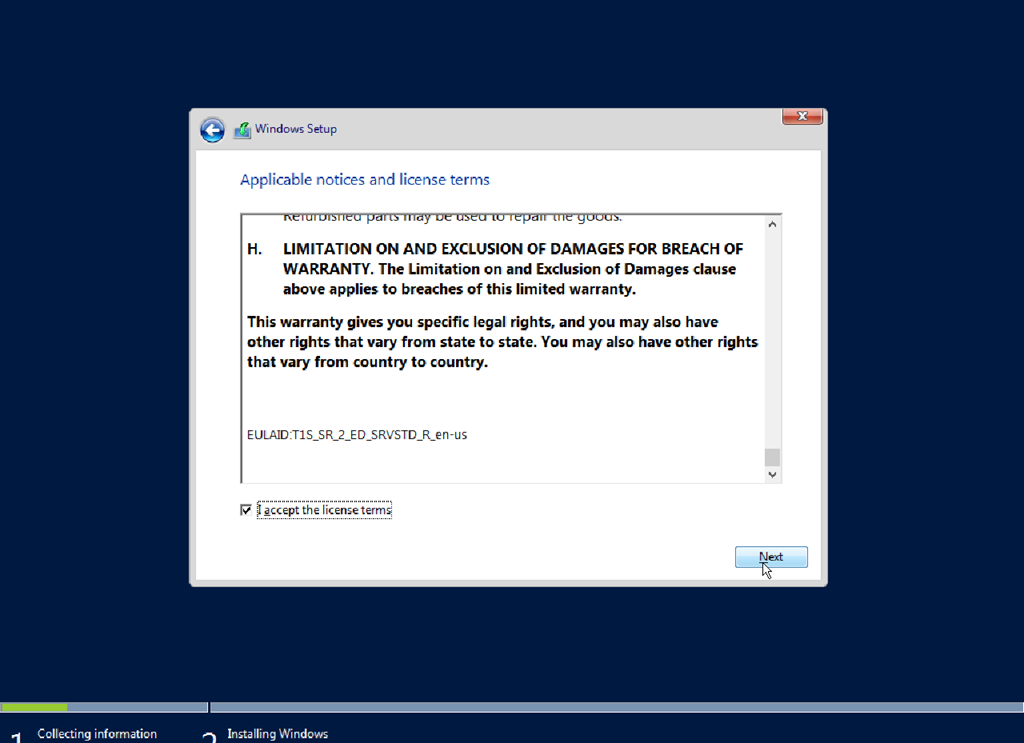
- Read the license terms and press I accept the license terms
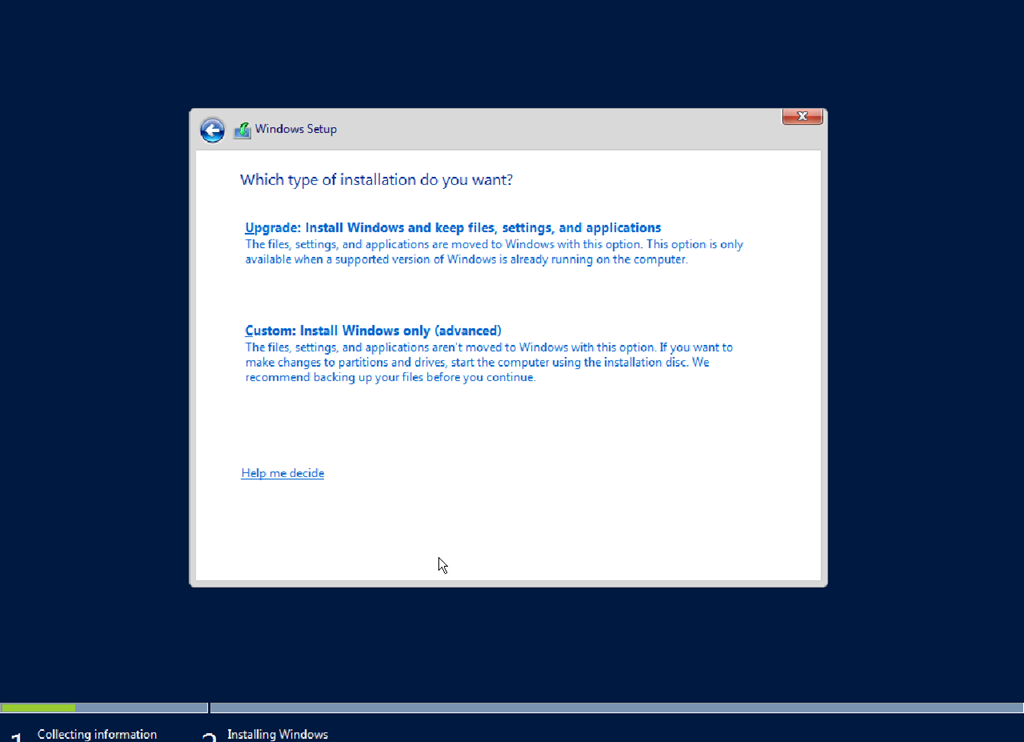
- Now choose the windows installation that you want to use
- Select a disk and press next, if you don’t know how to add a disk then here is how to
- First, you have to press on New>Hard Disk

- Now you press Next

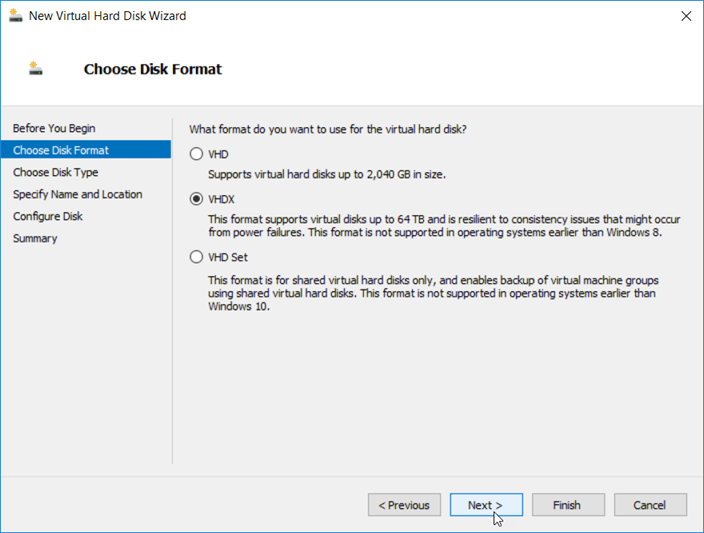
- Press on the Disk Format you want and then Next
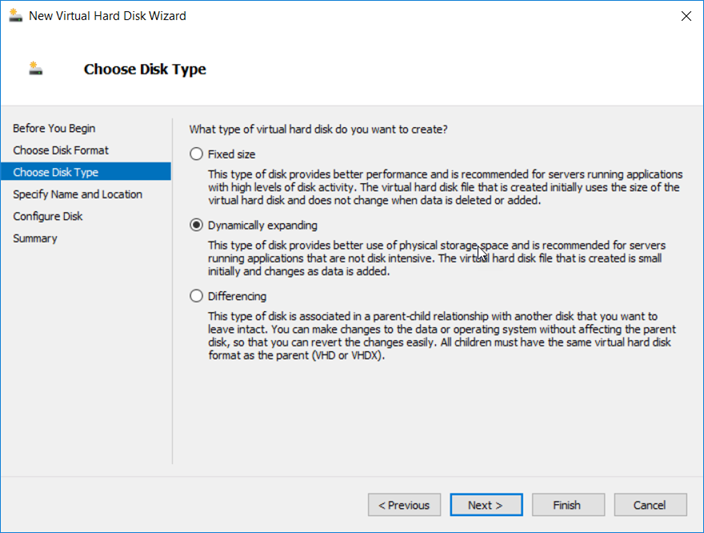
- Now you choose your Disk Type then press next
- Now you choose the location of your Hard Disk and also the name and then you press next
- Choose how much storage is in your disk (has to be lower then what you have available in the location you put your disk in) press on next and it will show you the summary of the hard disk and then you press on finish and there you go! You got your disk, let’s continue on

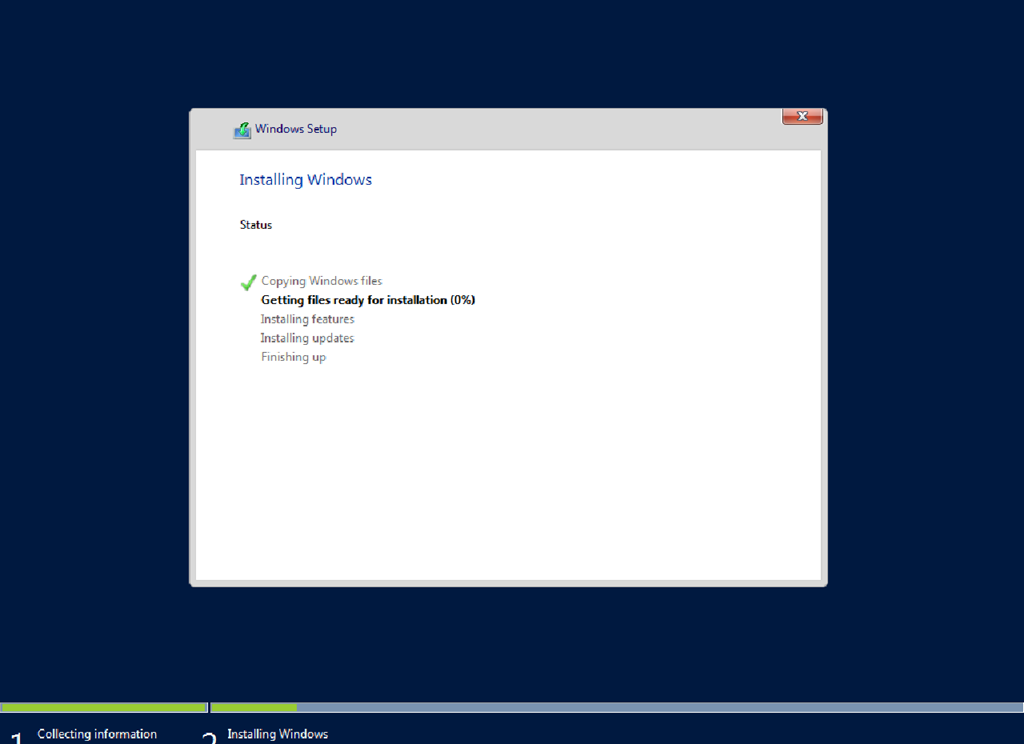
Now it will say Installing and after it is done it will restart your virtual machine
- Now when you open it, you should see this and you can setup a password
- Type in your password and you should get into your desktop
- If you had already set up your internet it will ask you for Network access and of course you press on Yes, if you do not know how to set up a network then here is how
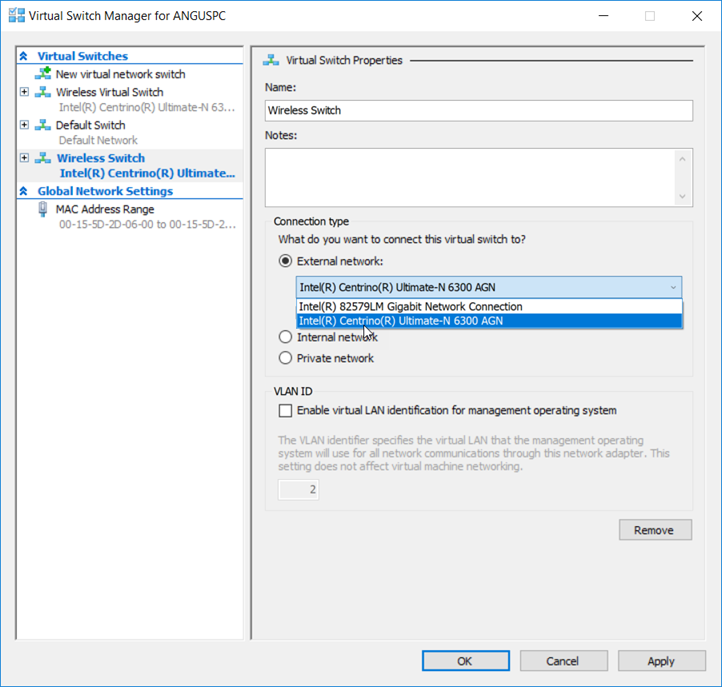
- First go to the Virtual Switch Manager which is at the side in the Hyper-V Manager
- Go to the New virtual network switch place and use External
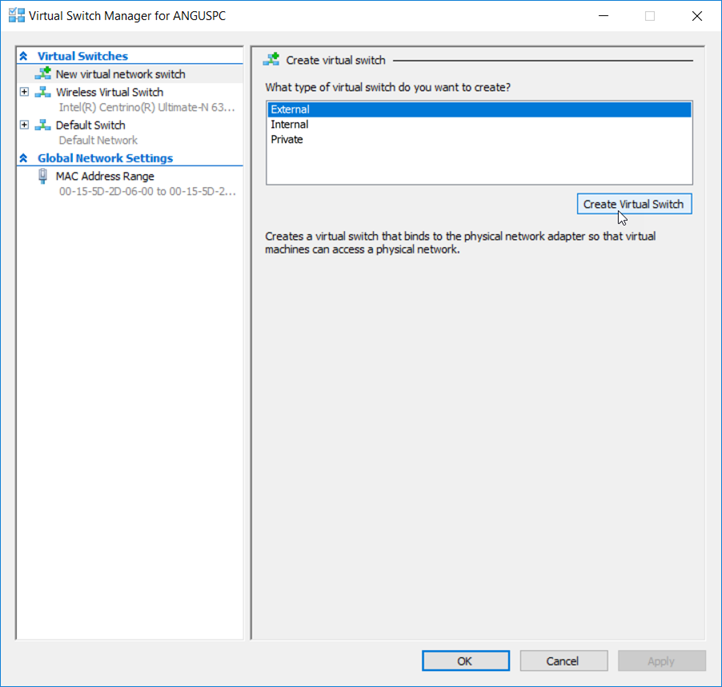
- Name it what you want, I named mine the Wireless Switch and use the second scroll down menu for your network, if that doesn’t work then use the first one
To be continued…
Twitter: @FrostedFright