
Version 8 of Veeam Backup for Microsoft 365 introduced proxy pools to improve performance and scalability in large installations. By logically combining several backup proxies, a proxy pool enables dynamic load distribution of backup and restore traffic, removing bottlenecks and accelerating processes.
Note:
- It is not possible to add the default backup proxy server to backup proxy pools.
- Each backup proxy server in the backup proxy pool needs to be reachable by its DNS name.
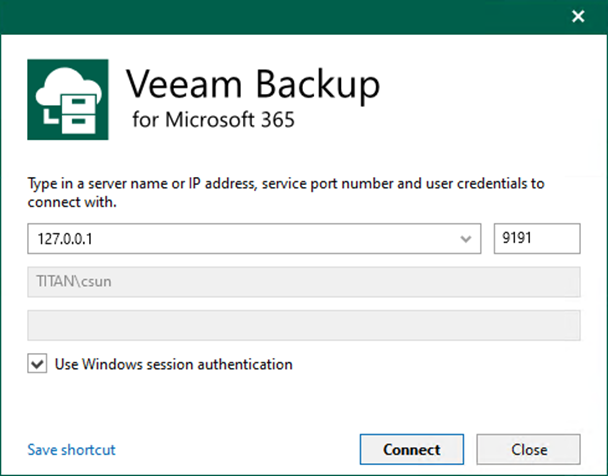
1. Login to the Veeam Backup for Microsoft 365 Manager server.
2. Open the Veeam Backup for Microsoft 365 console and click Connect.
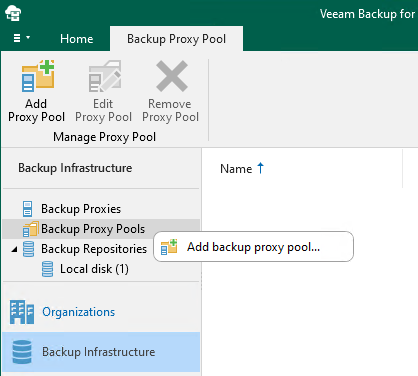
3. On the Veeam Backup for Microsoft 365 console page, select Backup Infrastructure.

4. On the Backup Infrastructure page, right-click Backup Proxy Pools and select Add backup proxy pool.
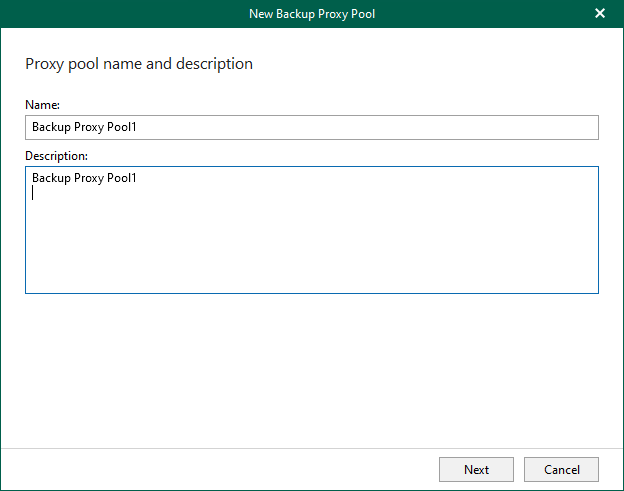
5. In the Name field, enter the name for the backup proxy pool, and click Next.
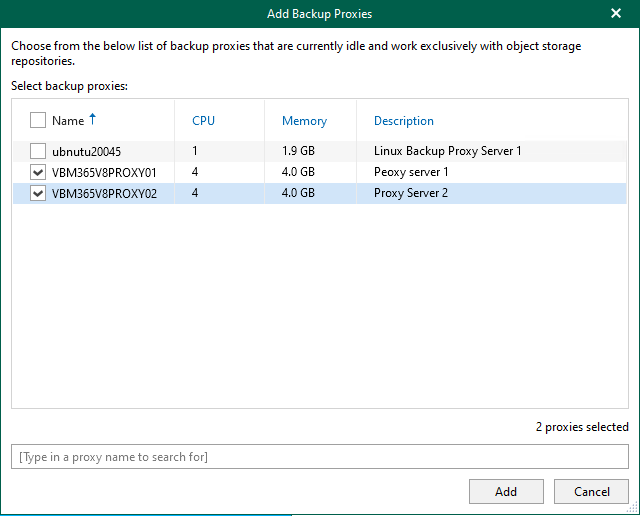
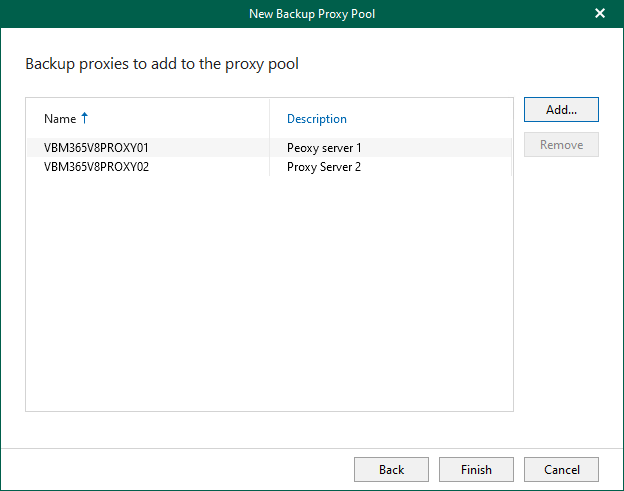
6. Click Add on the Backup proxies to add to the proxy pool page.

7. Select the Backup proxy servers and click Add.
8. Click Finish on the Backup proxies to add to the proxy pool page.
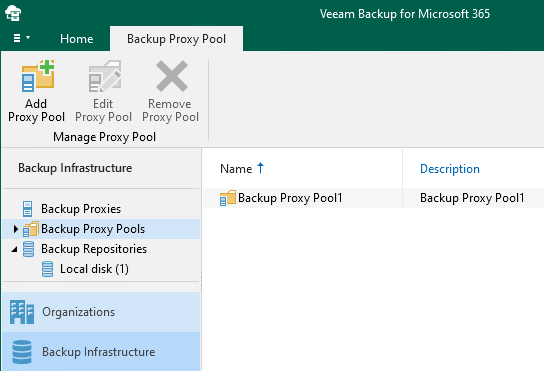
9. Verify that the Linux Backup proxy pool has been added.
I hope you enjoy this post.
Cary Sun
X: @SifuSun
Web Site: carysun.com
Blog Site: checkyourlogs.net
Blog Site: gooddealmart.com
Amazon Author: Amazon.com/author/carysun