
There are many ways to rebuild the Hyper-V host, but I will show you how to rebuild a Microsoft Hyper-V host via PXE. This process is also can use for other vendors, not for the DataOn host only. It would be best to ask the host hardware vendor to send you the custom WIM image file before rebuilding it.
1. Log in to a server (or create a new VM).
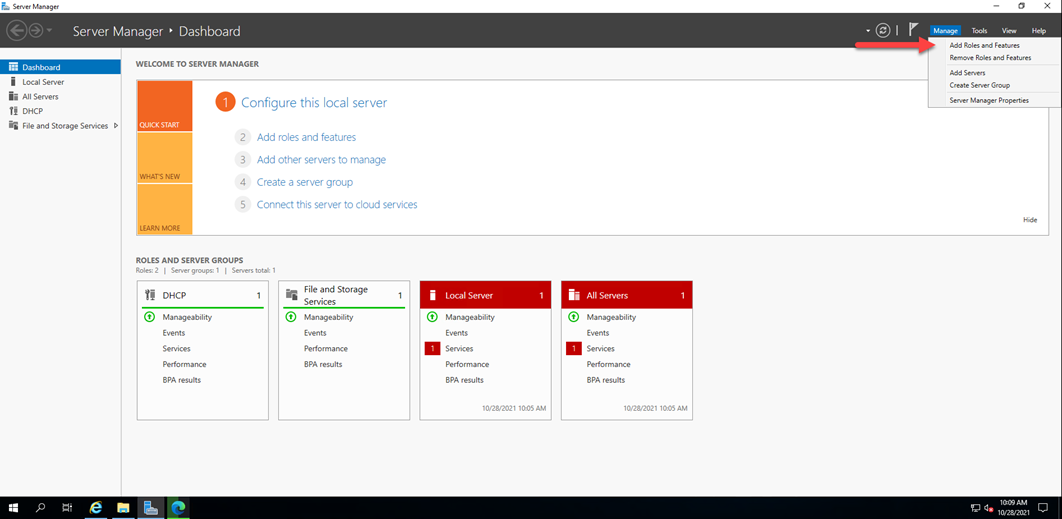
2. Select Add Roles and Features from the Manage drop-down list.
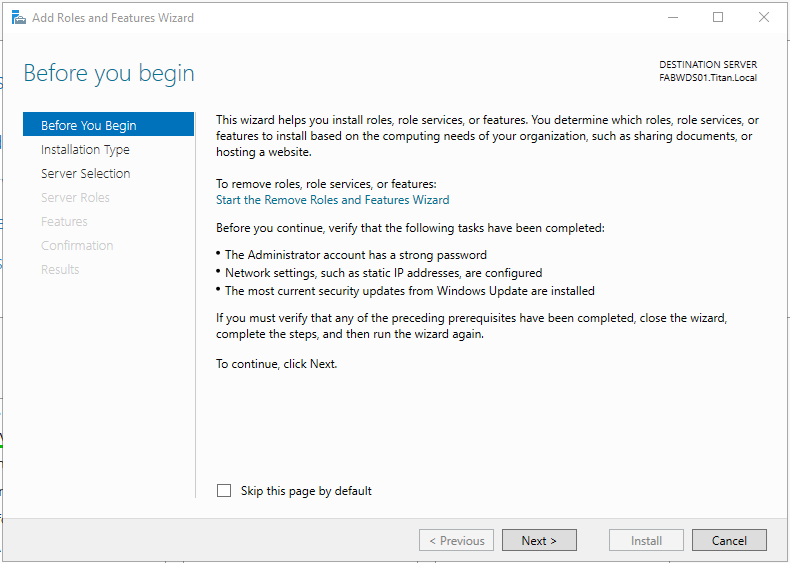
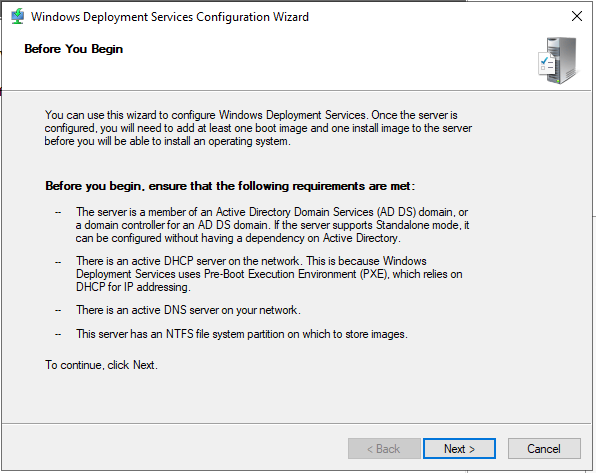
3. Click Next on the Before You Begin page.
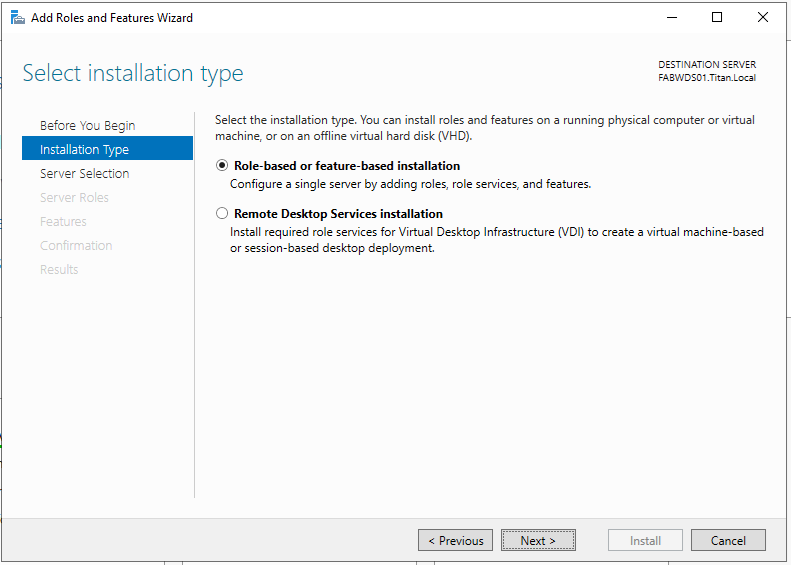
4. Select Role-based or feature-based installation on the Installation Type and click Next.
5. Click Next on the Server Selection page.

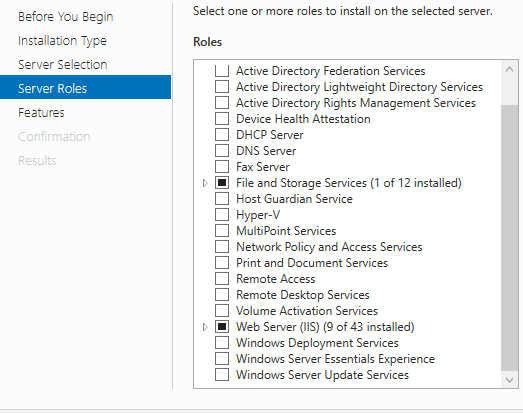
6. Select the Windows Deployment Service checkbox on the Server Roles page.
7. Click Add Features on the Add Features that are required for Windows Deployment Services? page.

8. Click Next On the Server Roles page.

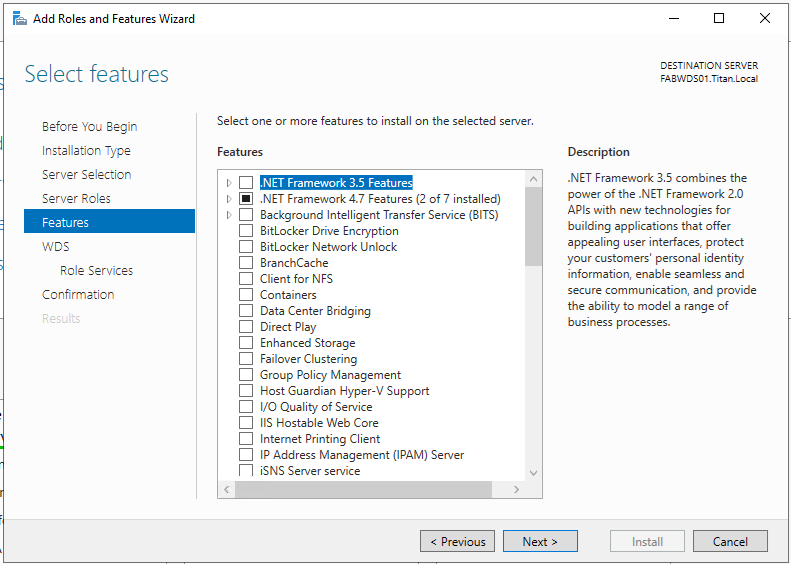
9. Click Next On the Features page.
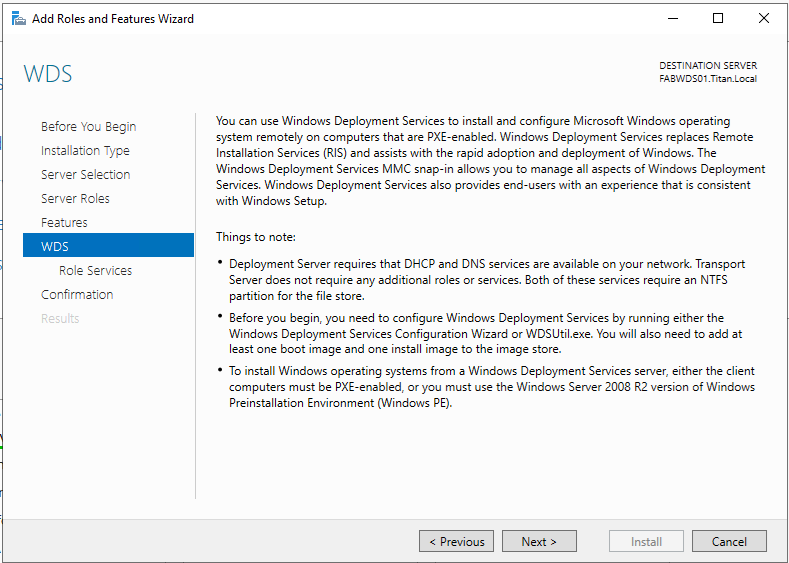
10. Click Next on the WDS page.
11. Select the Deployment and Transport Server checkboxes on the Role Services page and click Next.

12. Select Restart the destination server automatically if required checkbox on the Confirmation page.
13. Click Yes on the Warning message.

14. Click Next on the Confirmation page.

15. Click Close on the Results page.

16. Log in to the server after reboot.
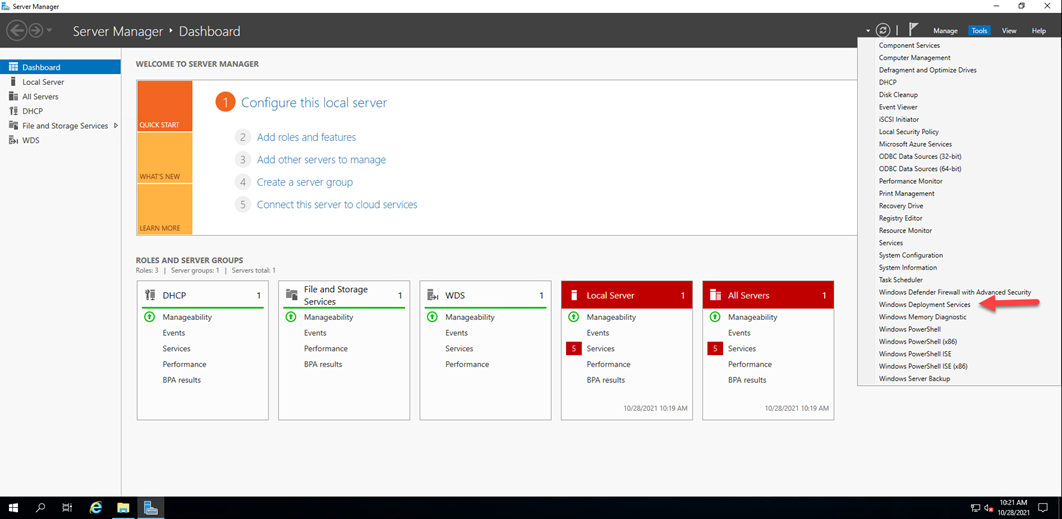
17. Select Windows Deployment Services from the Tools drop-down list.
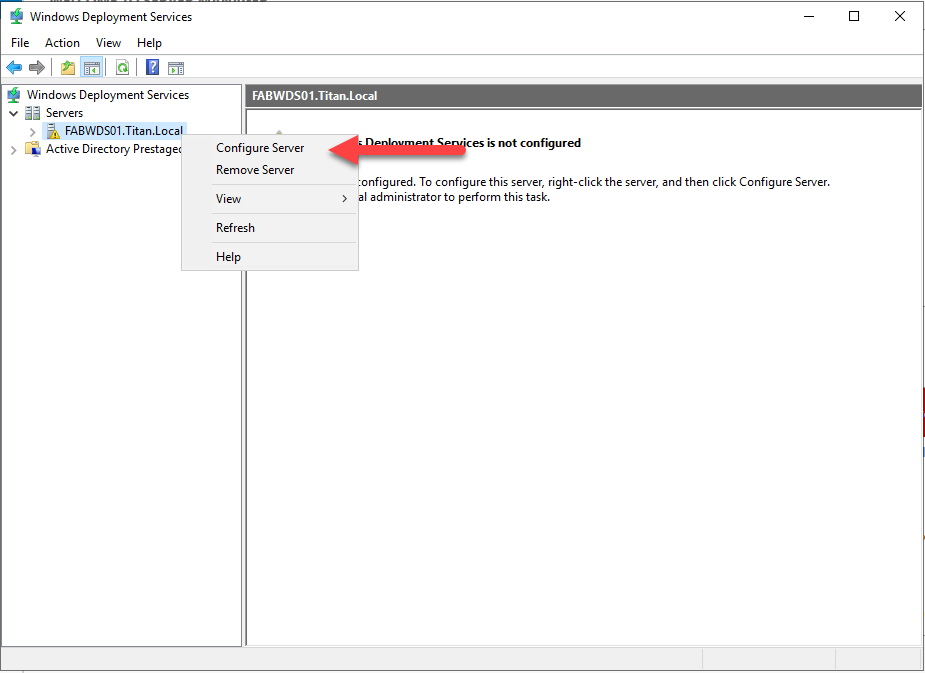
18. On the Windows Deployment Services page, expand Servers.
19. Right-click the WDS server and select Configure Server.
20. Click Next on the Before You Begin page.
21. Select Integrated with Active Directory on the Install Options page and click Next.

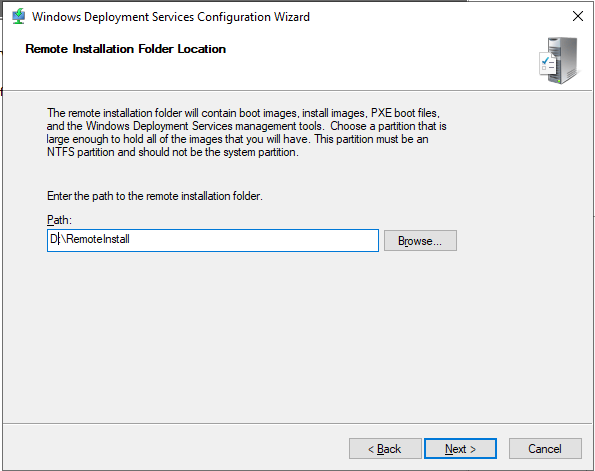
22. Click Browse on the Remote Installation Folder Location page.
23. Select the folder path and click Next.
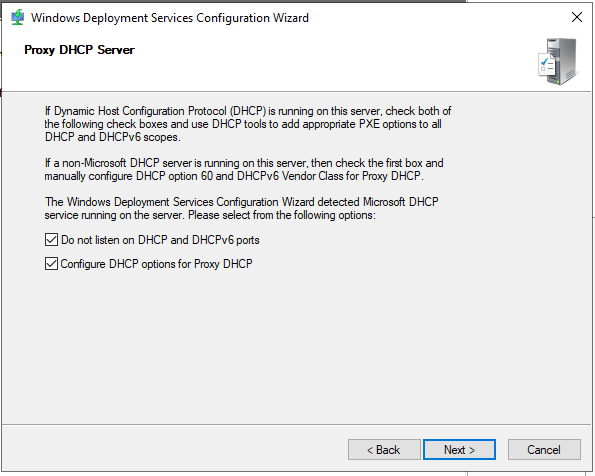
24. On the Proxy DHCP Server page, select the Do not listen on DHCP and DHCPv6 ports checkbox.
25. Select the Configure DHCP options for Proxy DHCP checkbox and click Next.
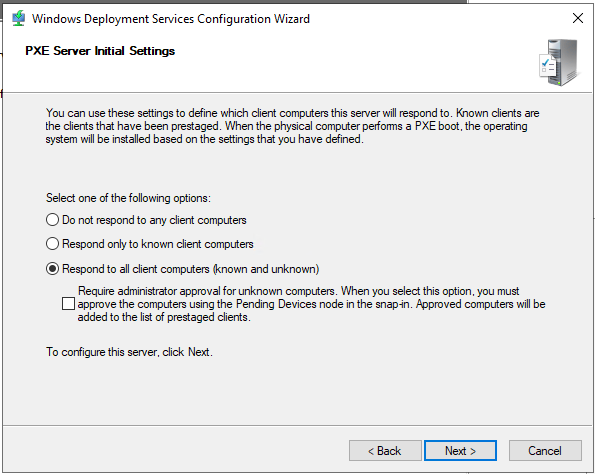
26. Select Respond to all client computers (known and unknown) and click Next.
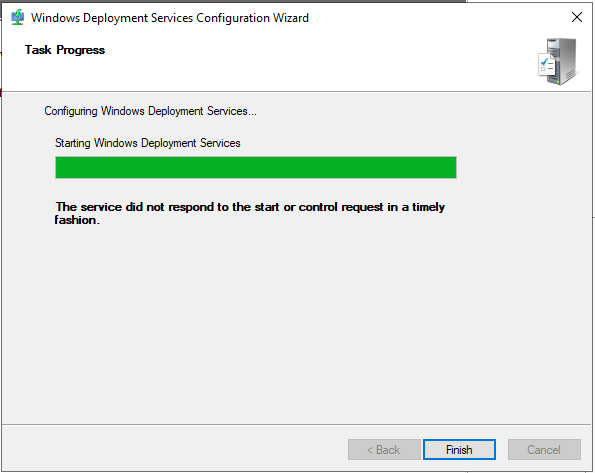
27. Click Finish on the Task Progress page.
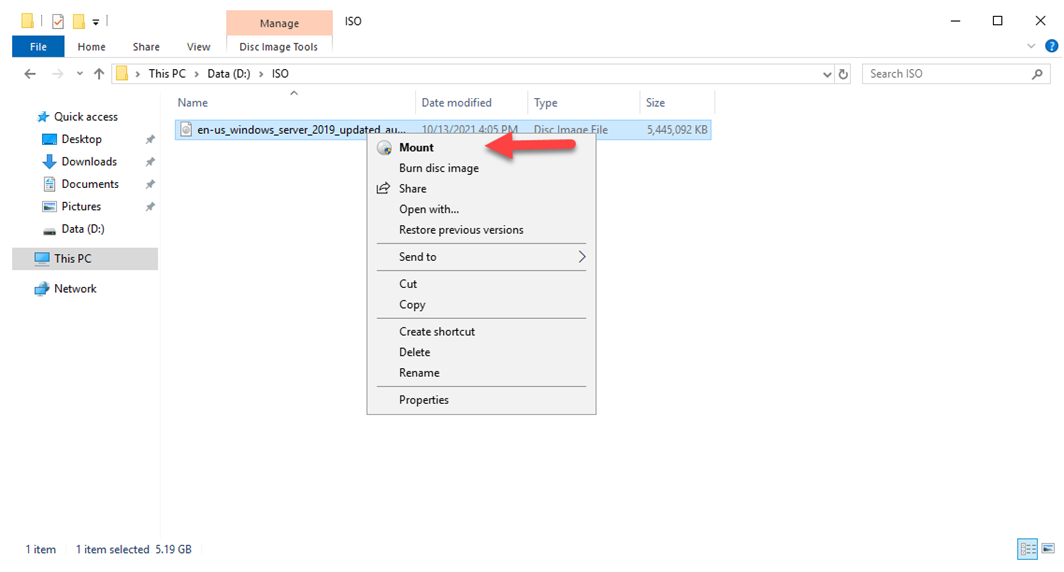
28. Mount the Windows OS iso image file.
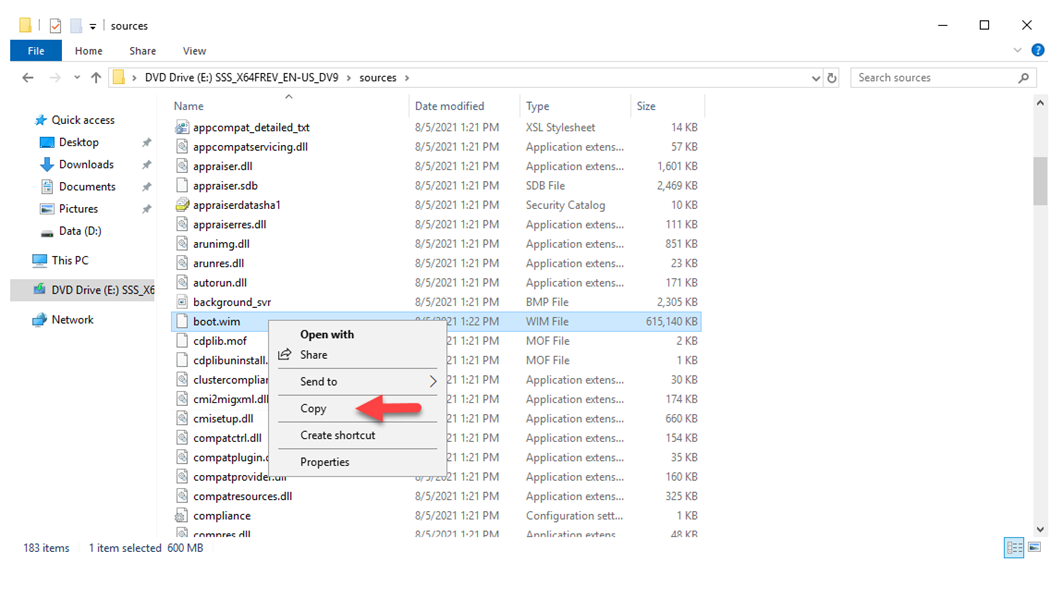
29. Copy the boot.wim file.
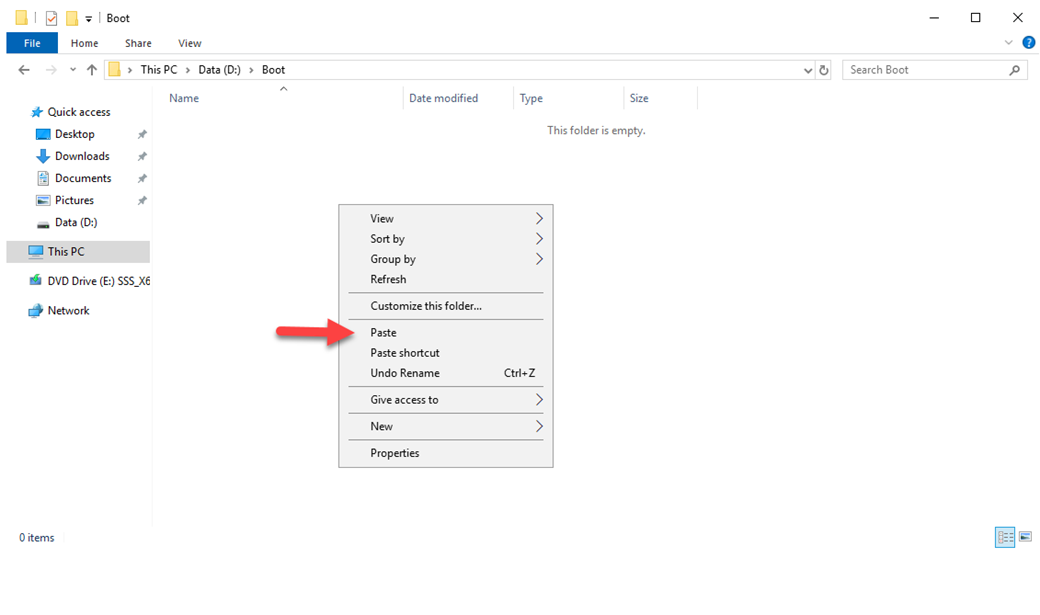
30. Paste the boot.wim file to the Boot folder.
31. On the Windows Deployment Services page, right-click the WDS server.
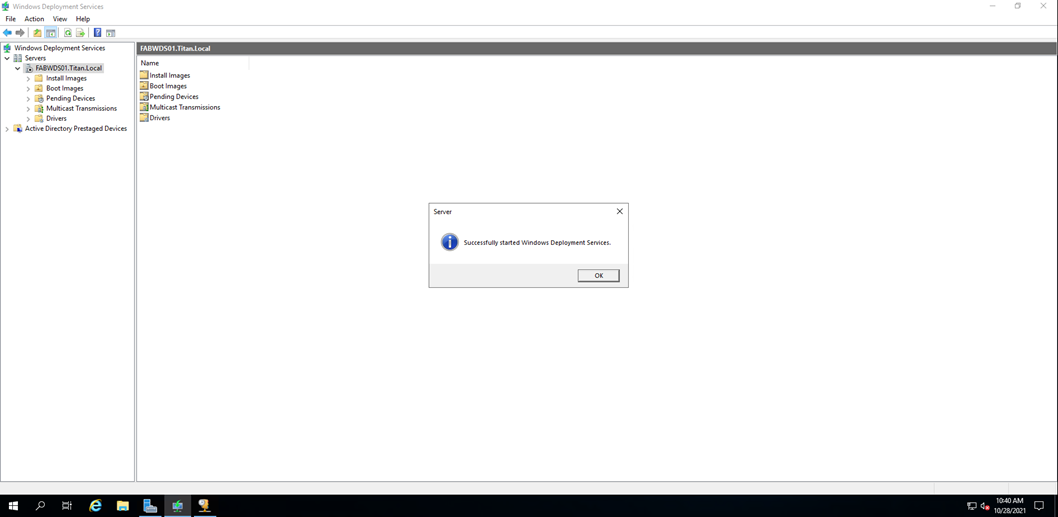
32. Select All Tasks and click Start.

33. Click OK on the Successfully started Windows Deployment Services information message.
34. Expand the WDS server, right-click Add Boot Images and click Add Boot Image.

35. Click Browse on the Image file page.
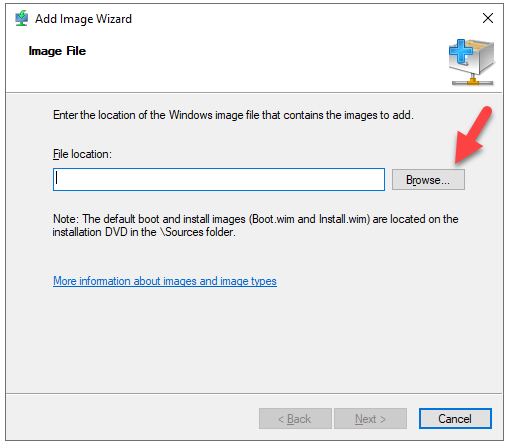
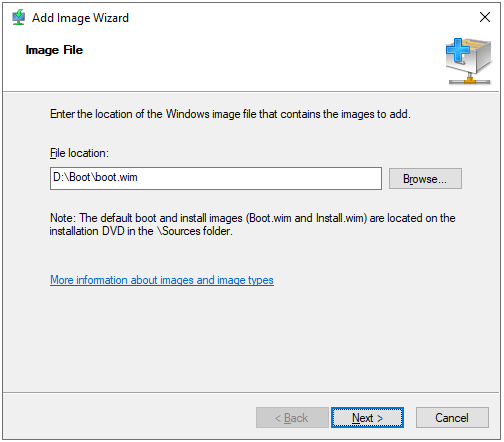
36. Select the boot.wim file and click Open.

37. Click Next on the Image File page.
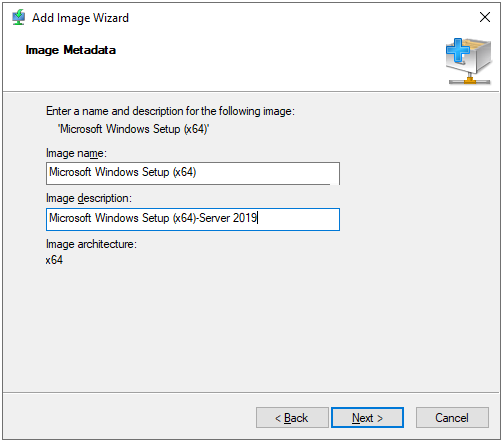
38. enter the image’s description in the description field and click Next.
39. Click Next on the Summary page.
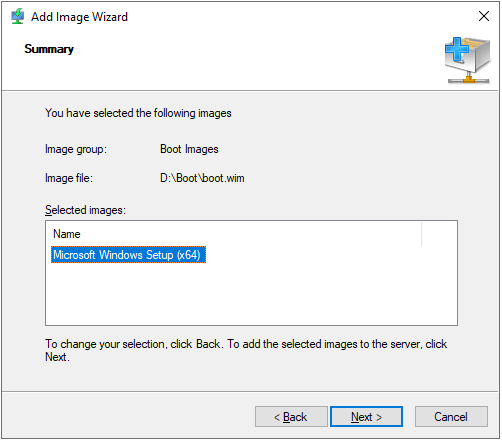
40. Click Finish on the Task Progress page.
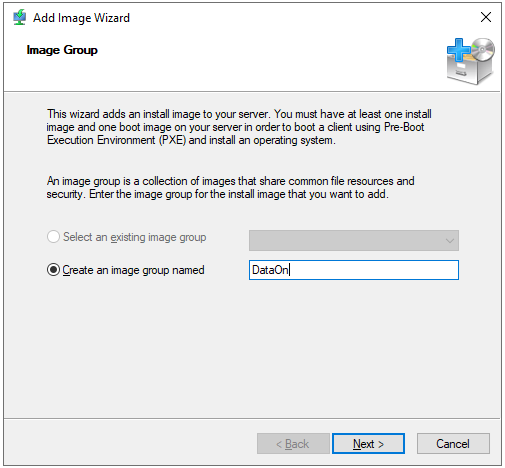
41. Expand the WDS server, right-click Install Images and click Add Install Image.

42. Select Create an image group named on the Image Group page.
43. Enter a name in the field and click Next.
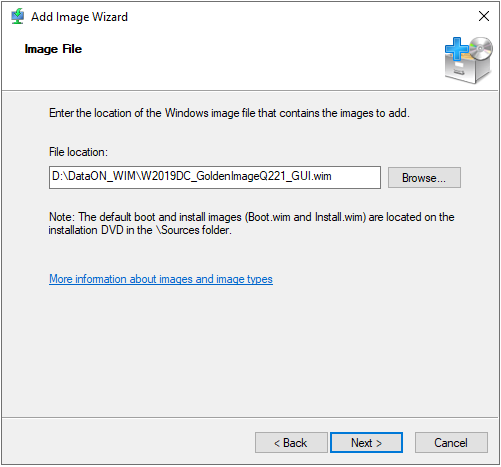
44. Click Browse on the Image File page.

45. Select the DataOn custom WIM image file and click Open.
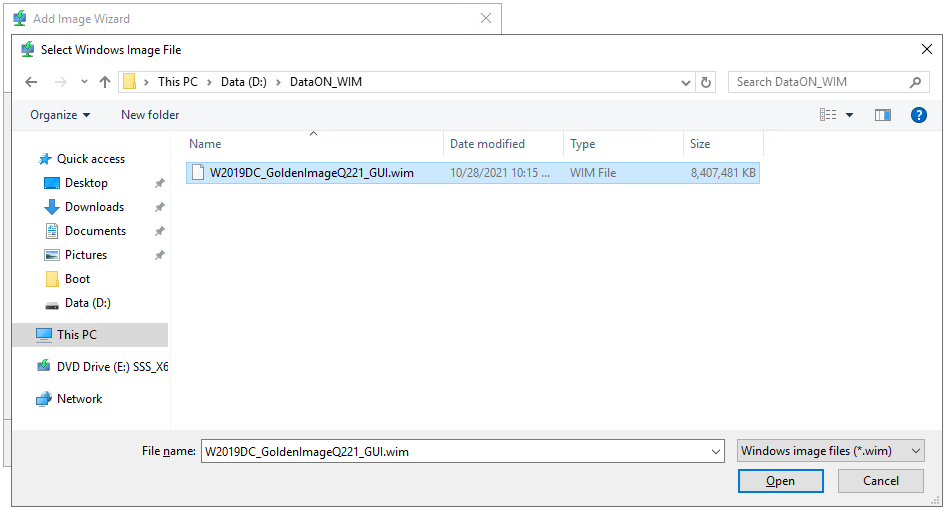
46. Click Next on the Image File page.
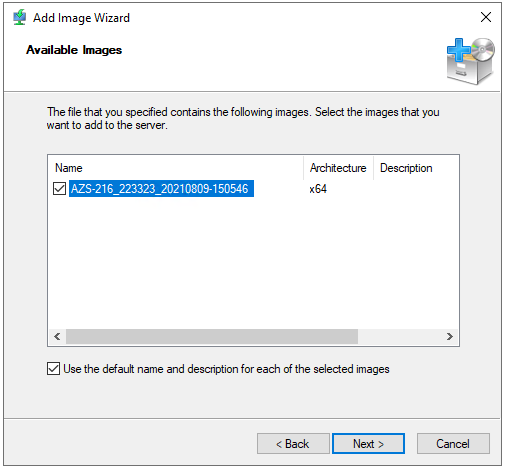
47. Select the image checkbox from the list on the Available images page.
48. Select Use the default name and description for each of the selected images checkbox and click Next.
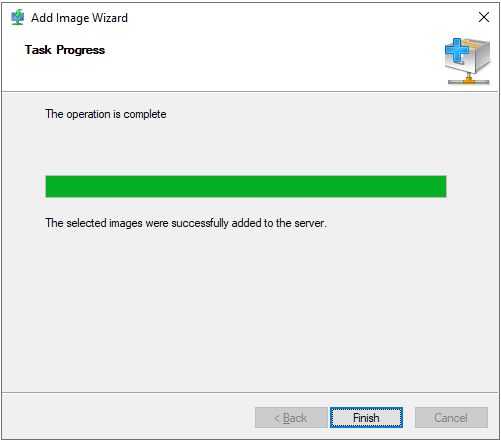
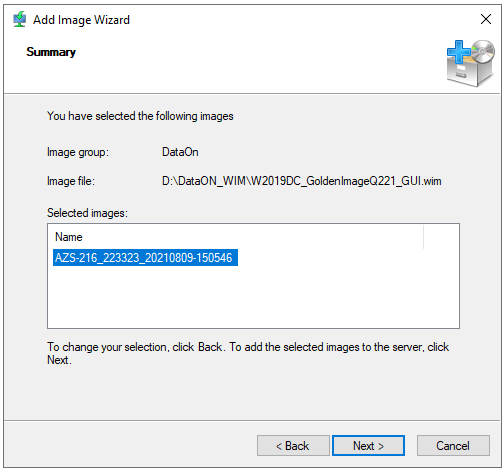
49. Click Next on the Summary page.
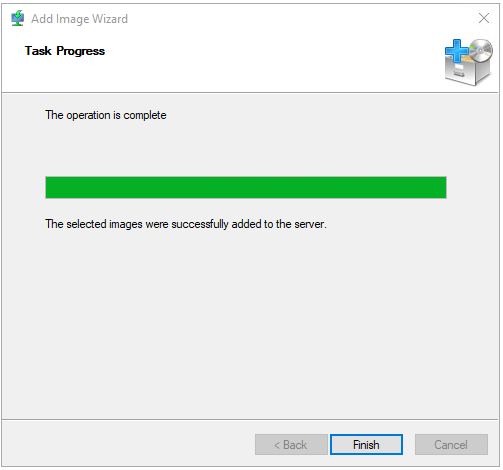
50. Click Finish on the Task Progress page.
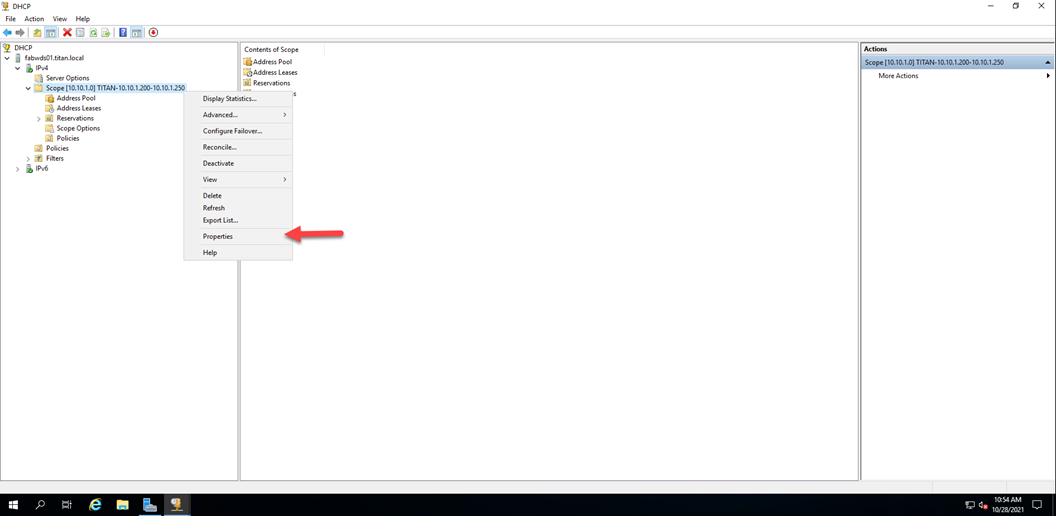
51. Open the DHCP manager tool, right-click Scope and select Properties.
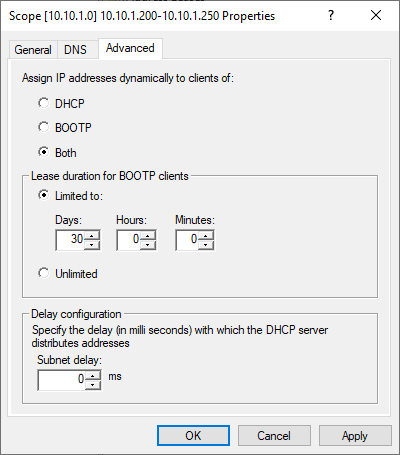
52. Select Advance on the Scope page.
53. Ensure to enable BOOTP and click OK.
54. Ensure the network settings are correct.

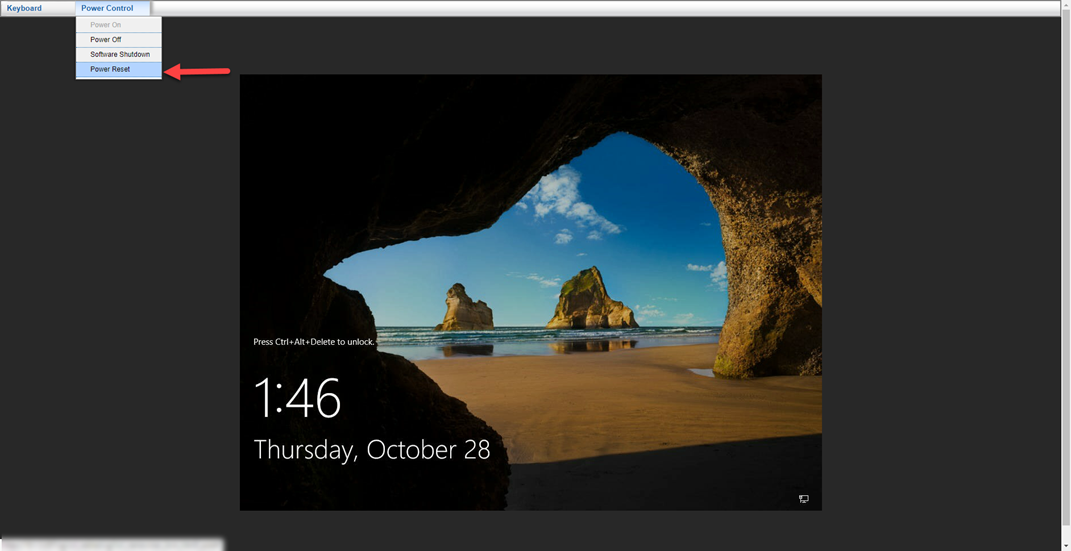
55. Open IPMI and select Power Resr from the Power Control drop-down list.
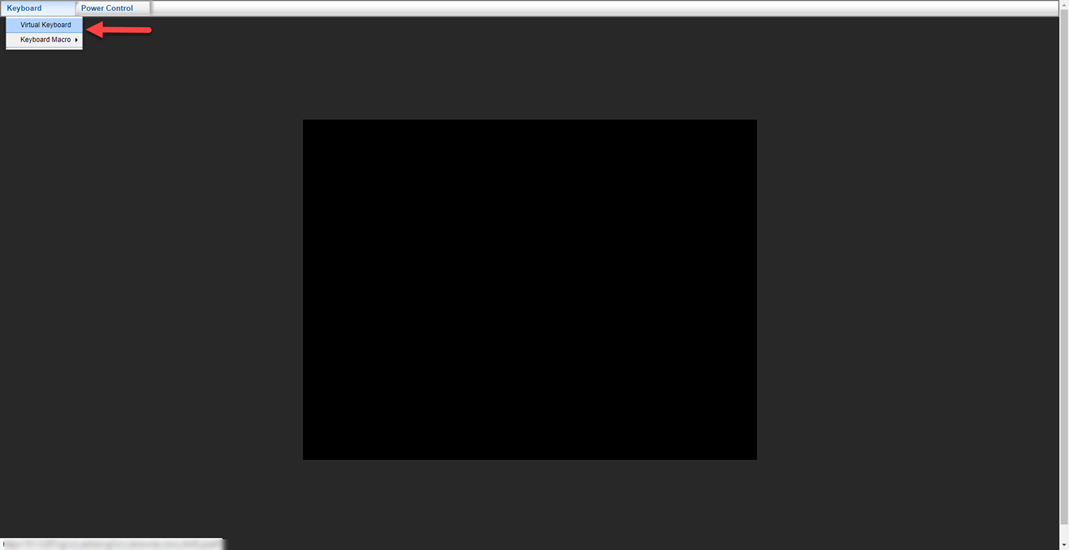
56. Select Virtual Keyboard from the Kepboard drop-down list.
57. Click F12 on the Virtual Keyboard to boot from network.

58. Press Enter key for network boot services.

59. Ensure the DataOn host boot from the boot.wim image.

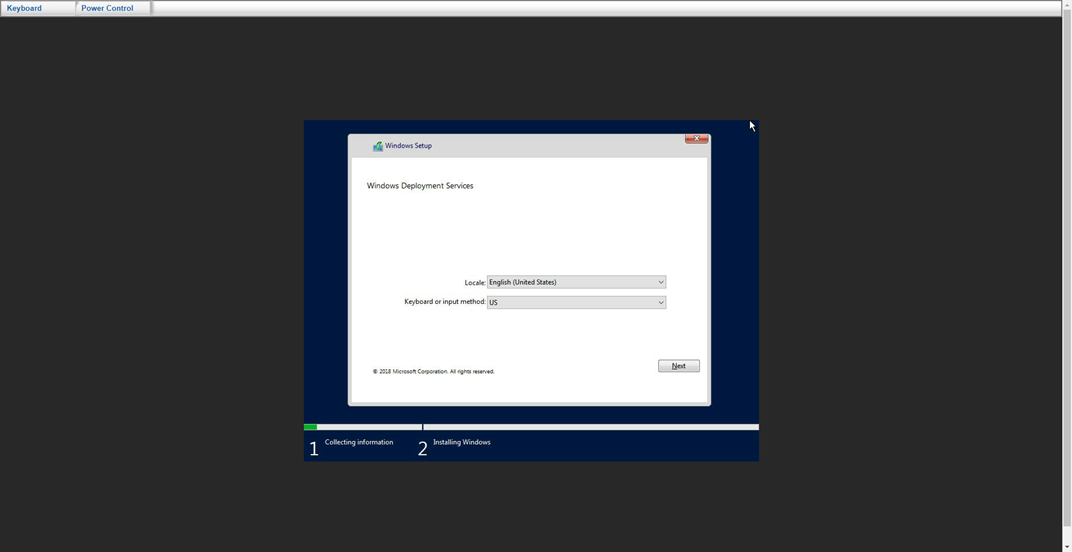
60. Click Next on the Windows Deployment Services page.
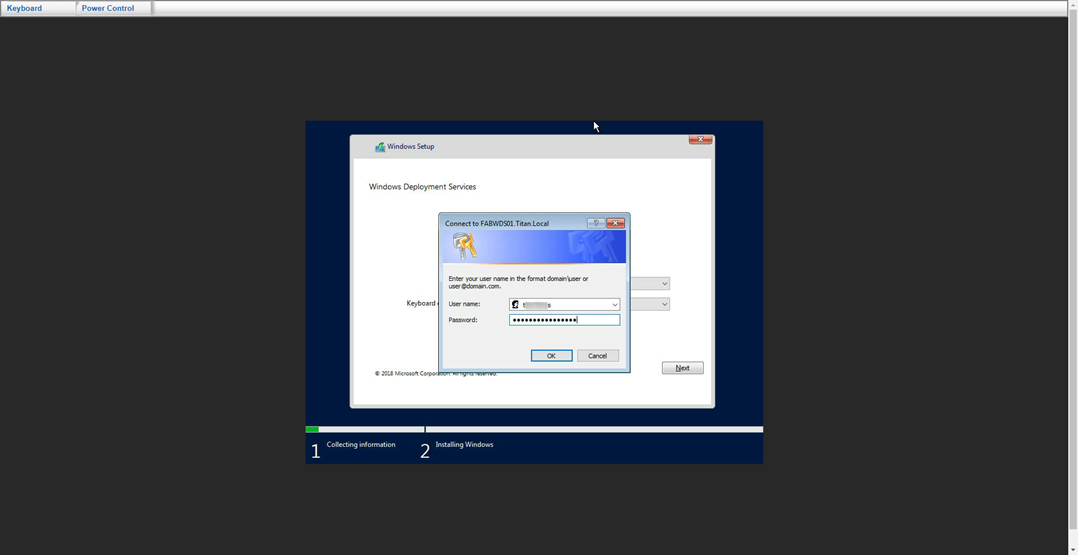
61. Enter a domain username and password, and click OK.
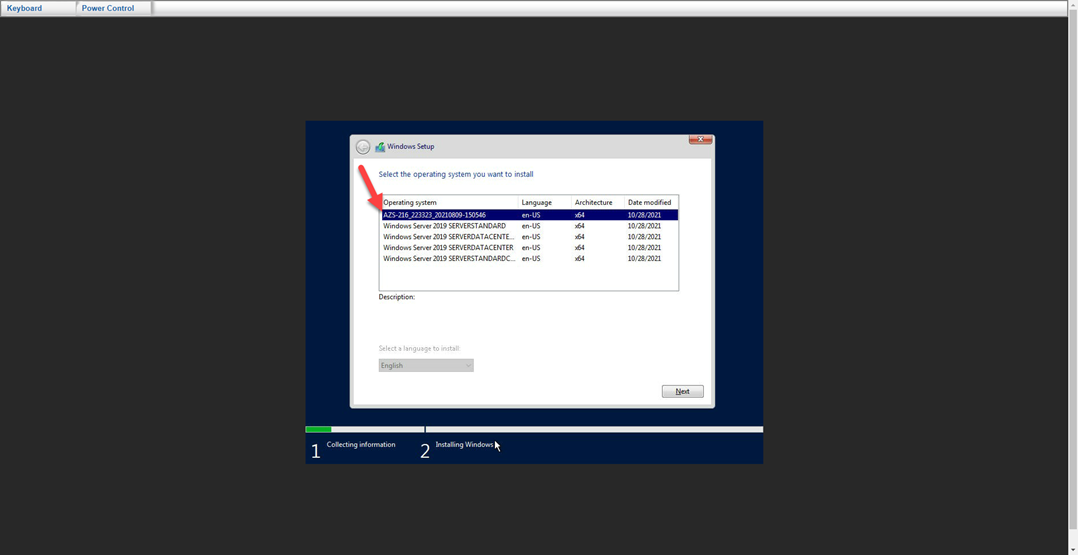
62. Select the custom Operating system image and click Next.
63. Following the installation steps to complete the installation Windows Operating system.
I hope you enjoy this post.
Cary Sun
Twitter: @SifuSun
Web Site: carysun.com
Blog Site: checkyourlogs.net
Blog Site: gooddealmart.com