
Suppose you plan to use as backup infrastructure components and servers that you plan to use for various types of restore operations. In that case, you must add the Microsoft Windows servers to the backup infrastructure.
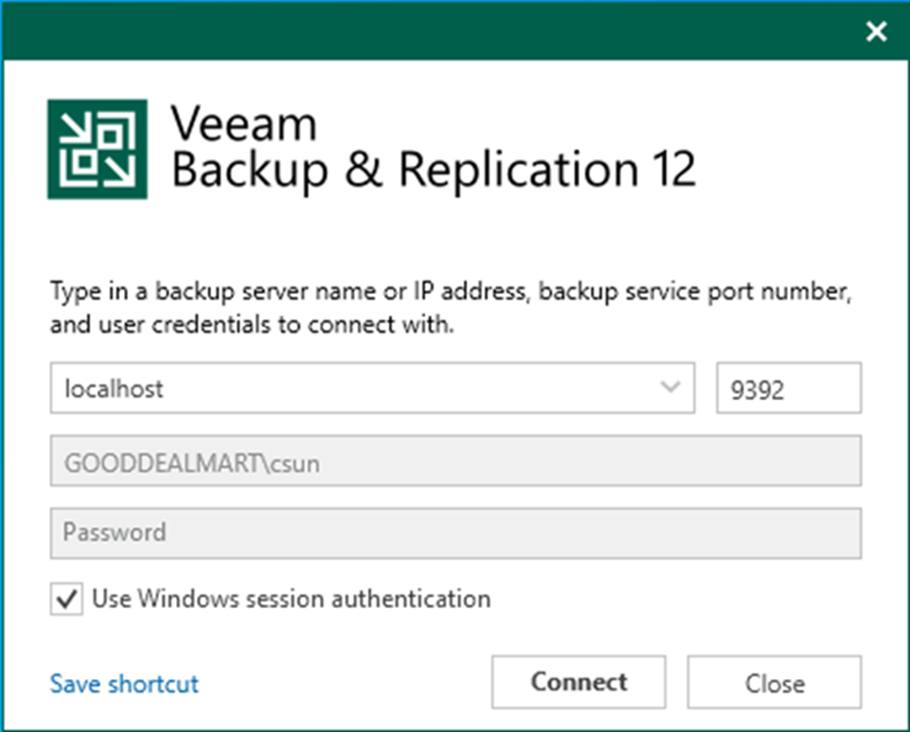
1. Log in to the Veeam Backup and Replication Manager server.
2. Open the Veeam Backup & Replication Console and click Connect.
3. On the Home page, select Backup Infrastructure.
4. On the Backup Infrastructure page, select Managed Servers.
5. Right-click Managed Servers and select Add Server.
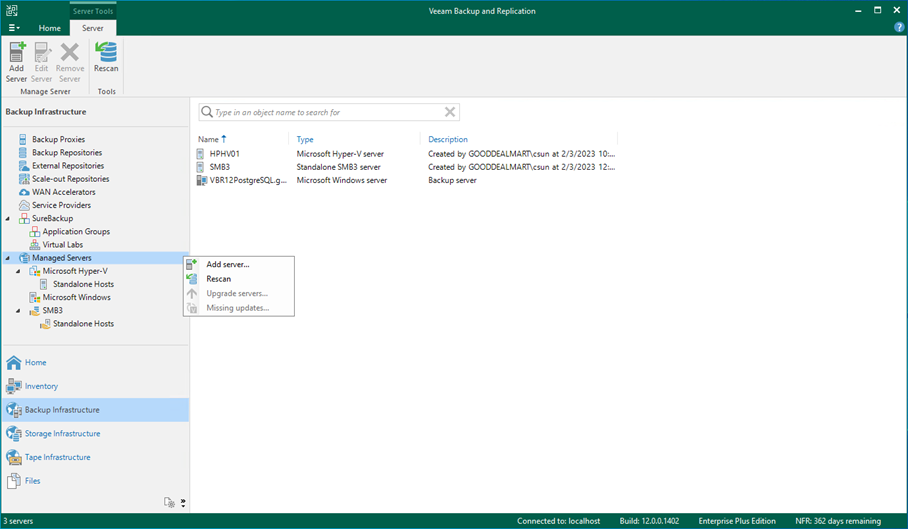
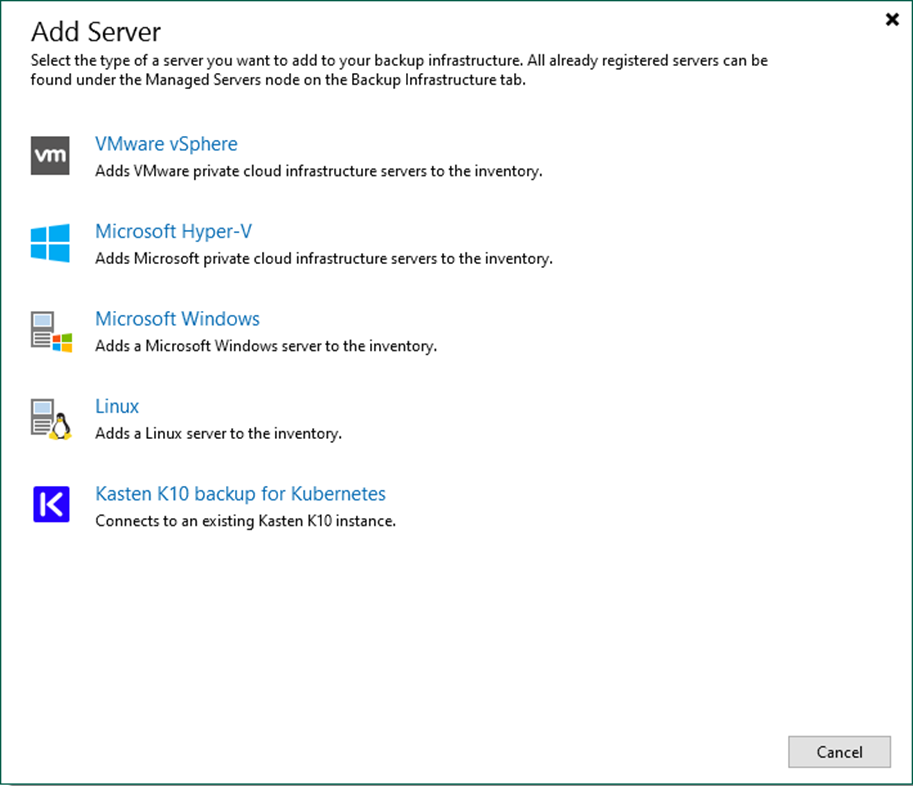
6. On the Add Server page, select Microsoft Windows.
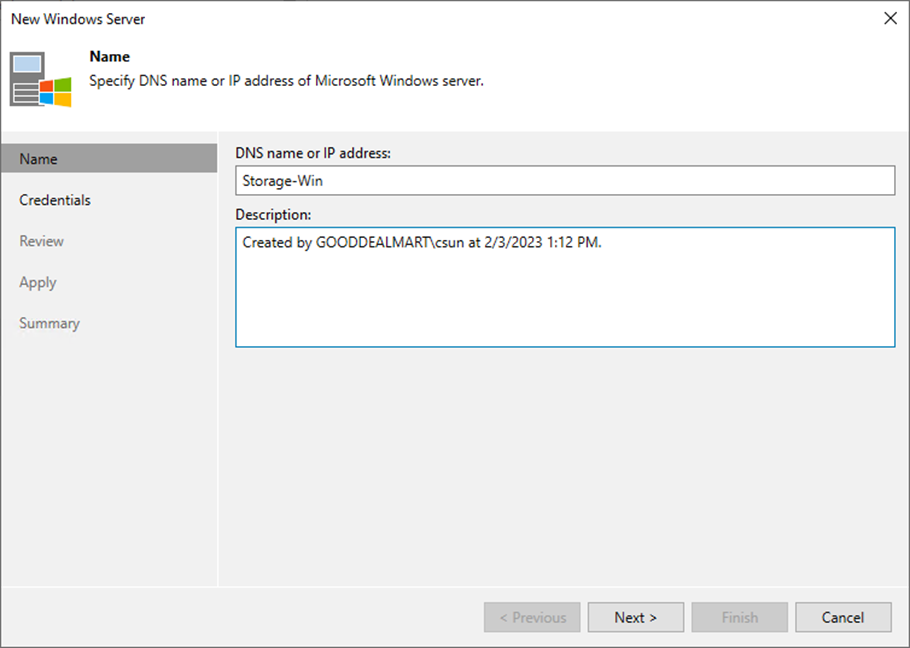
7. Enter the Microsoft Windows server’s full DNS name or IP address on the Name page.
8. Give a brief description in the Description field for future reference and click Next.
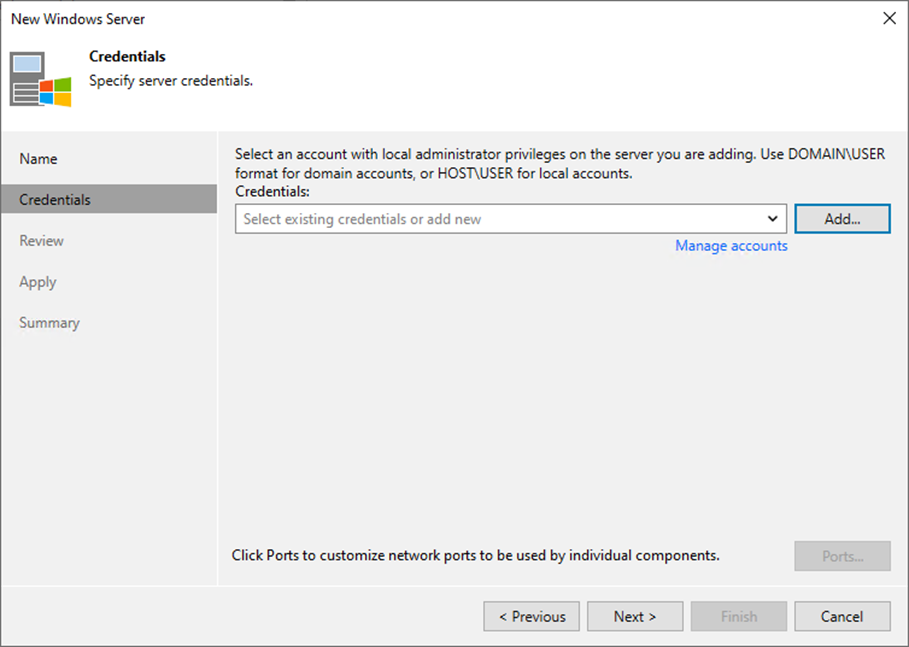
9. Select an account from the Credentials drop-down list on the Credentials page or click Add on the right to add the credentials.
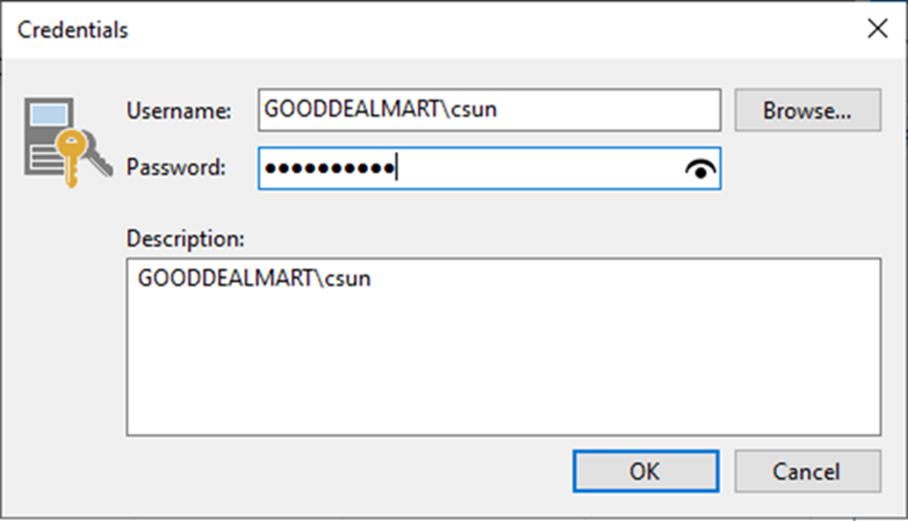
10. On the Credentials page, enter a username in the Username field. You also can click Browse to select an existing user account.
11. Enter the password In the Password field.
12. Give a brief description in the Description field for future reference and click OK.
13. On the Credentials page, click Ports.
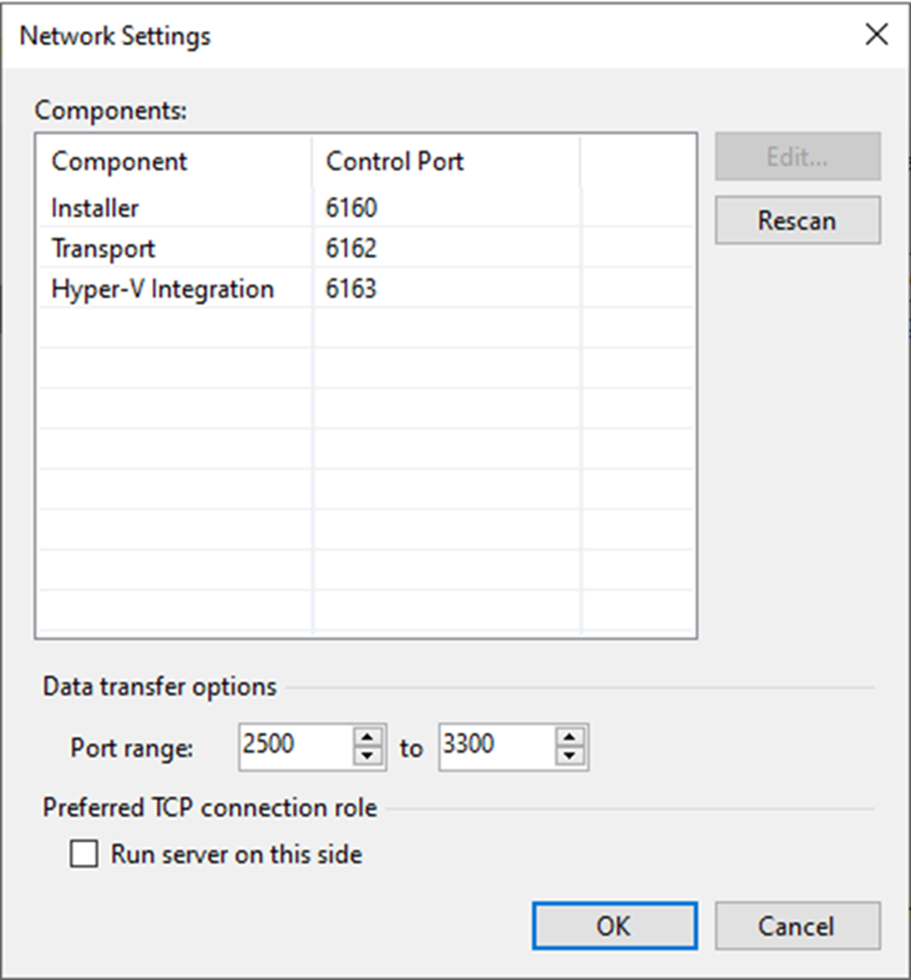
14. If necessary, change the network ports used by Veeam Backup & Replication components on the Network Settings page.
15. Configure connection settings for file copy operations in the Network Settings window’s Data transfer options section. Provide a set of ports for transmission channels between the source and target hosts (one port per task).
16. Select the Run server on this side checkbox in the Preferred TCP connection role section. The outside client cannot connect to the server on the NAT network in the NAT scenario. As a result, services that require external connection initiation may be disrupted.
17. Click OK.
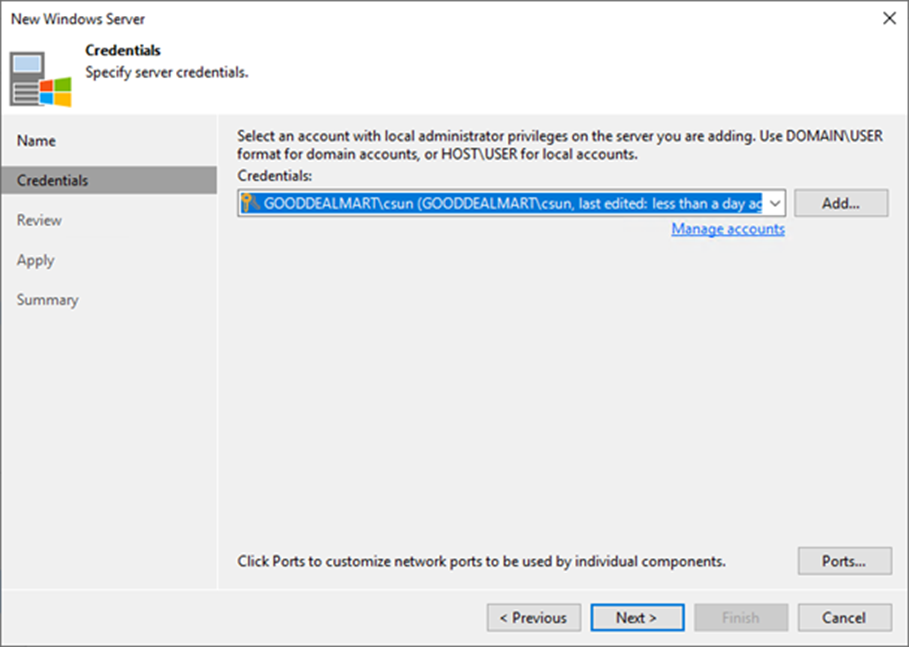
18. On the Credentials page, click Next.

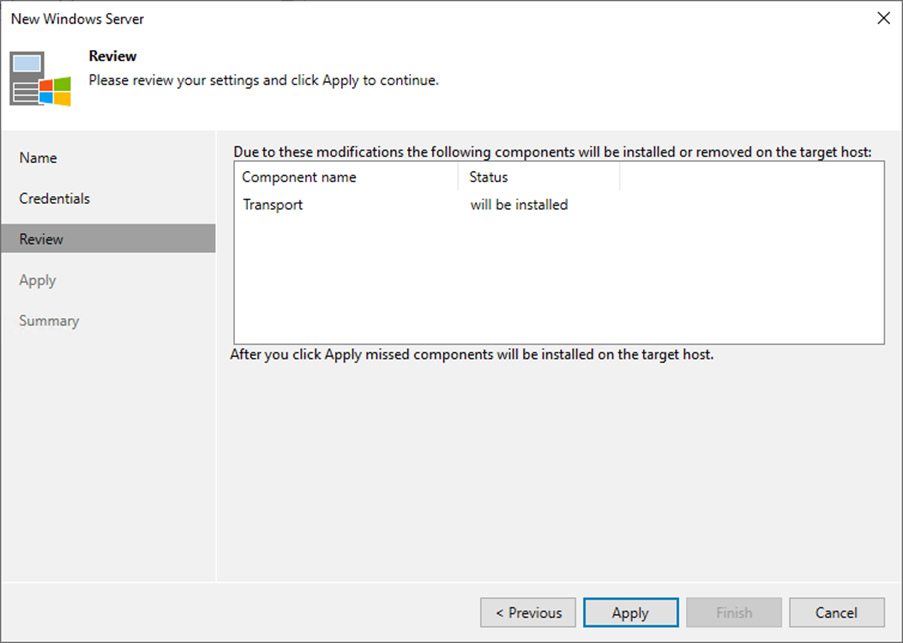
19. On the Review page, click Apply.
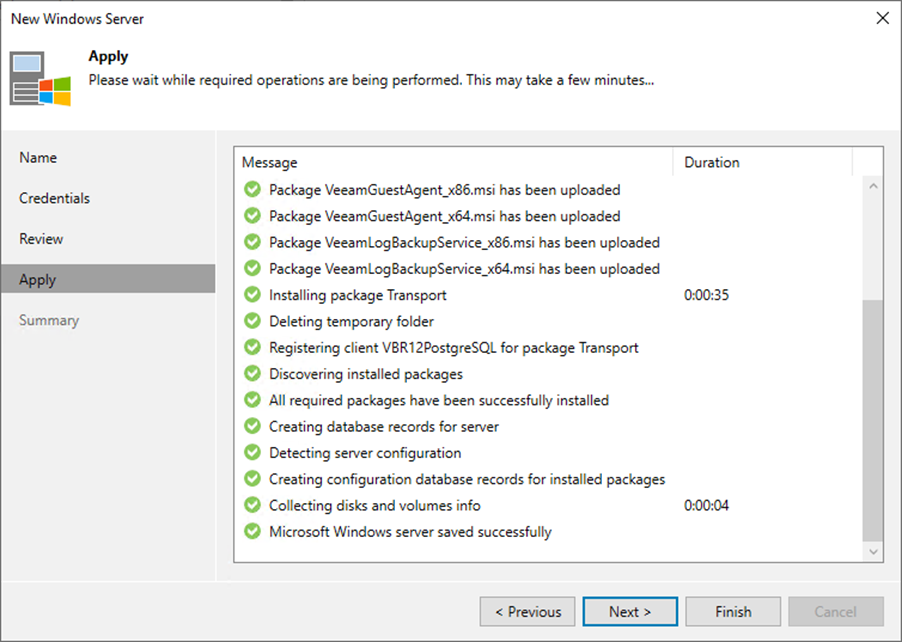
20. Click Next on the Apply page.
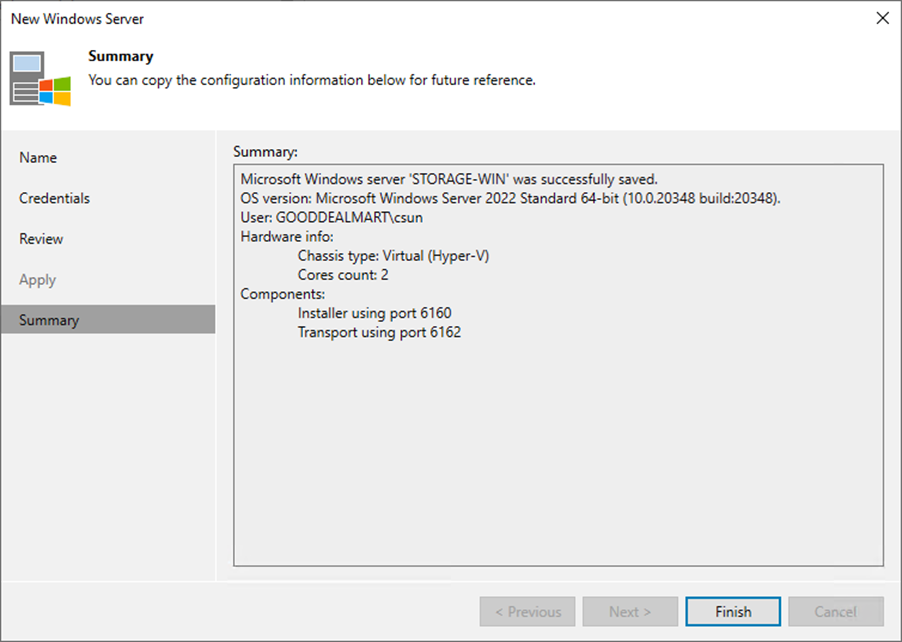
21. Click Finish on the Summary page.
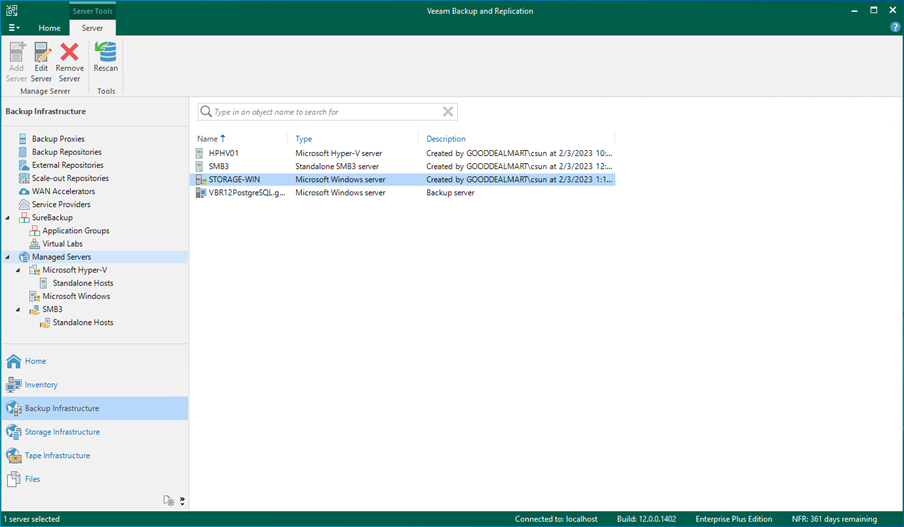
22. Ensure the new Microsoft Windows server is added.
I hope you enjoy this post.
Cary Sun
Twitter: @SifuSun
Web Site: carysun.com
Blog Site: checkyourlogs.net
Blog Site: gooddealmart.com