
As we know, Citrix changed their products name for their product lines, e.g. NetScaler ADC changed to Citrix ADC, today, I am going to show you how to install Citrix ADC VPX 13.0 at Microsoft Windows Server 2019 with Hyper-V.
-
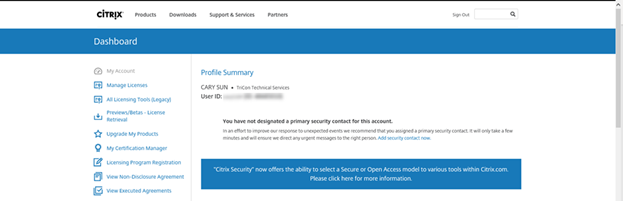
Sign in your Citrix account from citrix.com.
-
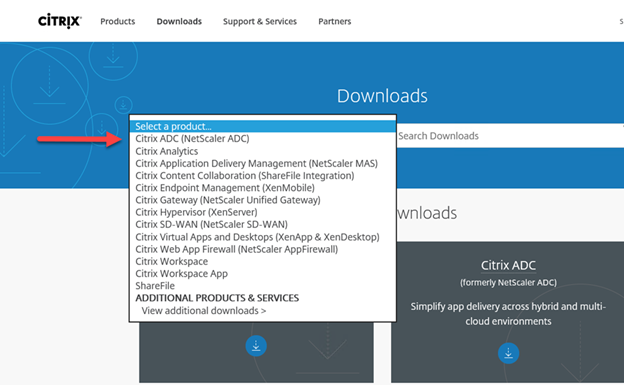
On the Dash page, select Downloads.
-
On the Downloads page, select Citrix ADC (NetScaler ADC).
-
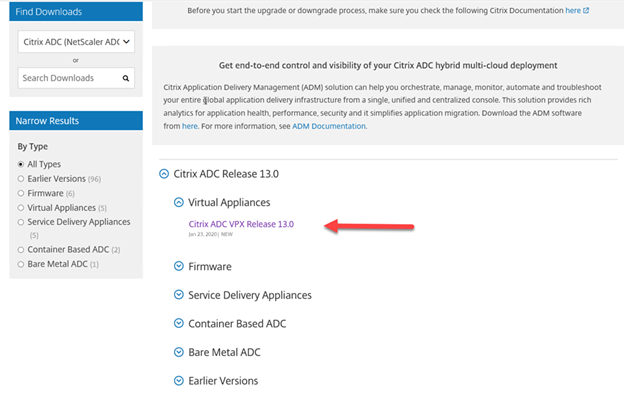
On the Citrix ADC page, expend Virtual ADC Release 13.0, expend Virtual Appliances, click Citrix ADC VPX Release 13.0.
-
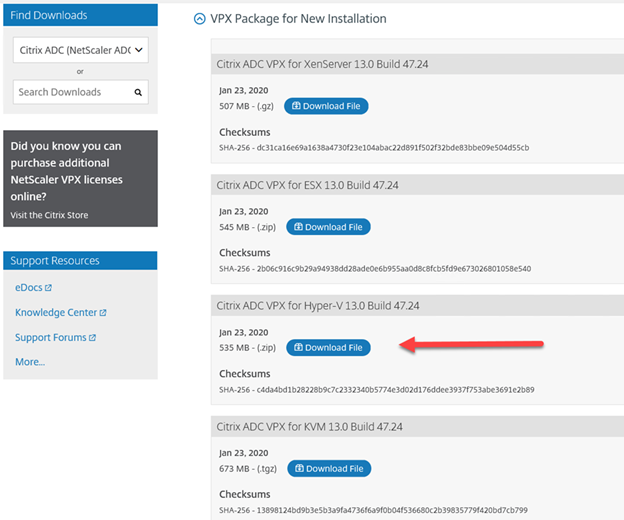
On the VPX Package for New Installation page, click Download File, it’s under Citrix ADC VPX for Hyper-V 13.0 Build 47.24.
-
On the End-User License Agreement page, click Yes, I accept.

-
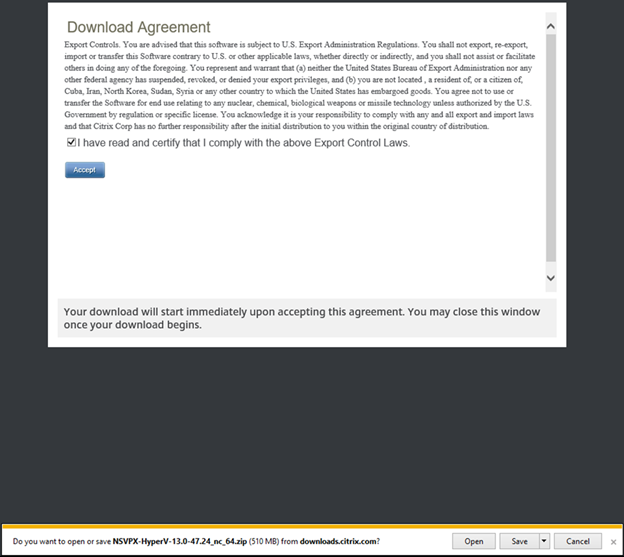
On the Download Agreement page, select I have read and certify that I comply with the above Export Control Laws, click Accept.
-
Save the file and unzip to the Windows Server 2019 with Hyper-V.


-
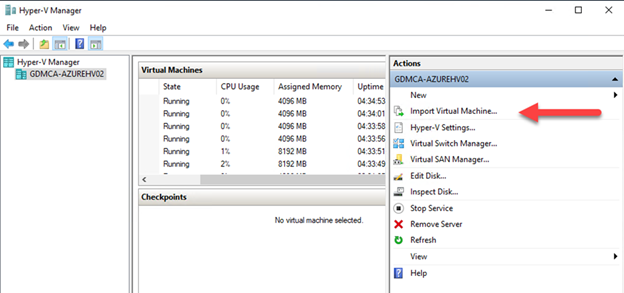
Open Hyper-V Manager, select the Windows Server 2019 which you would like to install Citrix ADC, click Import Virtual Machine.
-
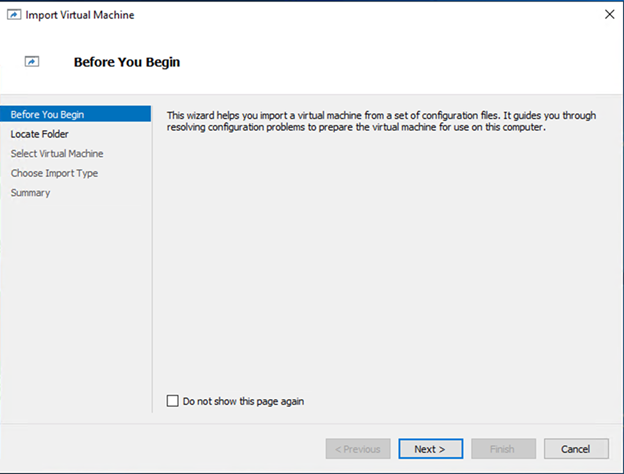
On the Before You Begin page, click Next.
-
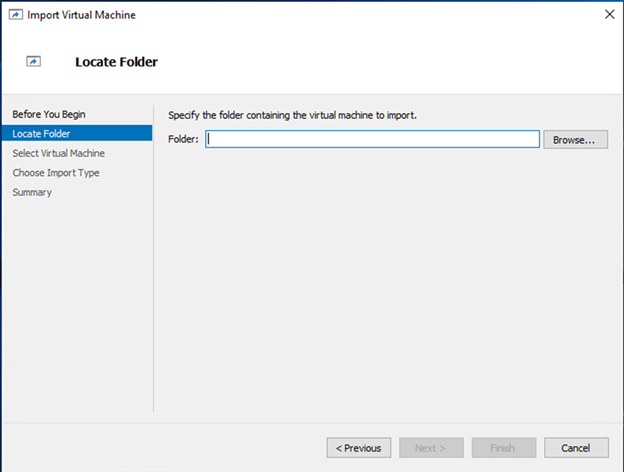
On the Locate Folder page, click Browse…
-
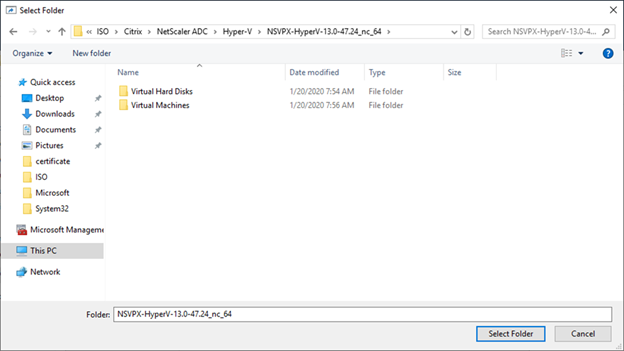
Select the folder of unzip Citrix ADC file, click Select Folder.
-
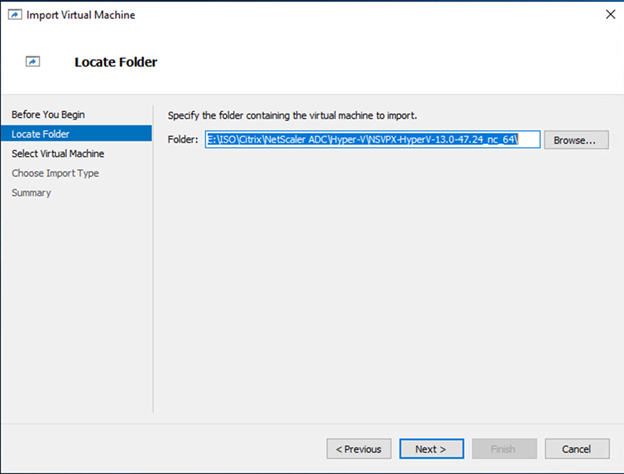
On the Locate Folder page, click Next.
-
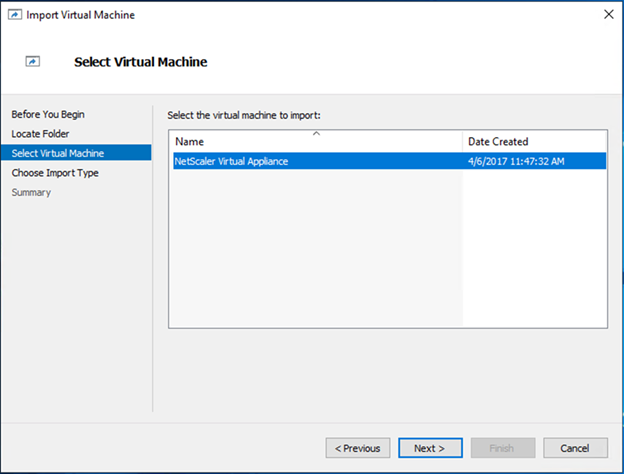
On the Select Virtual Machine page, you will see the NetScaler Virtual Alliance, click Next.
-
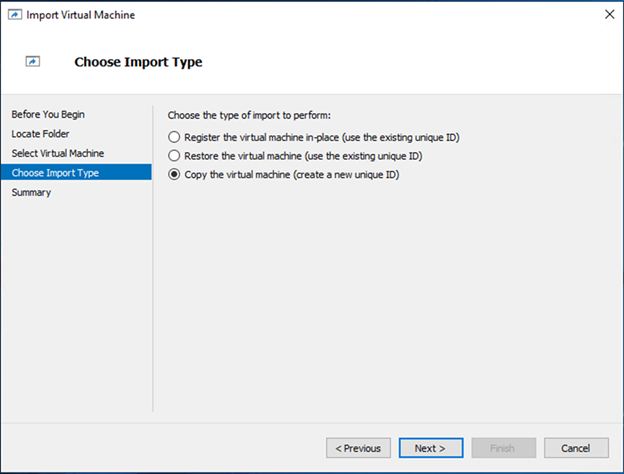
On the Choose Import Type page, select Copy the virtual machine (create a new unique ID), click Next.
-
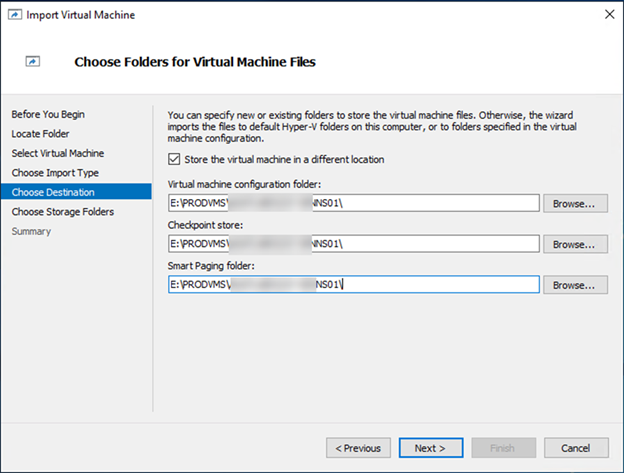
On the Choose Folder for Virtual Machine Files, select Store the virtual machine in a different location, click Browse… and select each folder for configuration, checkpoint store and smart paging, click Next. E.g. E:\PRODVMS\ADC01
-
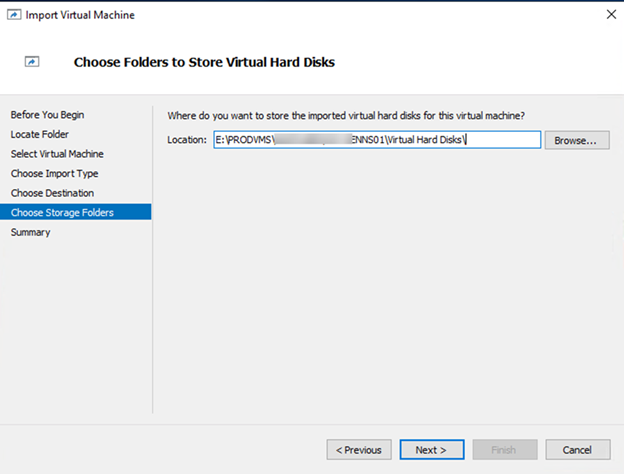
On the Choose Folders to Store Virtual Hard Disks page, click Browse…, select folder which you would like to import the virtual hard disks, click Next.
-
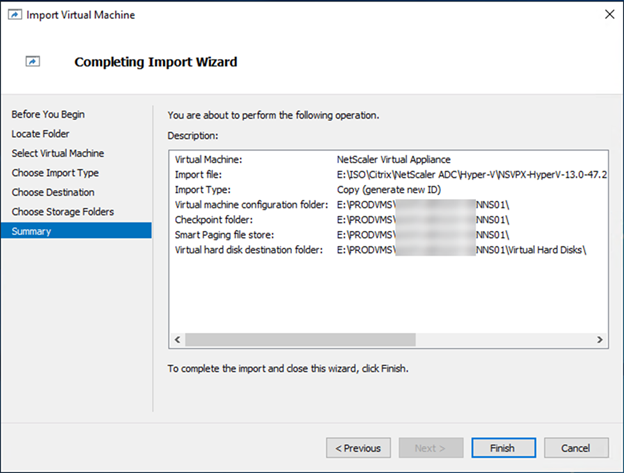
On the Completing Import Wizard page, click Finish.
-
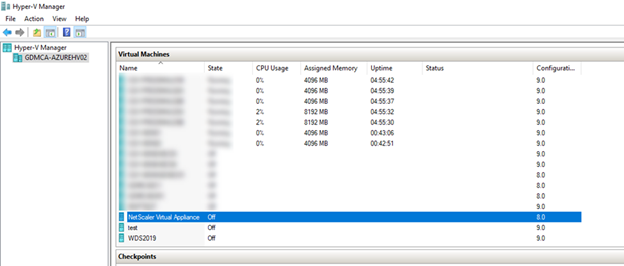
You will see the new NetScaler Virtual Appliance is listing at Virtual Machines of Hyper-V Manager.
-
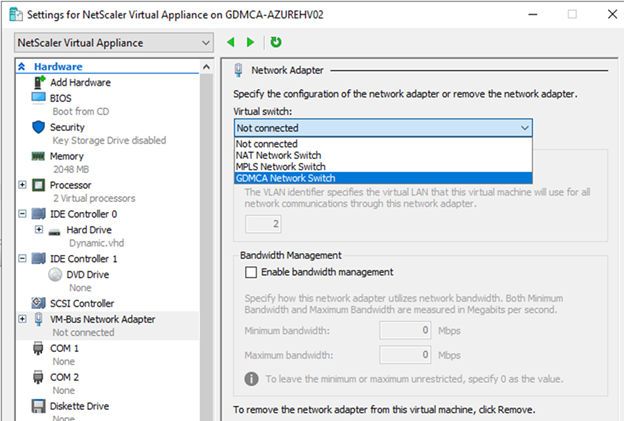
Right click the NetScaler Virtual Appliance, select Settings.

-
On the Hardware page, select VM-Bus Network Adapter, change Virtual switch from Not connected to the existing Network Switch.
-
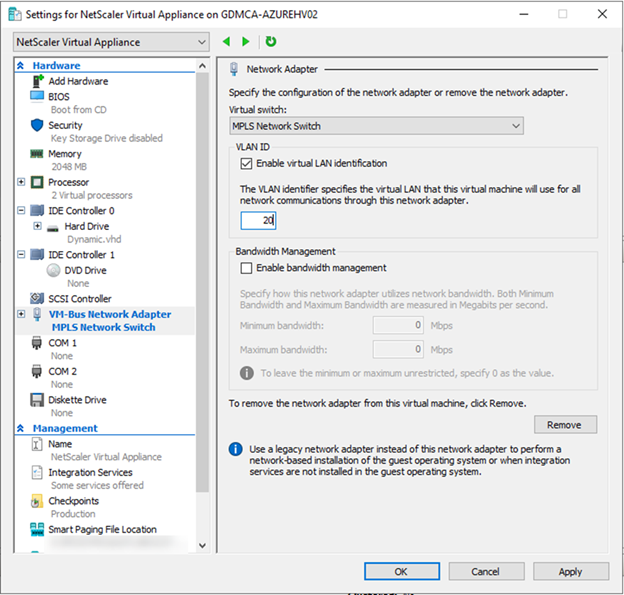
If you are using VLAN at your environment, select and type your VLAN ID, click Apply.
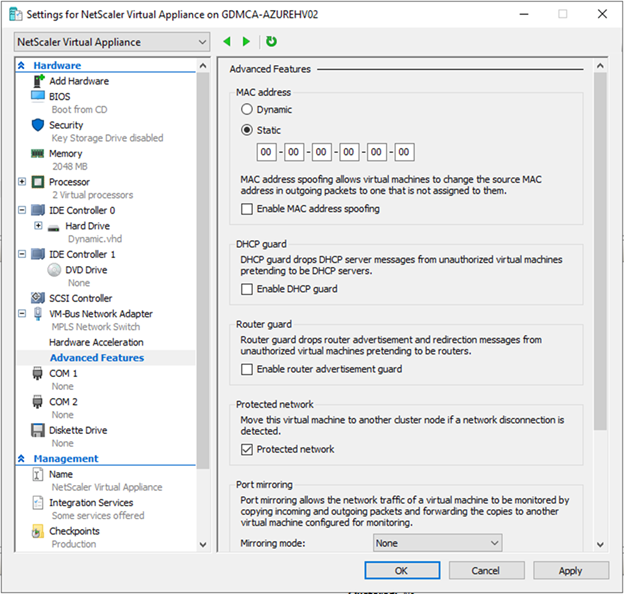
- Expend VM-Bus Network Adapter, select Advanced Feature.
-
On the MAC address page, select Static and type the mac address, which is bundle with the Citrix ADC license key, click OK.
-
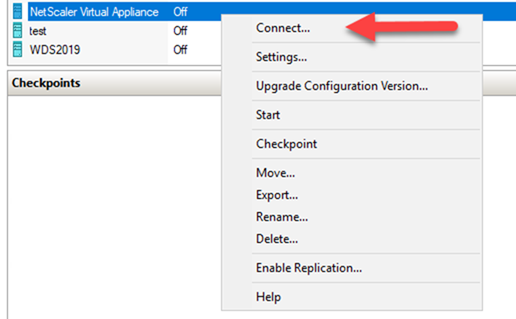
Right click the NetScaler Virtual Appliance, select Connect….
-
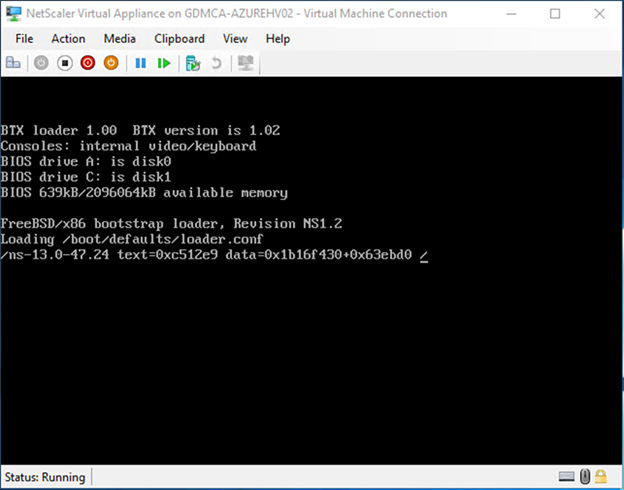
On the Virtual Machine Connection console, click Start.

-
Make sure the virtual machine is running without issues.
-
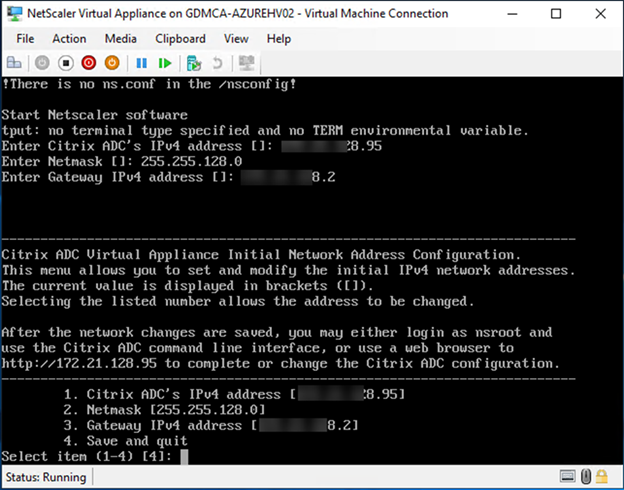
On the Virtual Machine Connection console, enter IP address, Netmask, Gateway IP address and then select 4 to save and quit.
-
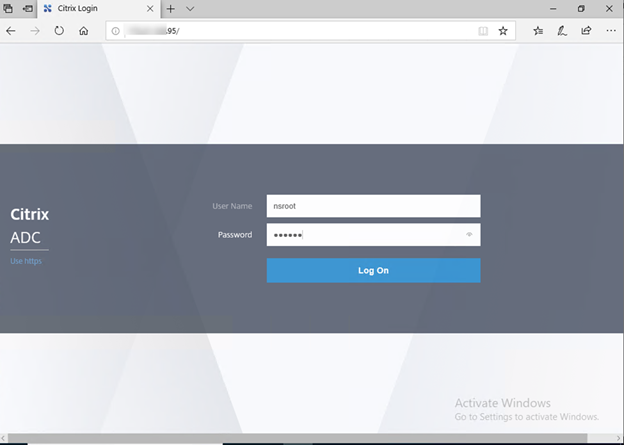
Open browser, and enter IP address of Citrix ADC, the default User Name is nsroot, and password is nsroot, click Log On.
-
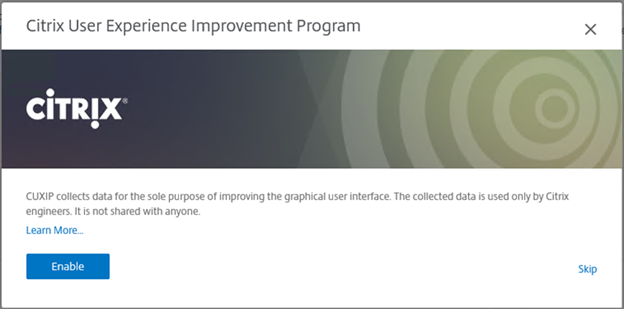
On the Citrix User Experience Improvement Program, click Skip.
-
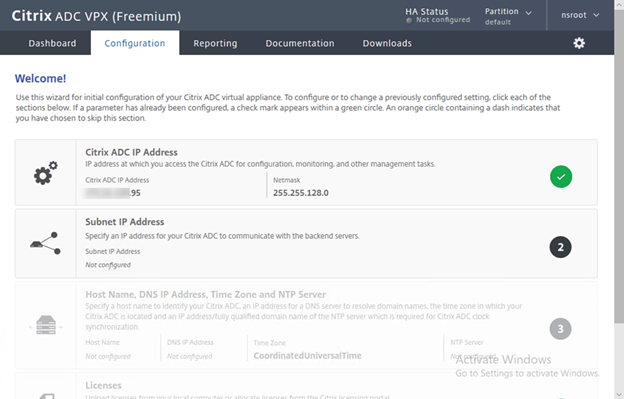
On the Configuration page, select Subnet IP Address.
-
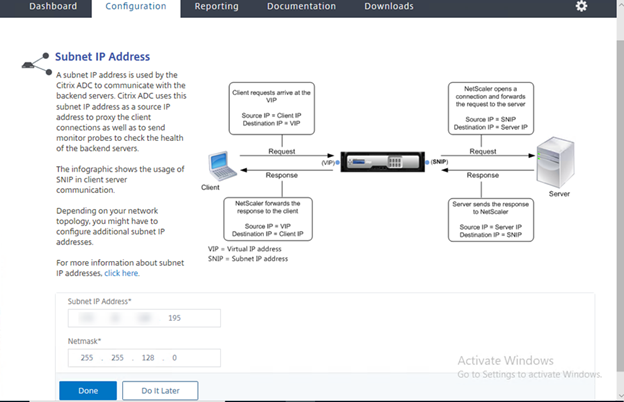
On the Subnet IP address page, enter the Subnet IP Address and Netmask, click Done.
-
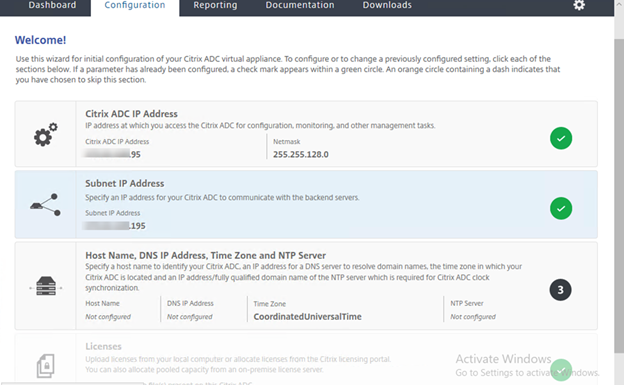
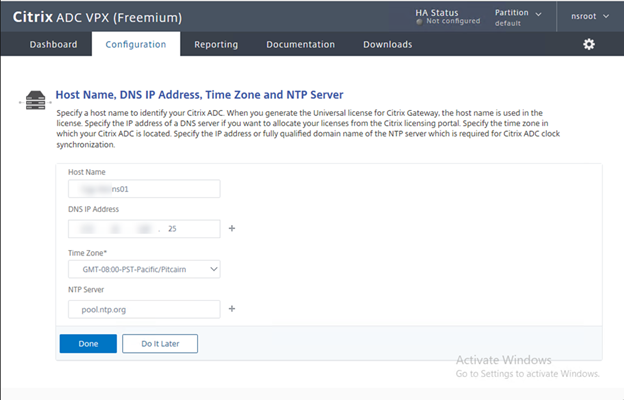
On the Configuration page, select Host Name, DNS, Time Zone and NTP Server.
-
On the Host Name, DNS, Time Zone and NTP Server page, enter Host Name for the Citrix ADC, enter the IP address of DNS server, select your time zone, and enter FQDN of NTP server, click Done.
-
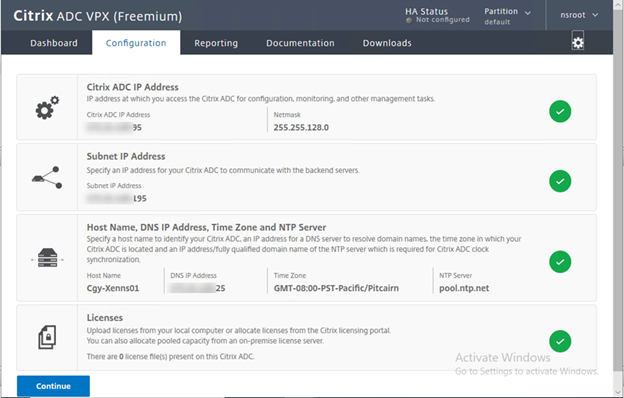
If you have an existing license of Citrix ADC, select License to install it, if don’t have any existing license, click continue and you will have 30 days trial license with limit features. E.g. Citrix ADC trial license doesn’t include Citrix Gateway feature.
-
On the Configuration page, click floppy disk sign to save the running configuration.

-
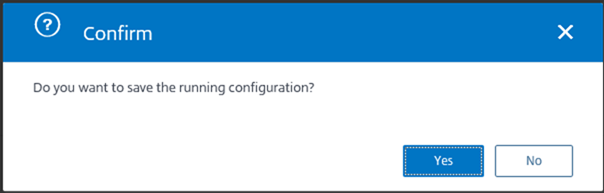
On the Confirm page, click Yes,
-
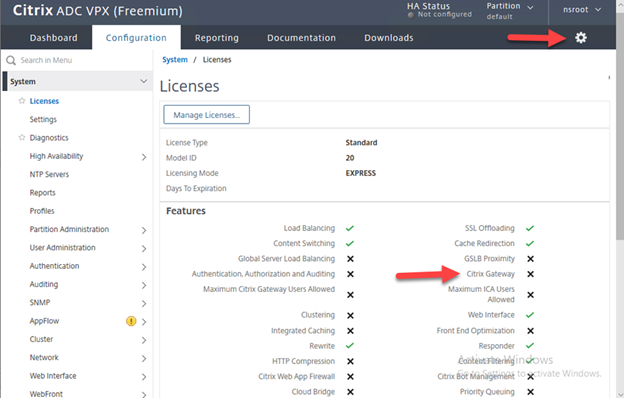
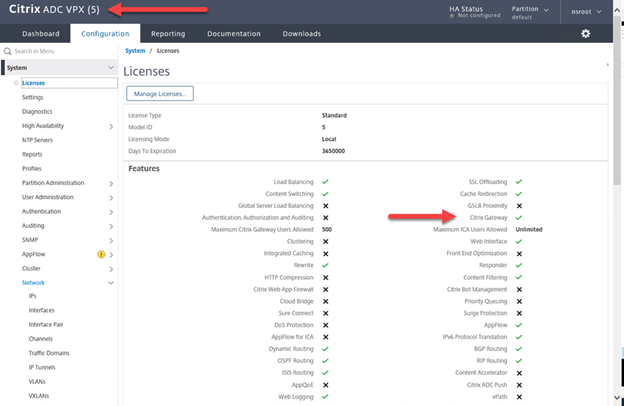
On the Configuration page, select License, you will see the trial license provide limit features only, it doesn’t support Citrix Gateway feature anymore. If you are going to install the existing license for the Citrix ADC, click gear sign and back to Configuration page.
-
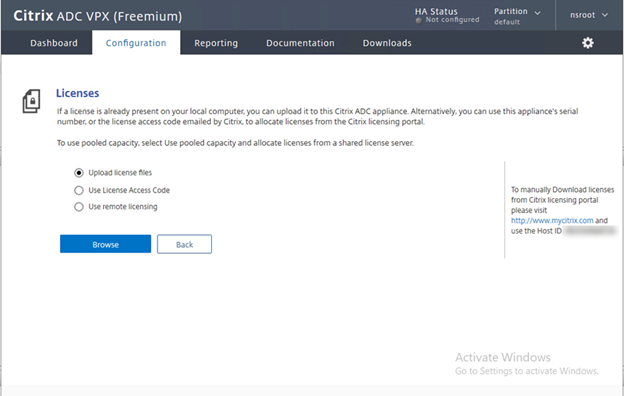
On the Configuration page, select Licenses.

-
On the License page, select Upload license files, click Browse.
-
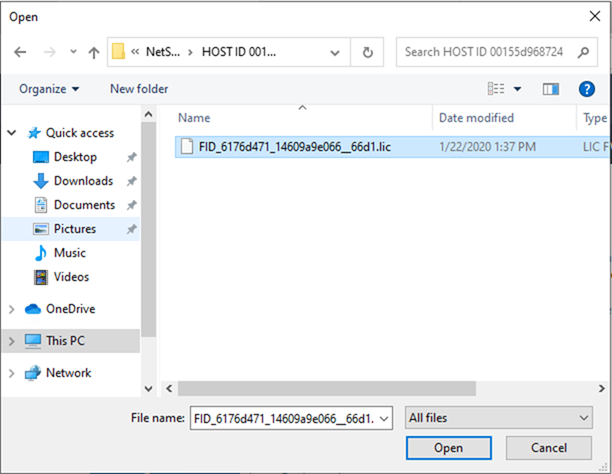
Select the license file, click Open.
-
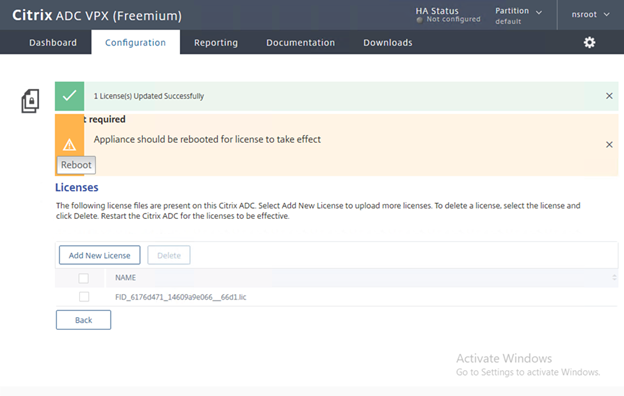
Make sure the license updated successfully, click Reboot.
-
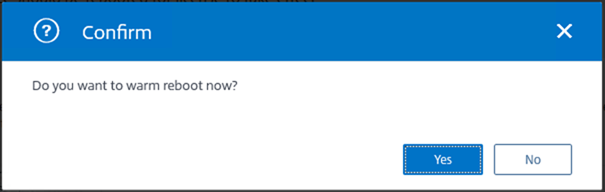
On the Confirm page, click Yes.
-
Login to Citrix ADC after reboot and the license support more features than trial, included Citrix Gateway.
-
If you would like to enable Citrix Gateway feature, right click Citrix Gateway Exclamation mark, click Enable feature.
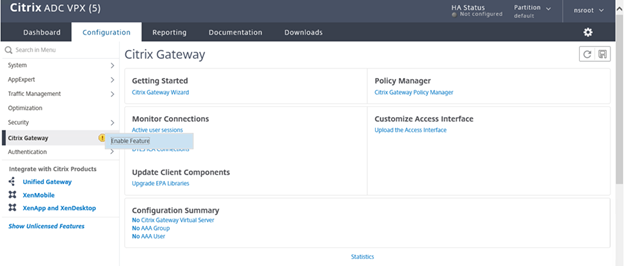
-
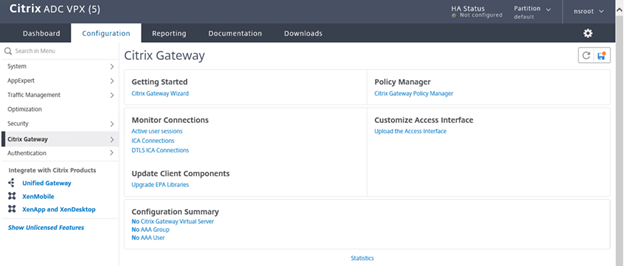
You will see the full features of Citrix after enable feature.
Hope you enjoy this post.
Cary Sun @SifuSun