
DomainKeys Identified Mail (DKIM) allows email senders to sign their outgoing emails digitally using cryptographic signatures. These signatures are stored as DKIM records in the domain’s DNS settings. Recipients’ mail servers can then use these signatures to verify that the email content has not been tampered with and originated from an authorized sender.
Configure and verify DKIM settings
1.Login to the Microsoft 365 portal and select Admin.
2.On the Microsoft 365 admin center, expand Settings and select Domains.
3.Click the custom domain on the Domains page.
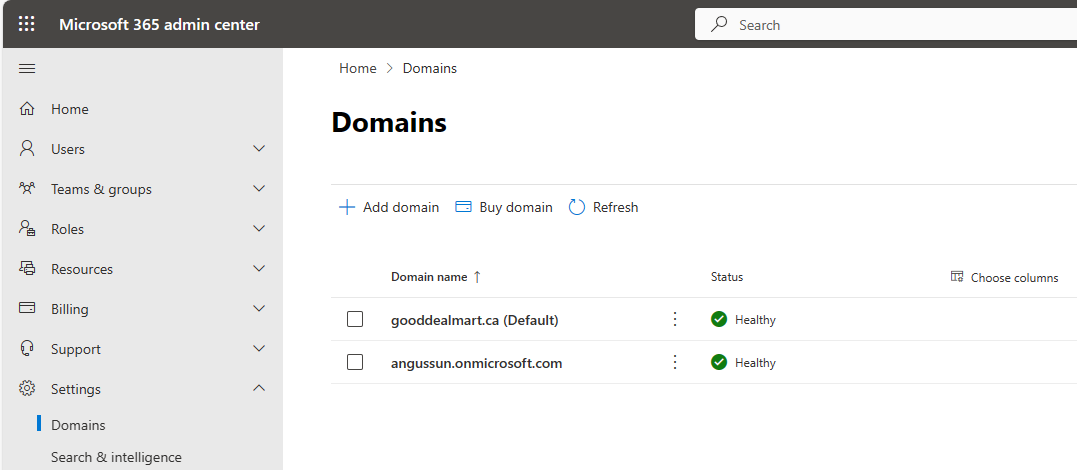
4.Select DNS records on the custom domain page.

5. Two CNAME records must be added to external DNS records as the DNS records page.
Hostname: selector1._domainkey
Points to address or value: selector1-<CustomDomain>._domainkey.<InitialDomain>
Hostname: selector2._domainkey
Points to address or value: selector2-<CustomDomain>._domainkey.<InitialDomain>
6.Ensure Both of them Status are OK

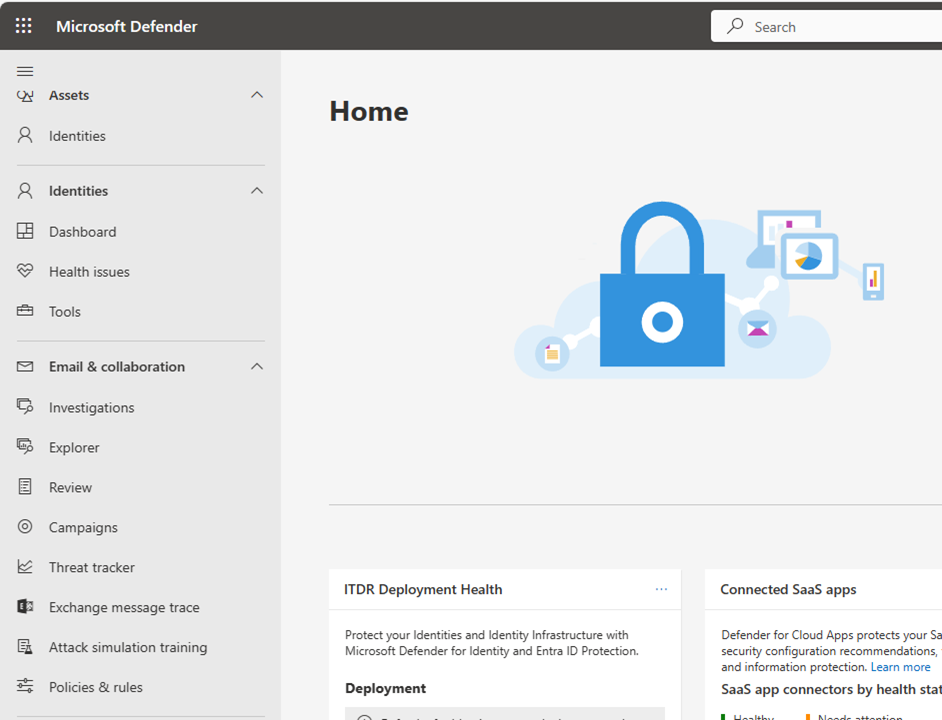
6.Open Https://security.microsoft.com
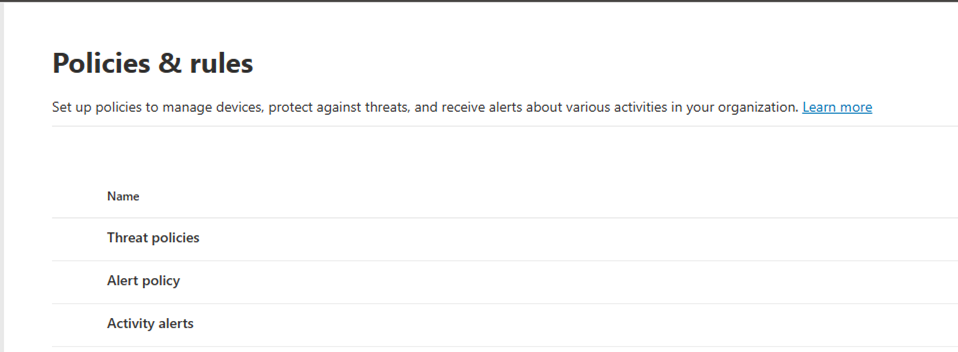
7.Expand Email & collaboration on the Microsoft Defender page and select Policies & rules.
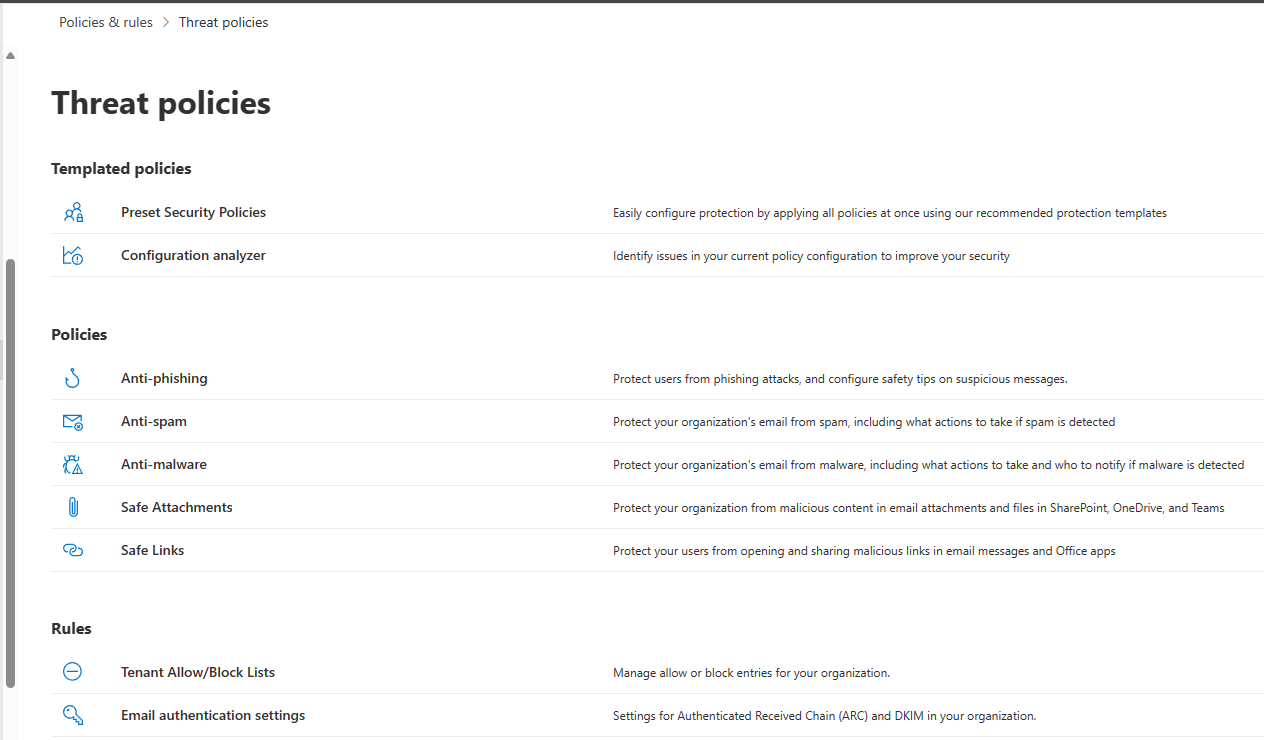
8.Select Threat policies on the Policies & rules.
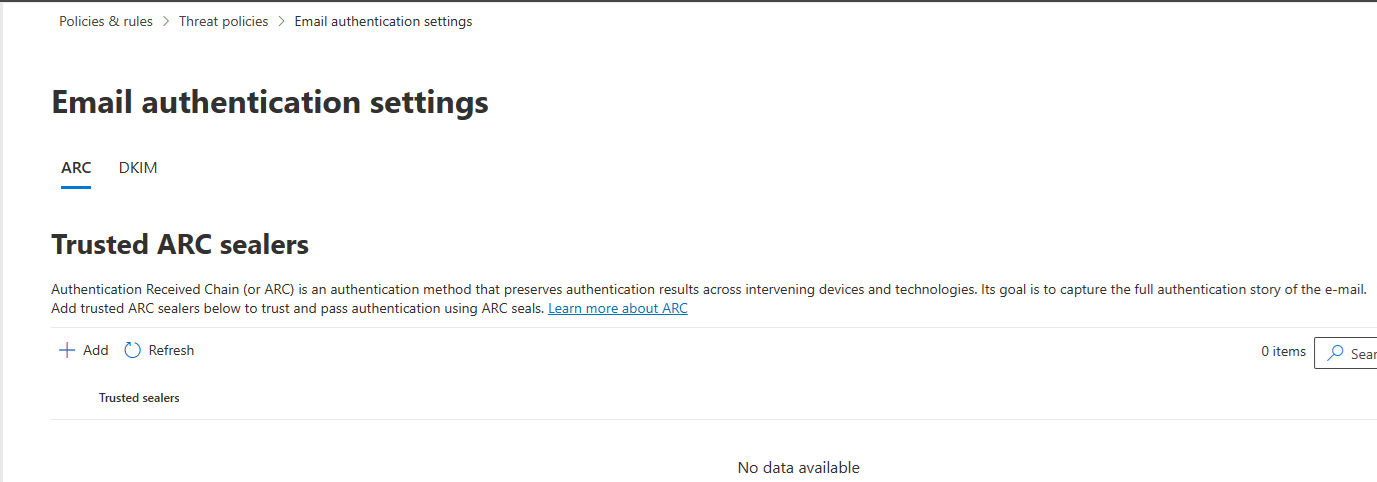
9.Select Email authentication settings on the Threat policies.
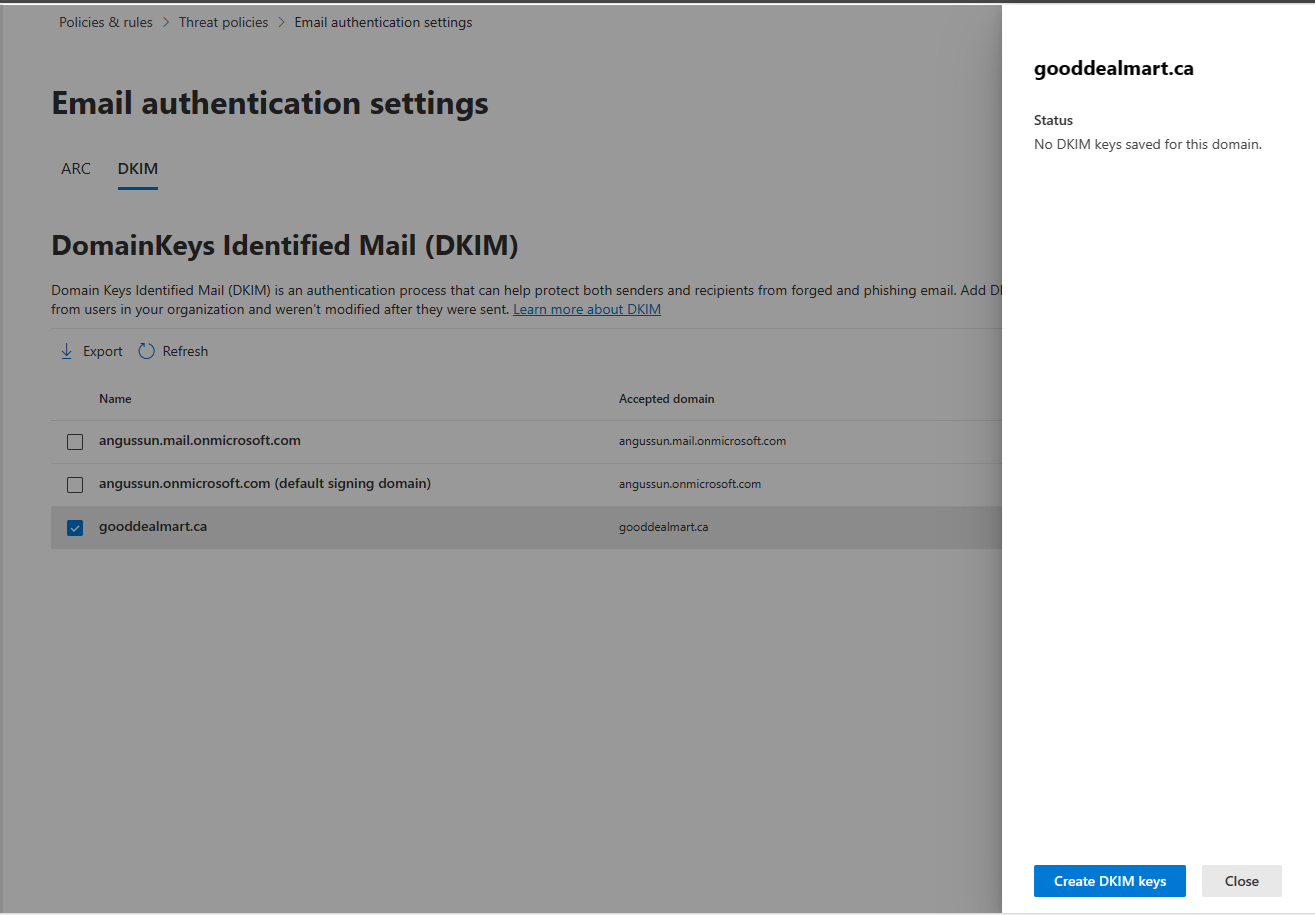
10.Select DKIM on the Email authentication settings.
11.Click the custom domain on the DomainKeys Identified Mail (DKIM) and click Create DKIM keys.
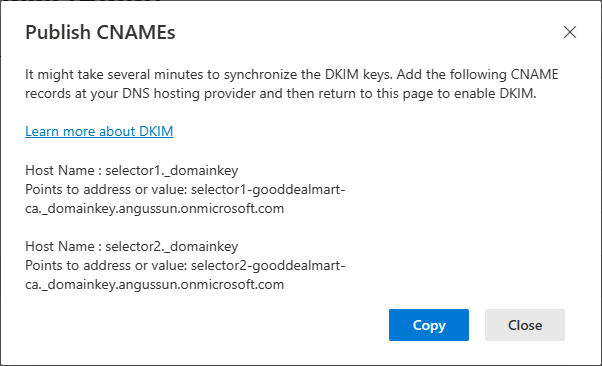
12.If you didn’t create those two CNAMEs, Copy Publish CNAMEs and create them at the external DNS records.
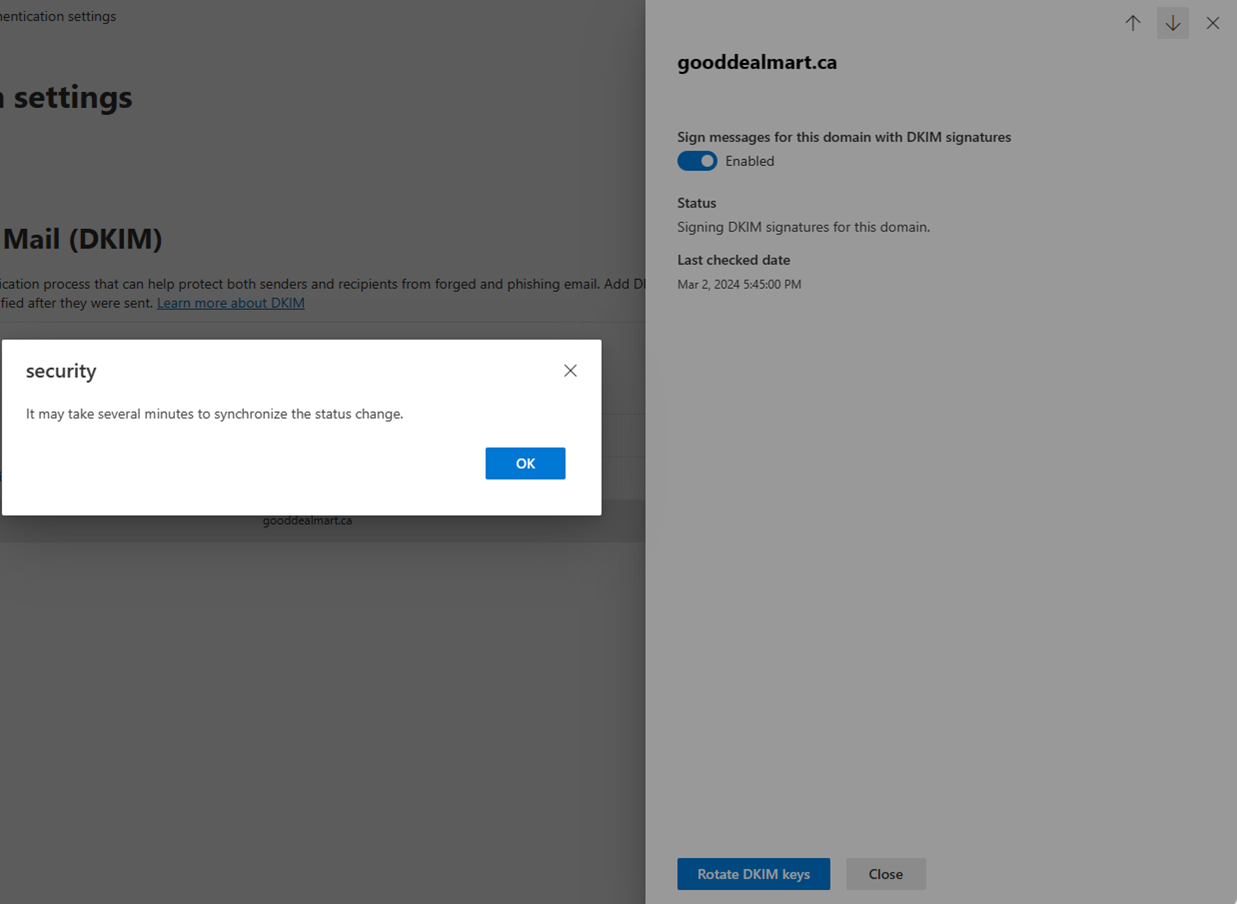
13.Enable the Sign messages for this domain with DKIM signatures. It may take several minutes to synchronize the status change. Click OK and click Close.
Verify DKIM
1.Open https://mxtoolbox.com/.
2.On the MX Lookup page, select type your domain name and click MX Lookup.

You may the DMARC error, it’s because we still not configured DMARC yet.
3.Select DKIM Lookup from the MX lookup drop-down list.

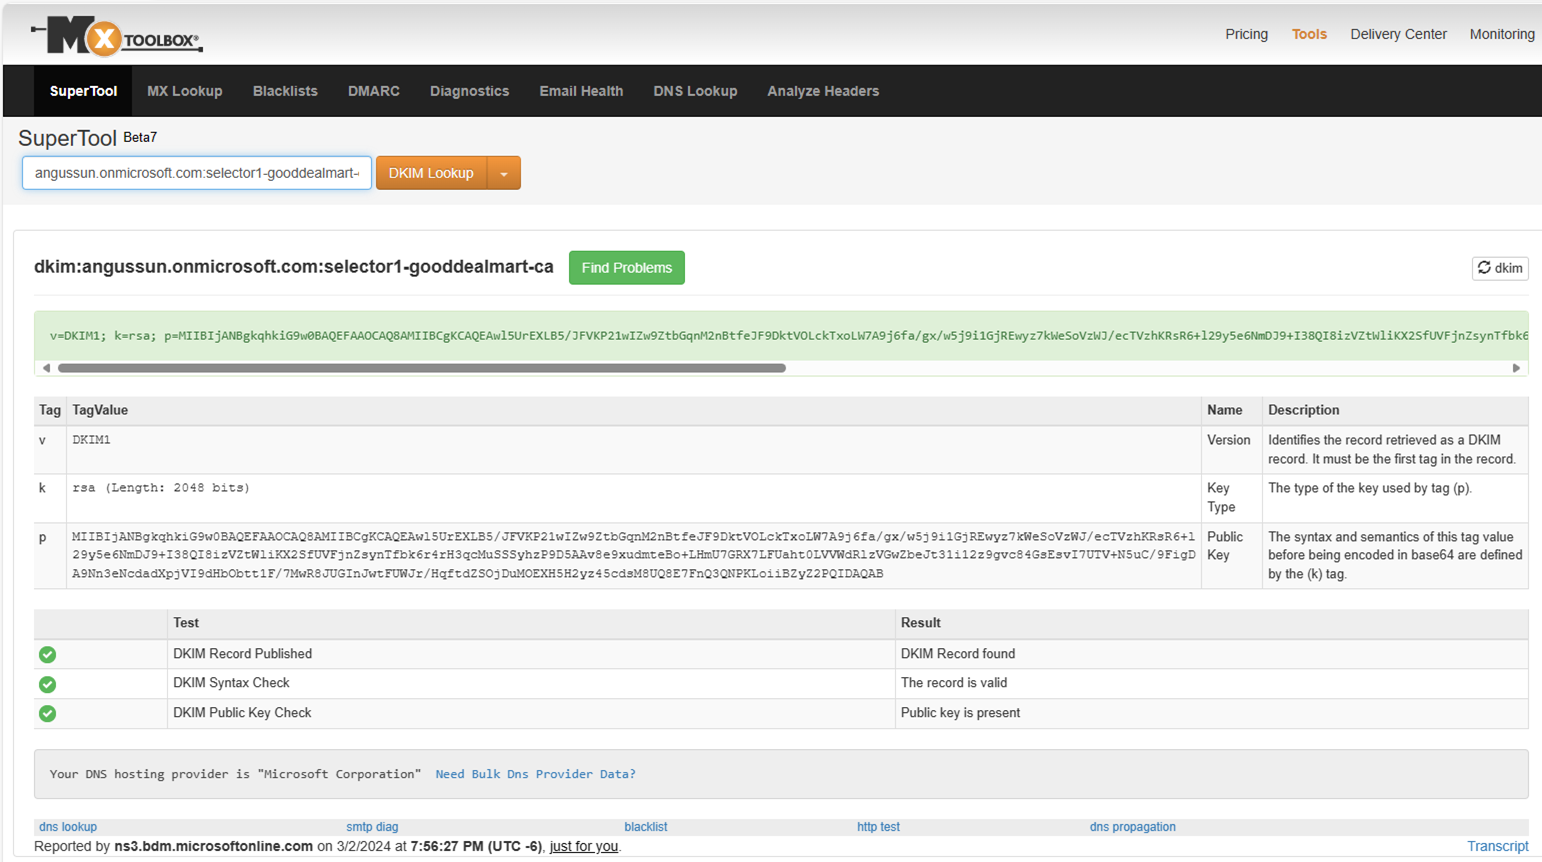
4.Type selector1-<CustomDomain>._domainkey.<InitialDomain> (e.g. selector1-gooddealmart-ca._domainkey.angussun.onmicrosoft.com). Click DKIM Lookup and ensure all DKIM tests are pass.
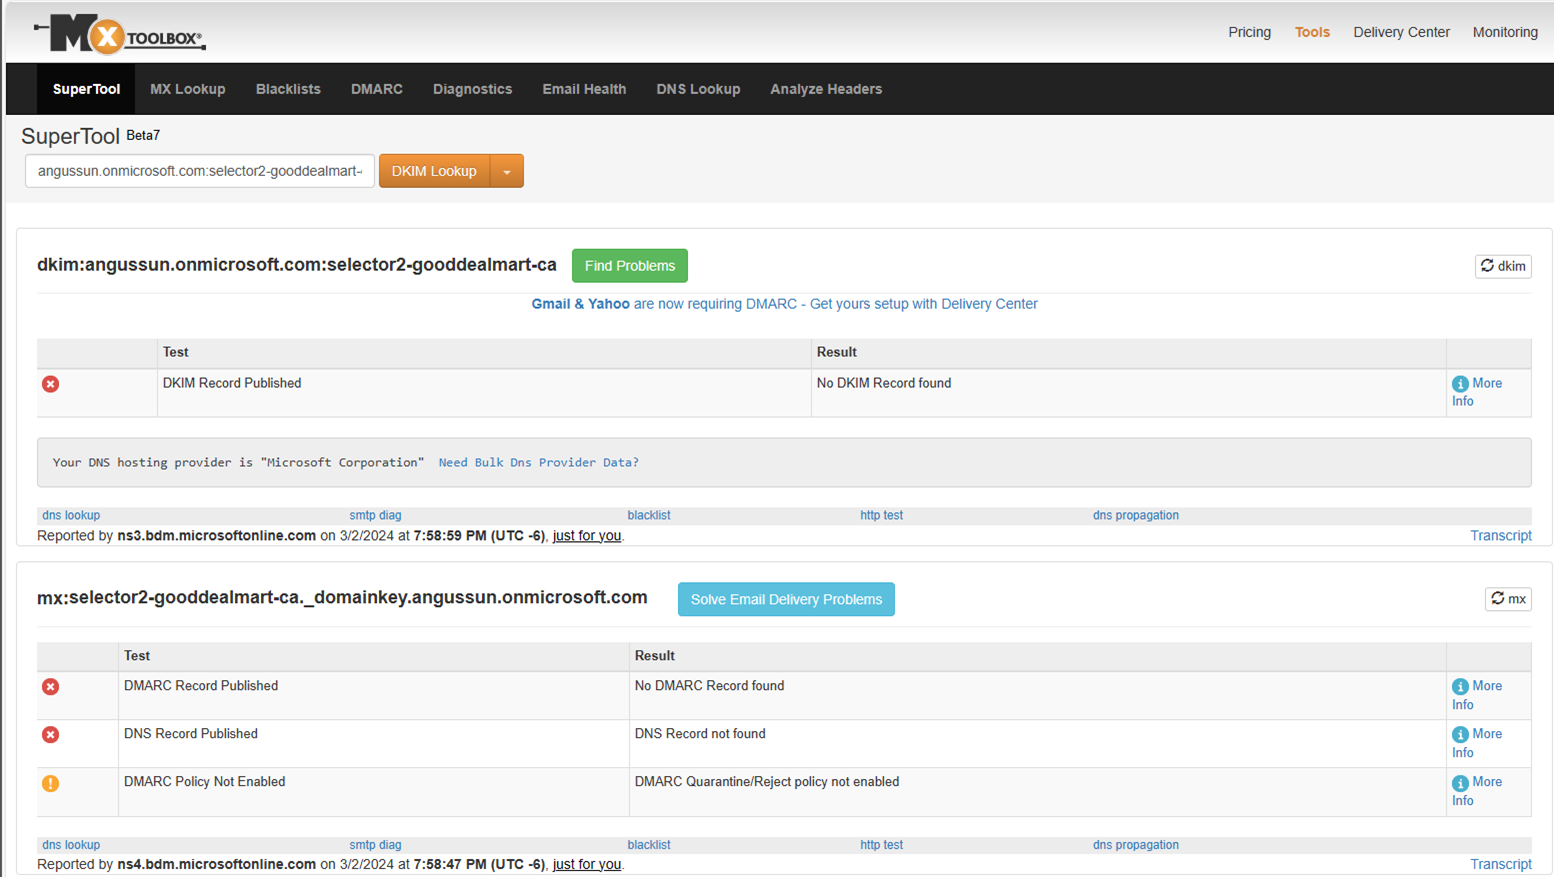
5.Type selector2-<CustomDomain>._domainkey.<InitialDomain> (e.g. selector2-gooddealmart-ca._domainkey.angussun.onmicrosoft.com). Click DKIM Lookup and you noticed the selector-2 test failed.
6.Go back to DKIM settings of https://security.microsoft.com, click the Rotate DKIM keys.

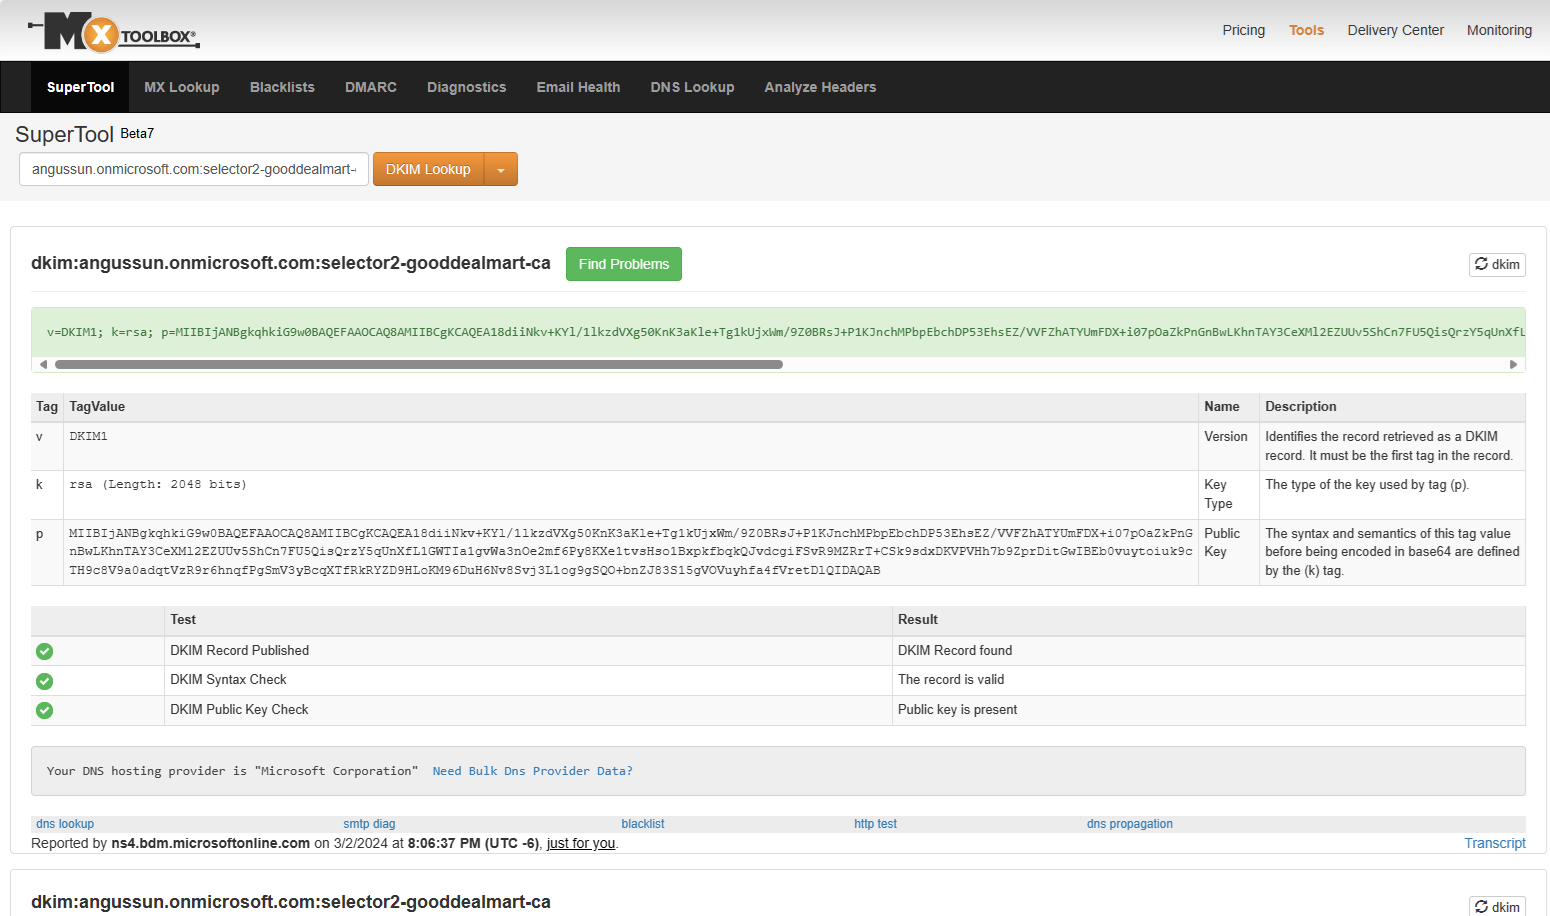
7.Go back to https://mxtoolbox.com/. Test the DKIM Lookup for selector2 again and ensure all tests are pass.
I hope you enjoy this post.
Cary Sun
X: @SifuSun
Web Site: carysun.com
Blog Site: checkyourlogs.net
Blog Site: gooddealmart.com
Amazon Author: Amazon.com/author/carysun