A customer asked me to build a Site-to-Site VPN between their CISCO PIX environment with Azure, yes, you don’t hear wrong, it is a PIX, I know it’s pretty old but we need to make it if customer need it. Let’s follow the steps and do it.

Settings in Microsoft Azure
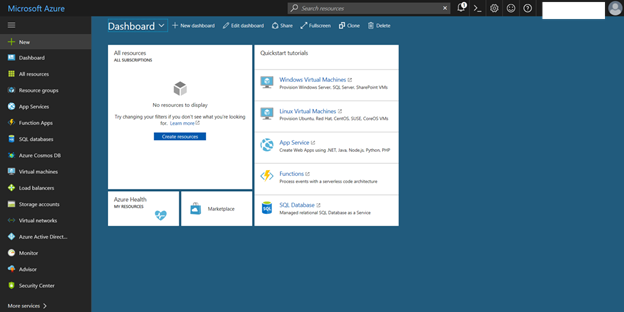
- Logon to Azure portal and click +New.
 2. In the Search the marketplace field, type Virtual Network and then Enter.
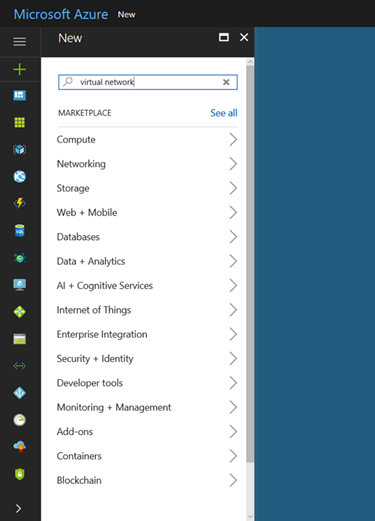
3. click Virtual Network, select Resource Manager from the Select a deployment model and then click Create.
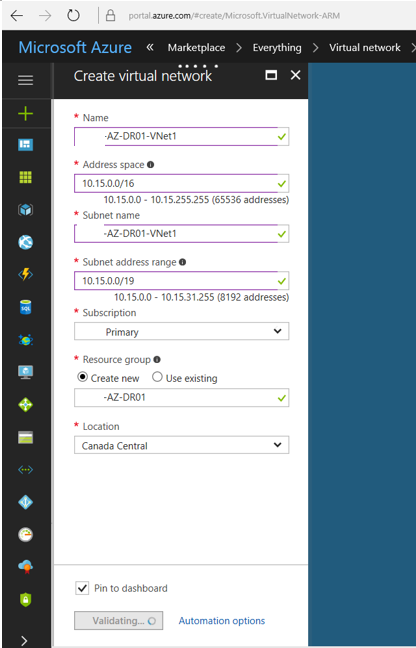
 4. On the Create virtual network page, enter the name for your virtual network in Name filed.
5. In the Address space filed, enter the address space, make sure that the address space that you specify does not overlap with the address space for your on-premises location.
6. In the Subnet name field, enter the subnet name.
7. In the Subnet address range field, enter the subnet address range, but don’t use all of address space for this, because you need to reserve space for gateway subnet.
8. In the Subscription field, verify that the subscription listed is the correct one.
9. In the Resource group field, create a new one by typing a name for your new resource group.
10. In the Location field, select the location for your Virtual Network and then select Pin to dashboard.
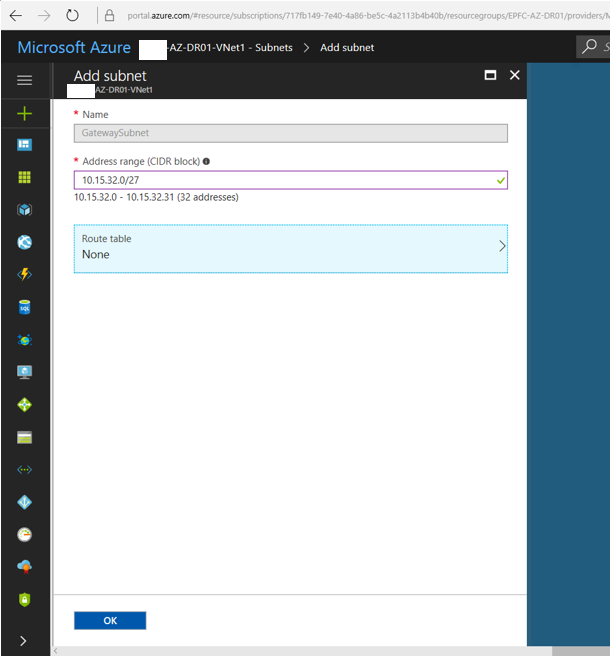
11. Select Subnets after the virtual Network is be created, click +Gateway subnet.
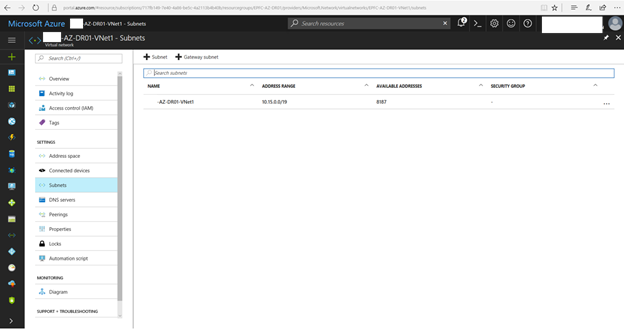 12. In the Address range field, enter your gateway subnet and then click OK.
 13. On the left side of the portal page, click +.
14. In the search filed, type Virtual Network Gateway and the enter.
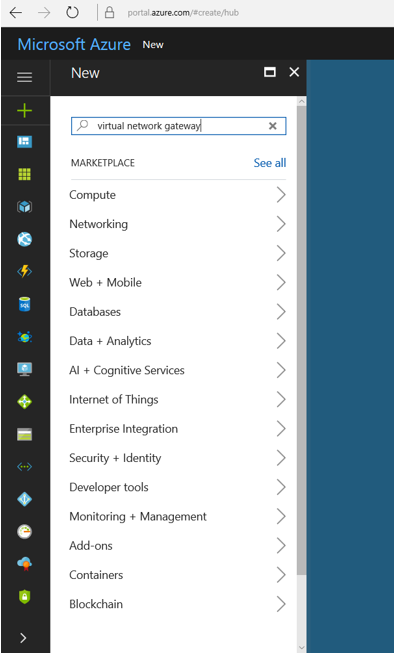
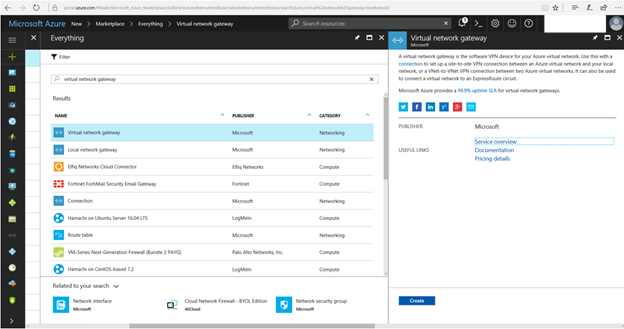
15. click Virtual Network Gateway in Results and then click Create.
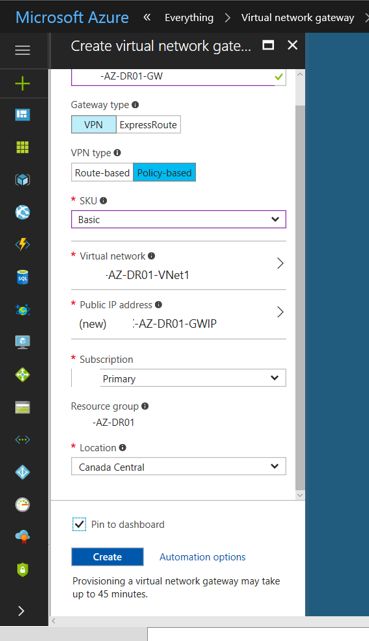
 16. On the Create virtual network gateway page, type the virtual gateway name in the Name field.
17. Select VPN as the Gateway type.
18. Select Policy-based as the VPN type.
19. Select Computer Account and then click Next.
20. Select Local Computer and then click Finish.
21. Select Basic as SKU.
22. Click Choose a virtual network in Virtual network field and select the new created virtual network.
23. Click Choose a public IP address in the Public IP address field, click Create new.
24. Type gateway IP address name in the Name field and then click OK.
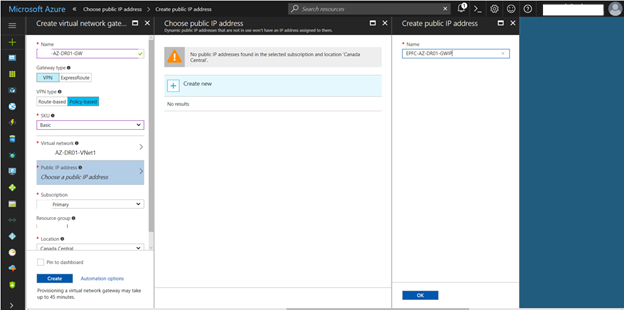 25. Select Pin to dashboard and then click Create.
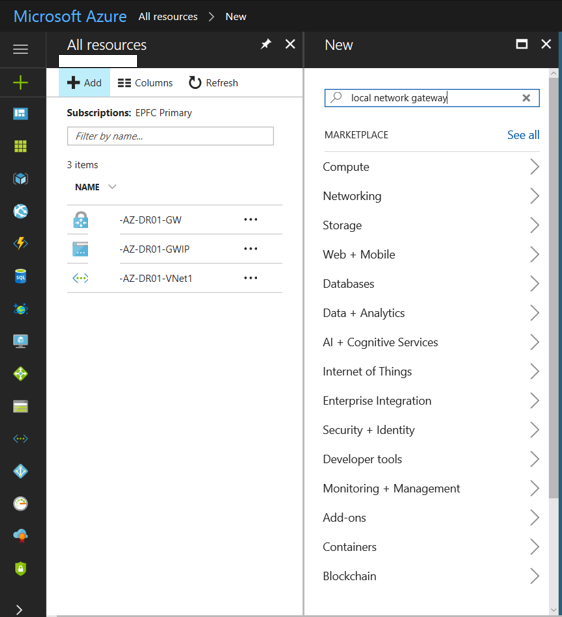
26. Select All resources in the Azure portal, click +Add.
27. Type local network gateway in search and then hit Enter.
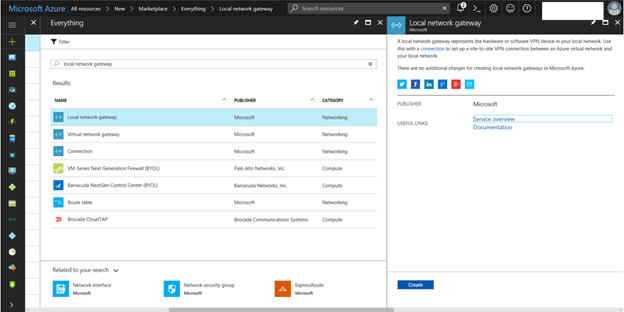
28. Select Local network gateway and click Create.
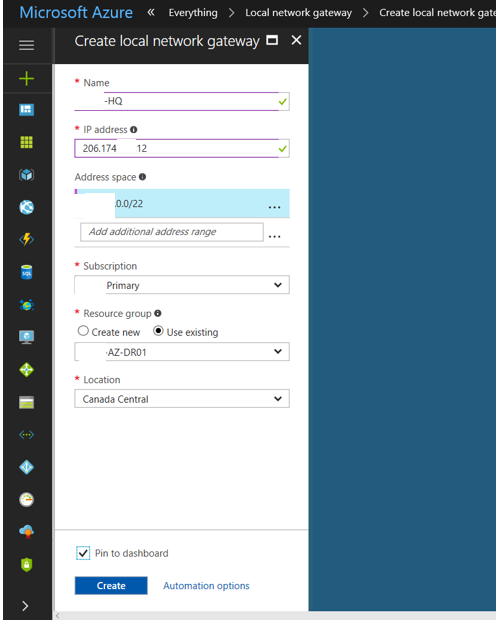
 29. On the Create local network gateway page, type your on-premises site name in the Name field.
30. In the IP address field, type the public IP address of the VPN device at on-premises site.
31. In the address space field, type the on-premises IP address range.
32. In the Resource Group field, Select Use existing and select the existing the resource group name.
33. Select Pin to dashboard and then click Create.
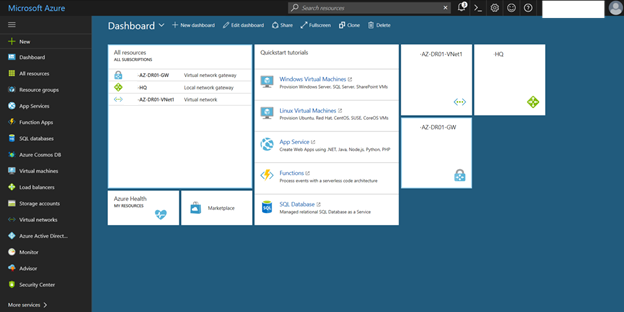
34. On the dashboard of Azure portal, select Virtual Network Gateway that we created.
 35. Select Connections and then click +Add.
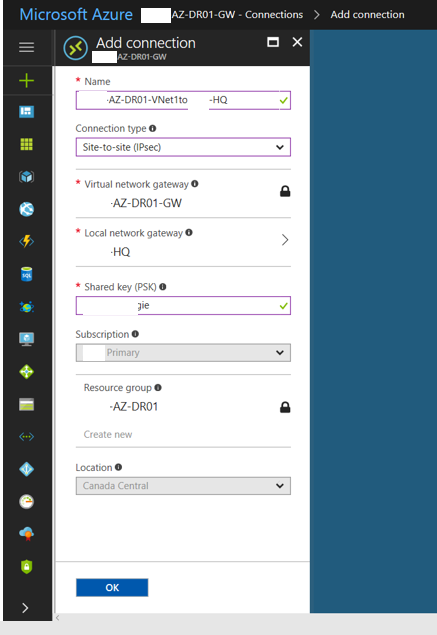
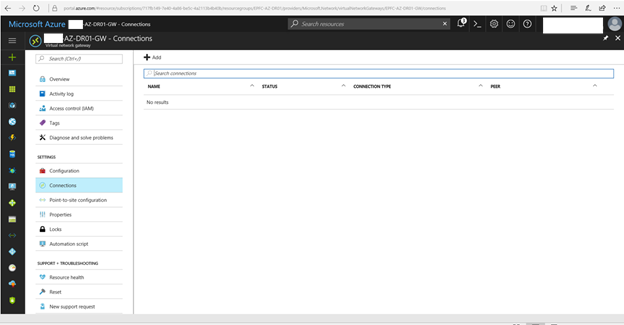 36. On the Add connection page, type Site-to-Site VPN name to the Name field.
37. Select Site-to-site (IPSEC) as Connection type.
38. In the Local network gateway field, select the local network gateway that we created.
39. Type shared key in the Shared key (PSK) field, this shared must be matched with your on-premises VPN device and then click OK.
Settings in Cisco PIX site
Logon to PIX and add configure as follow:
name 10.13.0.0 sh-az-vnet description Azure Vnet
name 52.176.xxx.xxx sh-az-vnetGWIP description Azure Gateway
access-list inside_nat0_outbound extended permit ip 10.10.0.0 255.255.0.0 sh-az-vnet 255.255.0.0
access-list outside_access_in extended permit ip sh-az-vnet 255.255.0.0 10.10.0.0 255.255.0.0
access-list outside_1_cryptomap extended permit ip 10.10.0.0 255.255.0.0 sh-az-vnet 255.255.0.0
nat (inside) 0 access-list inside_nat0_outbound
crypto ipsec transform-set ESP-AES-256-MD5 esp-aes-256 esp-md5-hmac
crypto map outside_map 10 match address outside_1_cryptomap
crypto map outside_map 10 set peer sh-az-vnetGWIP
crypto map outside_map 10 set transform-set ESP-AES-256-SHA
crypto map outside_map 10 set security-association lifetime seconds 3600
crypto map outside_map 10 set security-association lifetime kilobytes 102400000
crypto map outside_map 10 set reverse-route
crypto isakmp enable outside
crypto isakmp policy 10
authentication pre-share
encryption aes-256
hash sha
group 2
lifetime 28800
tunnel-group sh-az-vnetGWIP type ipsec-l2l
tunnel-group sh-az-vnetGWIP ipsec-attributes
pre-shared-key (type pre-shared key and it need match with Azure)
sysopt connection tcpmss 1350
sysopt connection permit-vpn
Verify the VPN connection
- Logon Azure portal.
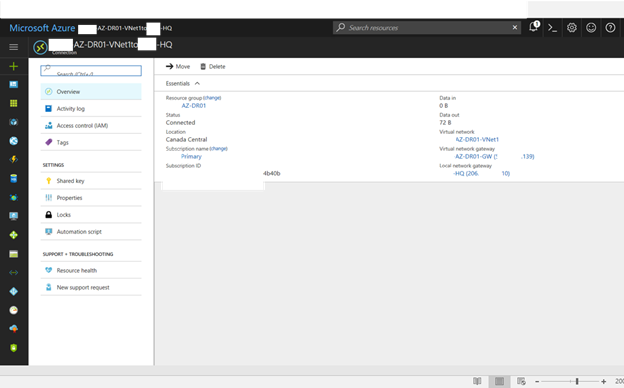
- select the virtual network gateway and then click connections.
- Check the VPN status and make sure it’s Connected.
 4. Logon on the Cisco PIX.
5. Type show crypto isakmp sa and check the status.
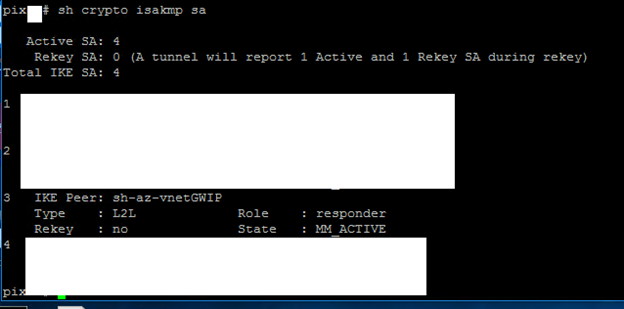
Now, we have Site-to-site VPN successfully.
Happy Friday and hope you enjoy this post!!
Cary Sun @SifuSun
