
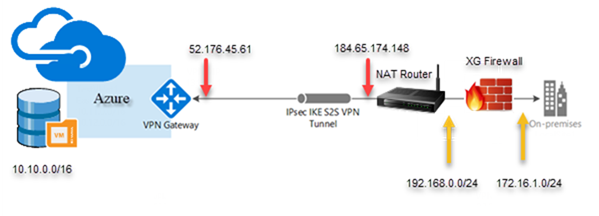
Today, I would like to tell you how to build a site-to-site VPN from Sophos XG firewall to Azure, if you have no budget to buy a hardware base firewall for your home office or lab, no worry, you also can download and install at Microsoft Hyper-V (or others) Virtual Machine and it’s free!!
Let’s follow step by step to build site-to-site VPN from Sophos XG firewall to Azure.
Settings in Microsoft Azure Site
-
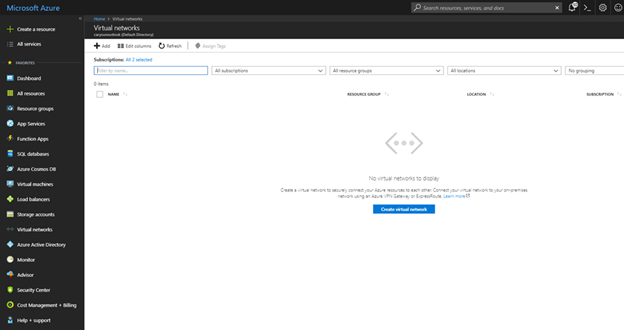
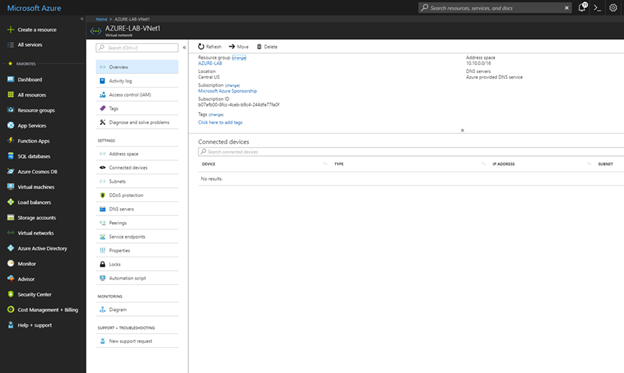
Logon to Azure portal and select Virtual networks.
-
On the Virtual networks page, click Create virtual network.
-
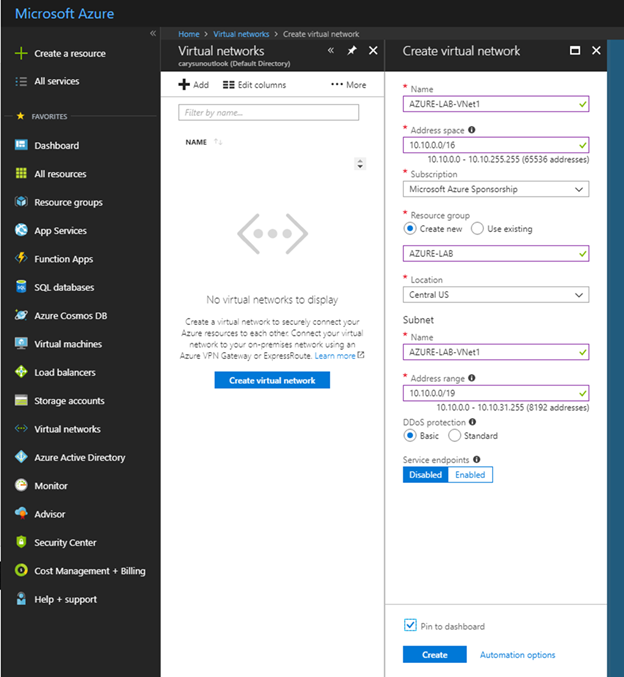
Enter information as follow and click Create.
Name: AZURE-LAB-VNet1
Address Space: 10.10.0.0/16
Subscription: select your subscription
Resource group: select Create new and enter your Resource Group name
Location: Select Central US (you also can choice other locations)
Subnet Name: enter your subnet name
Address range: 10.10.0.0/19
DDoS protection: Basic (Default)
Service endpoints: Disable (default)
-
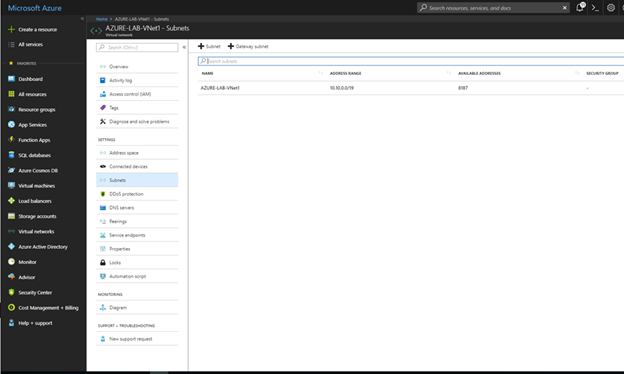
On the AZURE-LAB-Vnet1 page, select Subnets.
-
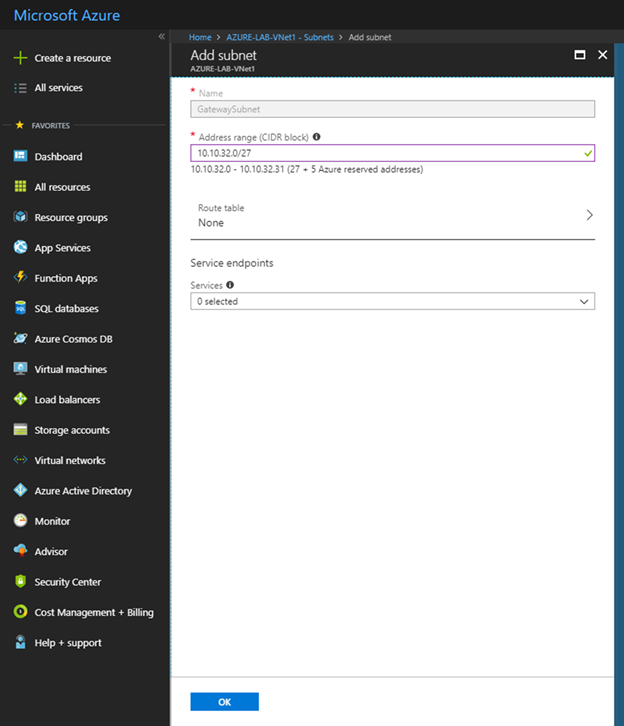
On the AZURE-LAB-VNet1 – Subnets page, click +Gateway subnet.
-
Enter Address range as 10.10.32.0/27 and click OK.
-
Go back to Azure Dashboard and click +Create a resource.
-
On the search bar, enter Virtual network gateway.
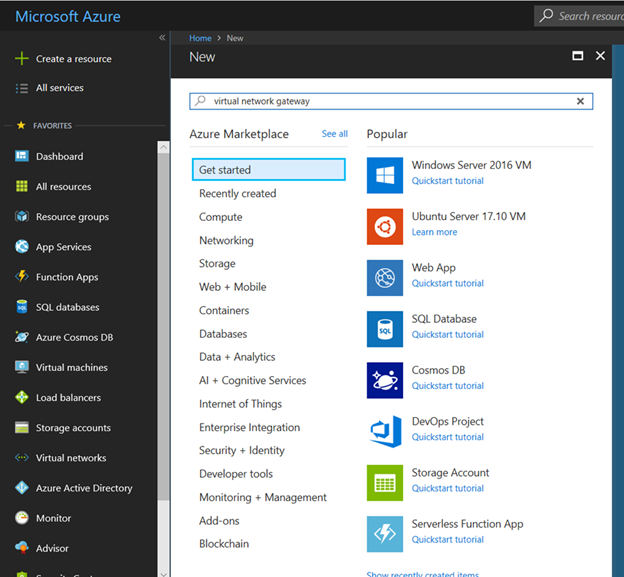
-
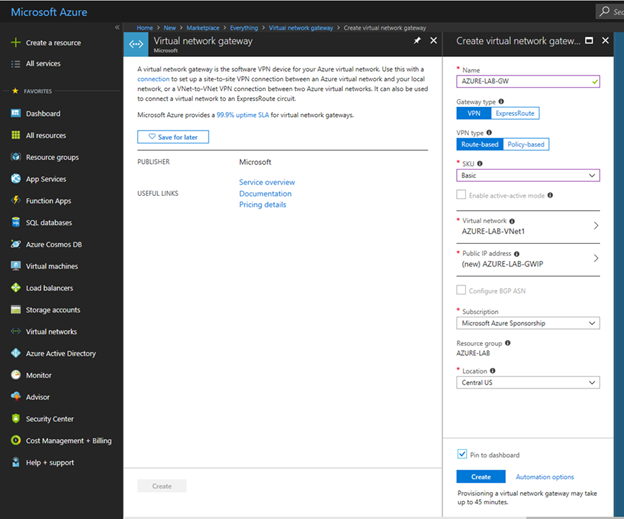
Select Virtual network gateway and click Create.
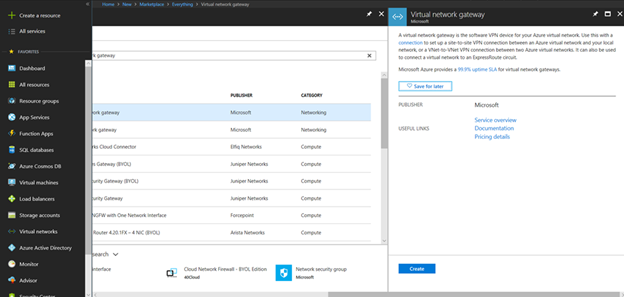
-
Enter information as follow and click Create.
Name: AZURE-LAB-GW
Gateway type: VPN
VPN type: Route-based
SKU: Basic
Virtual network: Azure-Lab-VNet1
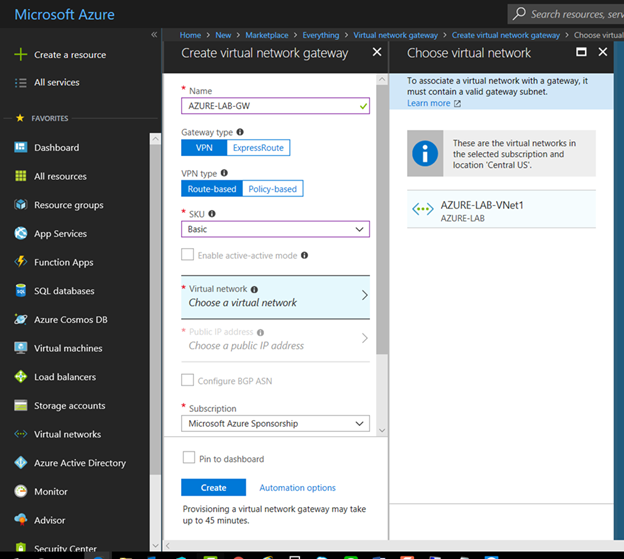
Public IP address: Create new, enter AZURE-LAB-GWIP as its name, Basic for SKU and then click OK.
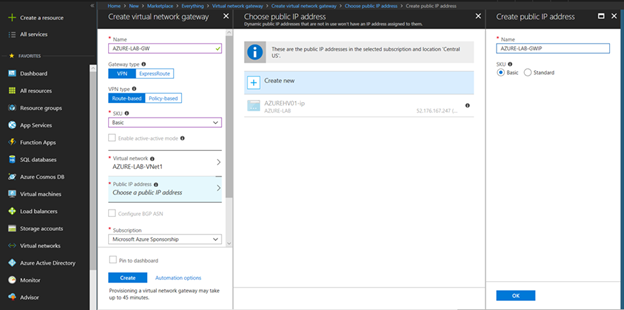
Subscription: select your subscription
Location: select the location as before (Central US) and then click Create.
-
Go back to Azure Dashboard and click +Create a resource.

-
On the search bar, enter Local network gateway.
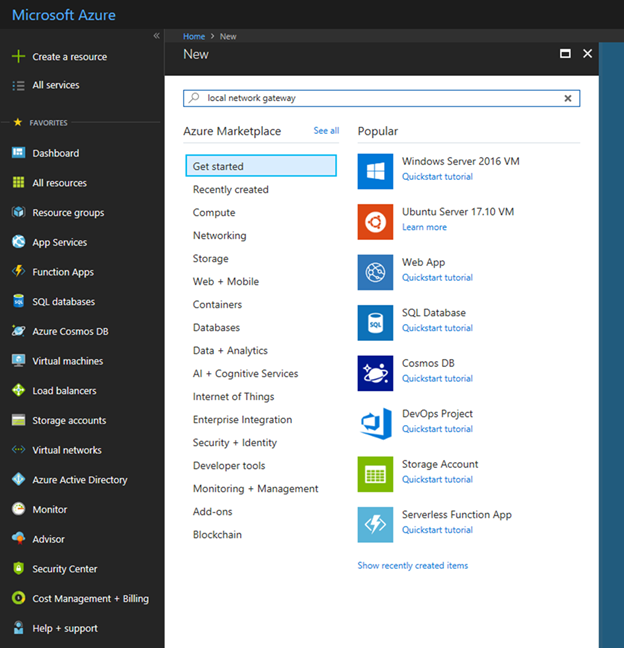
-
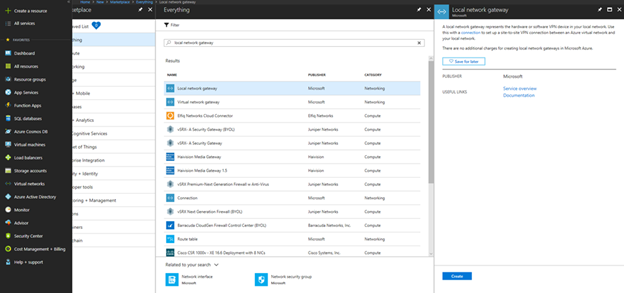
Select Local network gateway and click Create.
-
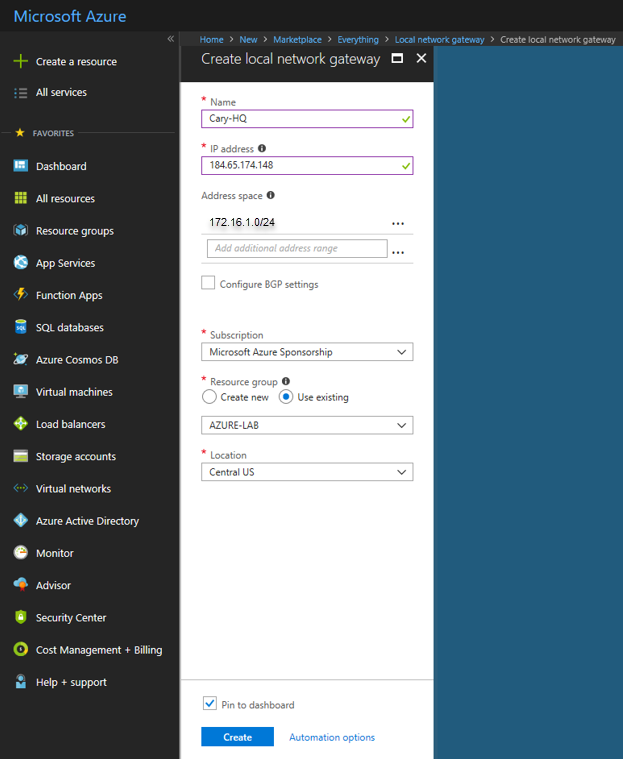
Enter information as follow and click Create.
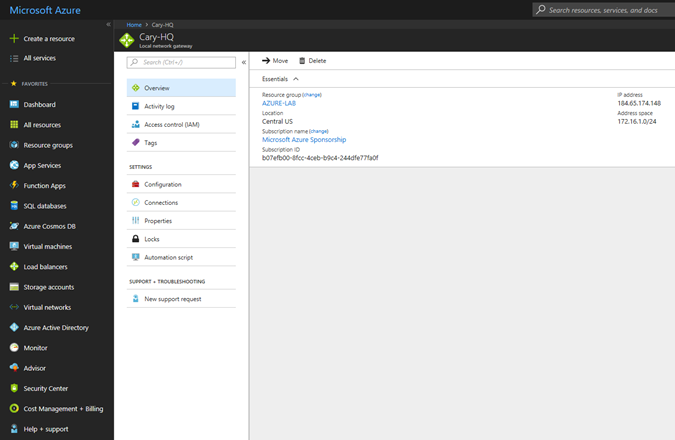
Name: Cary-HQ
IP Address: 184.65.174.148
Subscription: select your subscription.
Resource Group: click Use Existing and select AZURE-LAB
Location: select the same location as before (Central US) and then click Create.
-
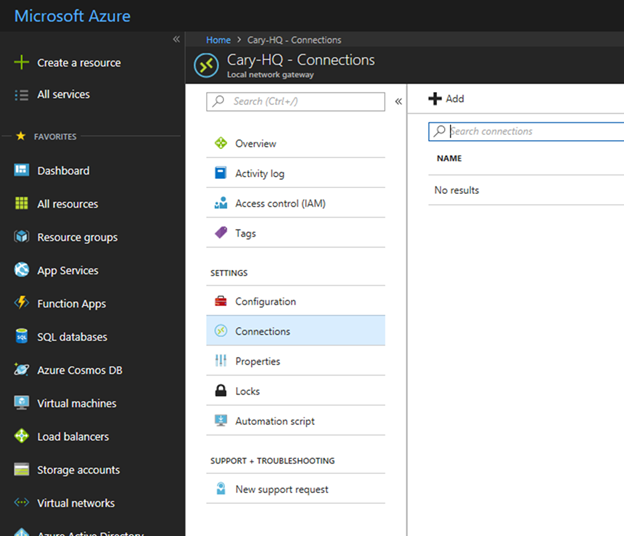
On the Cary-HQ page select Connections.
-
On the Cary-HQ – Connections page, click +Add.
-
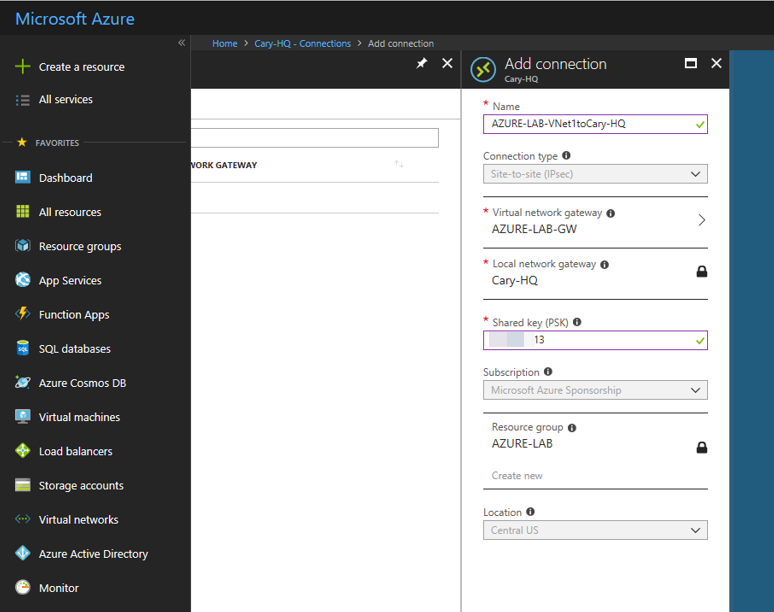
Enter information as follow and then click OK.
Name: AZURE-LAB-VNet1toCaryHQ
Virtual network gateway: AZURE-LAB-GW
Local network gateway: Cary-HQ
Shared key: enter your share, it is must the same as XG firewall site.
Settings On-premises Site
-
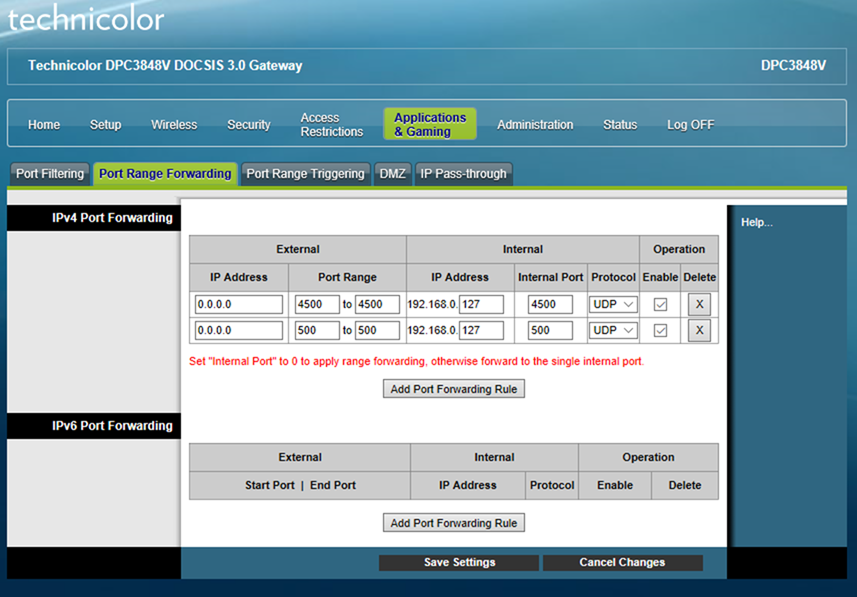
We are using Sophos XG firewall behind NAT device, so we need to do port forward settings at NAT Device.
-
Login to Sophos XG firewall.
-
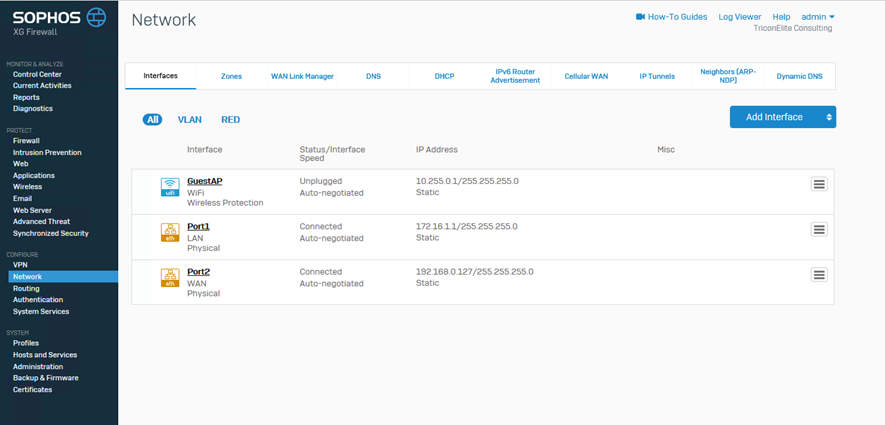
Select Network and make sure interfaces settings are correct.
-
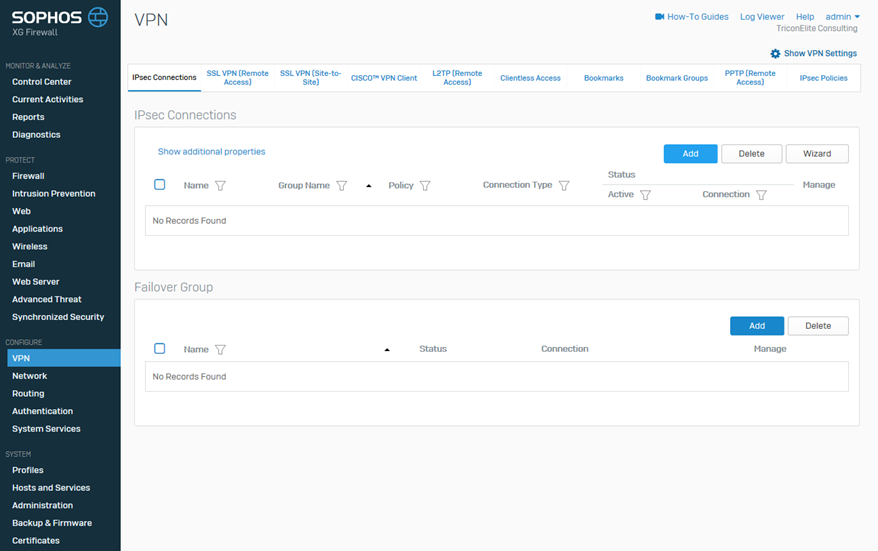
Select VPN and click Add, it’s under IPsec Connections.
-
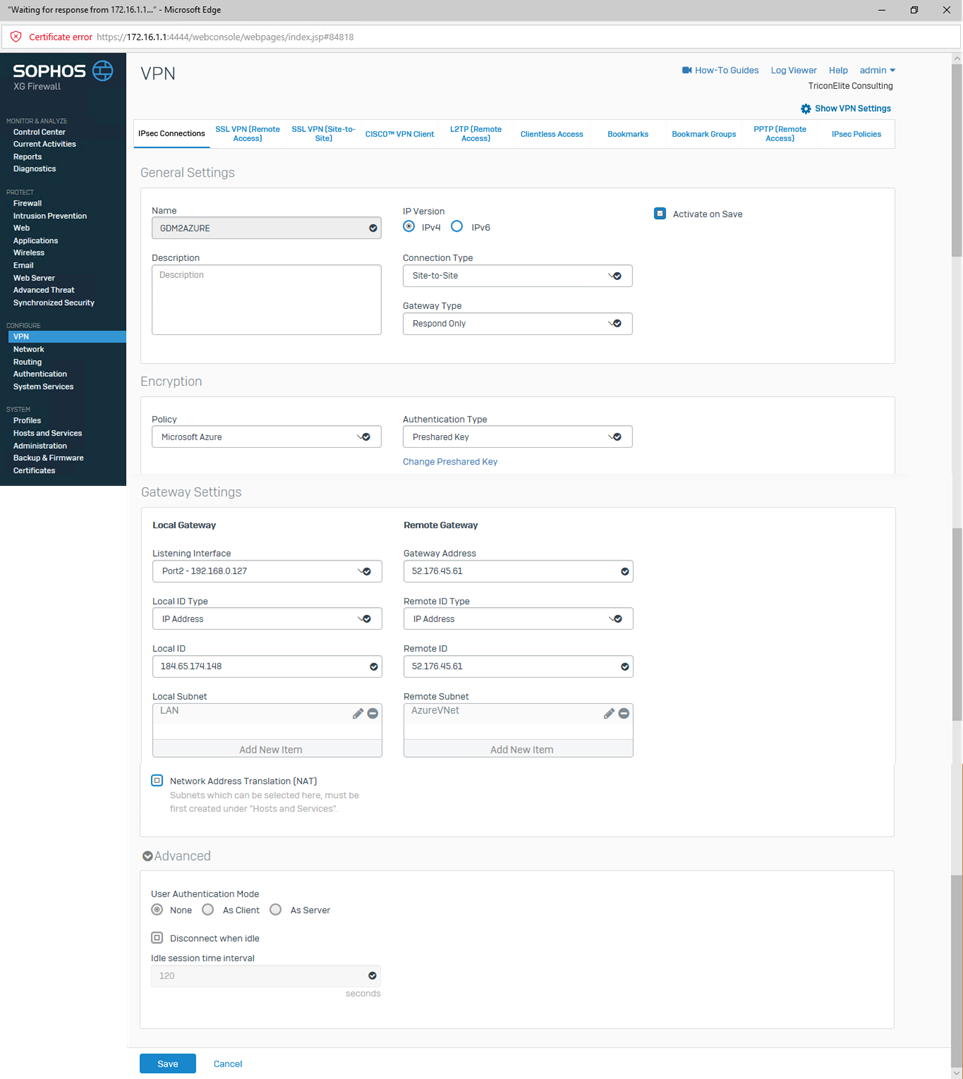
Enter information as follow and click Save.
Name: GAM2Azure
IP Version: IPv4
Connection Type: Site-to-Site
Gateway Type: Respond Only
Policy: Microsoft Azure
Authentication Type: select Preshared Key and type preshared key, it’s must be the same as Azure site.
Listening Interface: Port2 – 102.168.0.127
Local ID Type: IP Address
Local ID: 184.65.174.148
Local Subnet: LAN (172.16.1.0/24)
Gateway Address: 52.176.45.61
Remote ID Type: IP Address
Remote ID: 52.176.45.61
Remote Subnet: AZUREVNet (10.10.0.0/16)
-
On the VPN page, the Active and Connection status should show green.
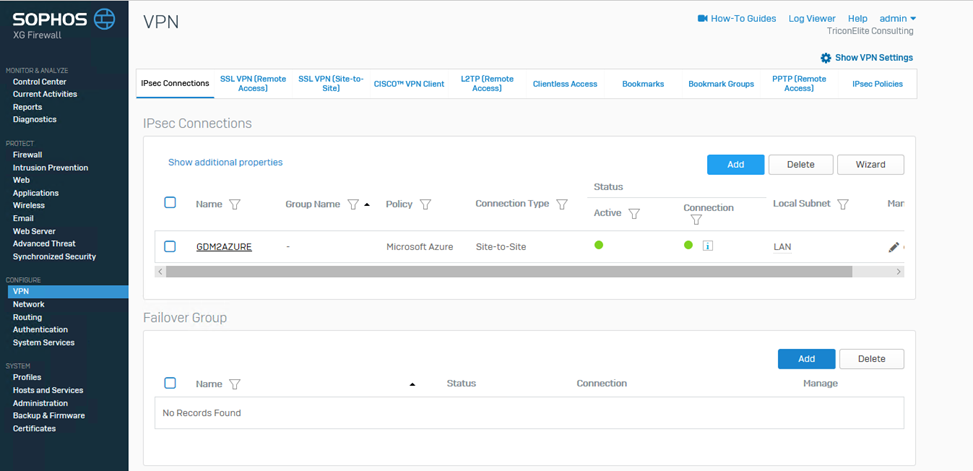
-
On the Azure Connection page, the status should show Connected.
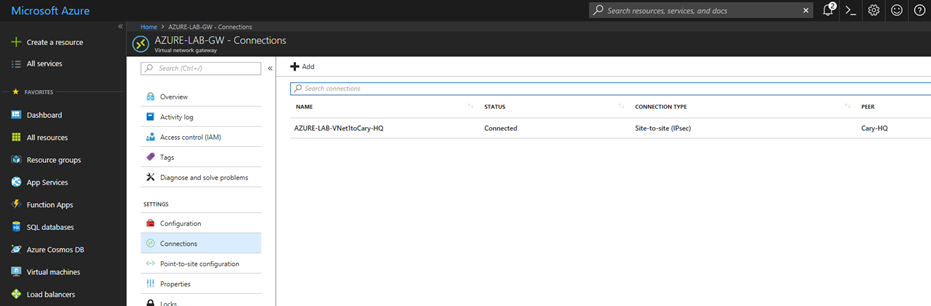
- You may find there is no traffic at VPN tunnel even their status show connected. No worry, that’s because we still not configure firewall rules yet.
-
On the Sophos XG Firewall configure web page, select Firewall and click Add Firewall Rule.

-
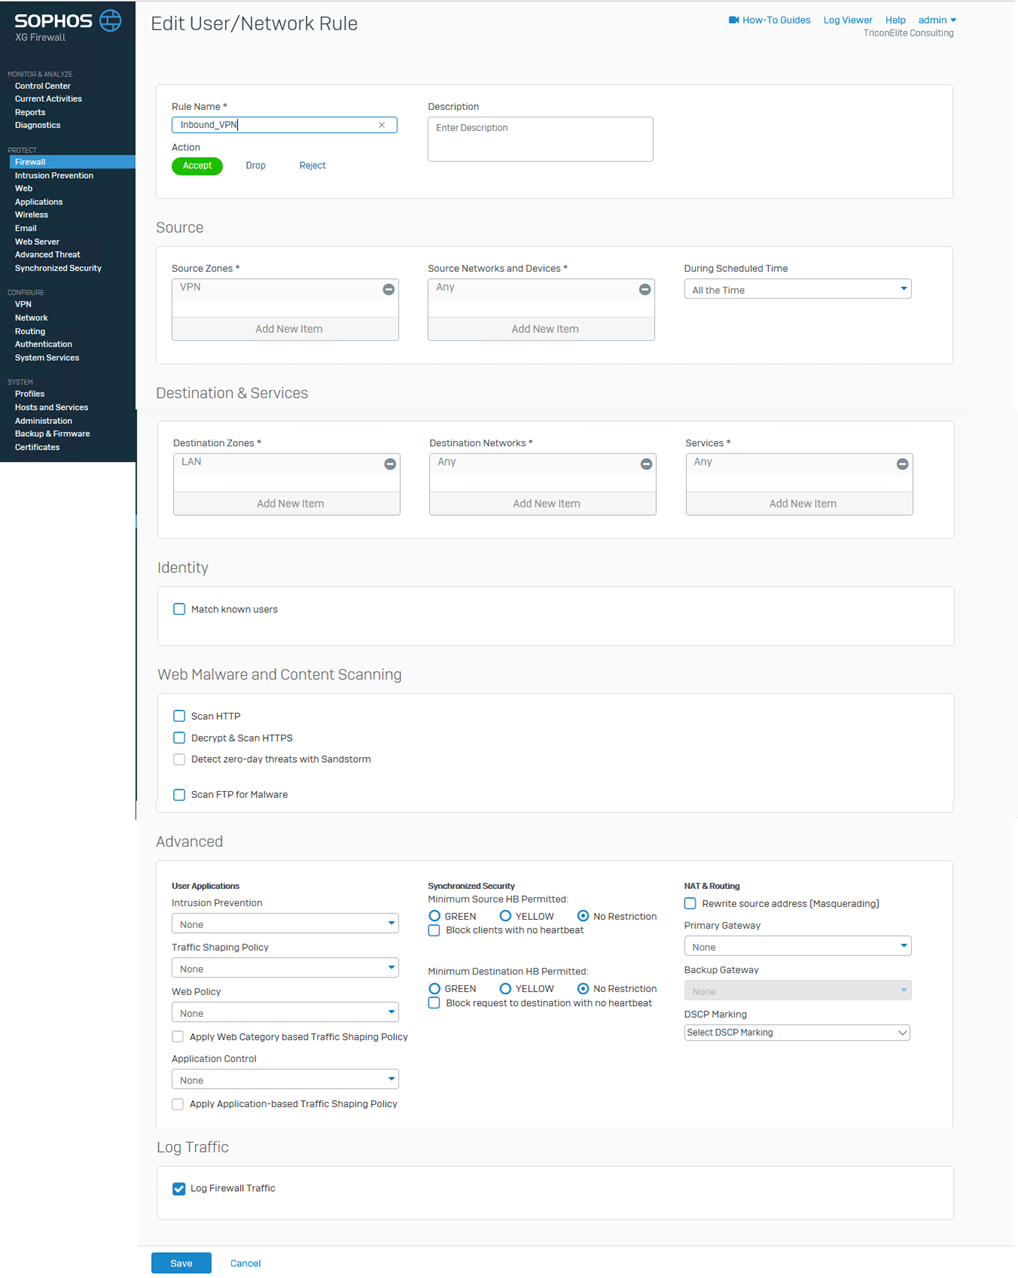
Enter follow information to create Inbound VPN rule and click Save.
Rule Name: Inbound_VPN
Action: Accept
Source Zones: VPN
Source Networks and Devices: Any
Destination Zones: LAN
Destination Networks: Any
Services: Any
-
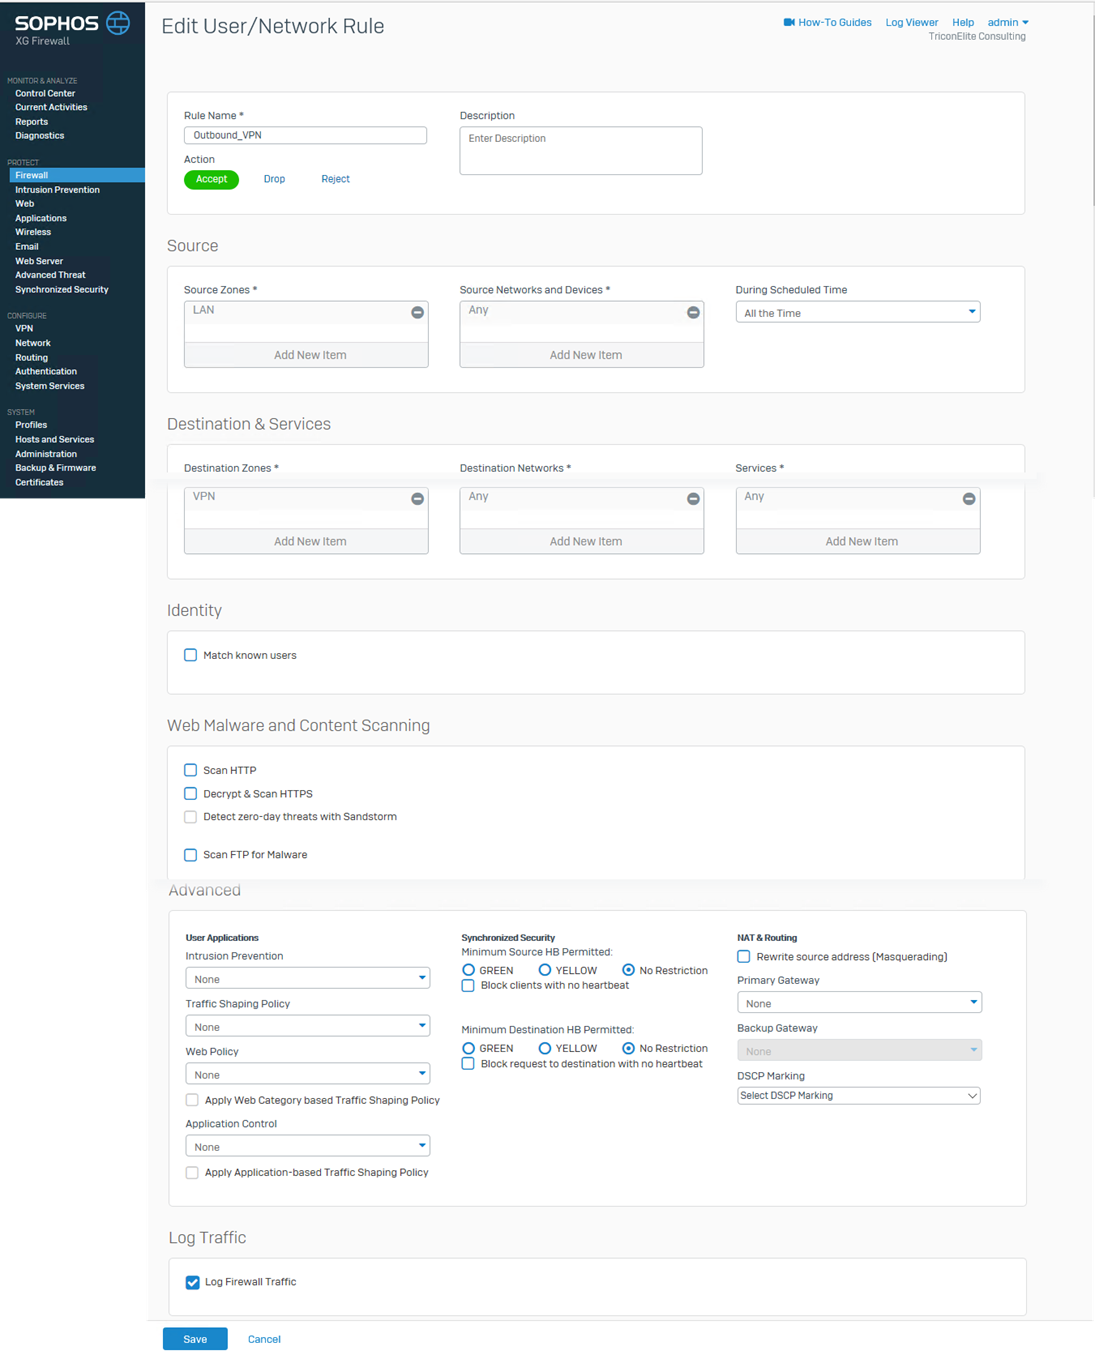
Enter follow information to create Outbound VPN rule and click Save.
Rule Name: Outbound_VPN
Action: Accept
Source Zones: LAN
Source Networks and Devices: Any
Destination Zones: VPN
Destination Networks: Any
Services: Any
Now, we have Site-to-site VPN successfully.
Hope you enjoy this post!!
Cary Sun @SifuSun